
by hankinslawrenceimages | Oct 18, 2019 | Workshops
When Bill and I work with a model, one thing we’re always looking for is someone who can help us create the photographs we’re seeing in our minds. We can figure out the lighting, the camera settings, and even some basic costuming. But when it comes to hair, makeup, anything more than basic costuming, a beautiful pose, or a perfect facial expression, we need help! And this is what an experienced model brings to a shoot.
I’ve recently started a series of photographs based on the Kodak Girl advertising campaigns of the early 1900’s. The Eastman Kodak company portrayed women as active photographers in their ads to encourage women to take up photography as a hobby (so they could sell more cameras and film). You can see some of the ads on my Pinterest board at https://www.pinterest.com/pattyhankins/inspiration-kodak-girls/
I shared my Pinterest board wtih two models, BlueRiverDream and Zoe Celesta West. I asked if they had any dresses with a vintage 1920s feel to them and said I’d bring the vintage cameras.
For the photos with BlueRiverDream, we headed out to a state forest in western Maryland. BlueRiverDream posed with a Graflex camera on a bridge over a stream.
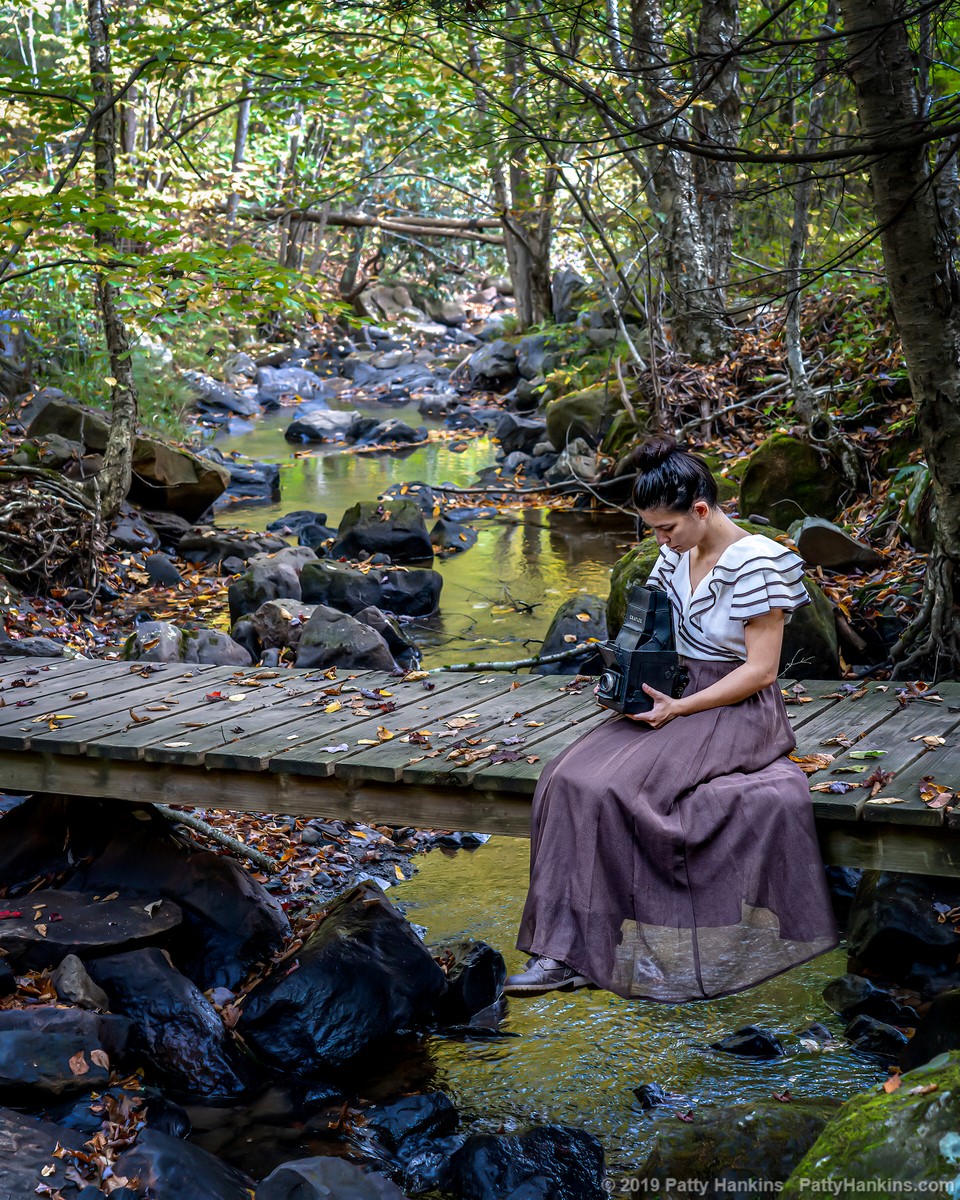
Inspired by the Kodak Girl – BlueRiverDream © 2019 Patty Hankins
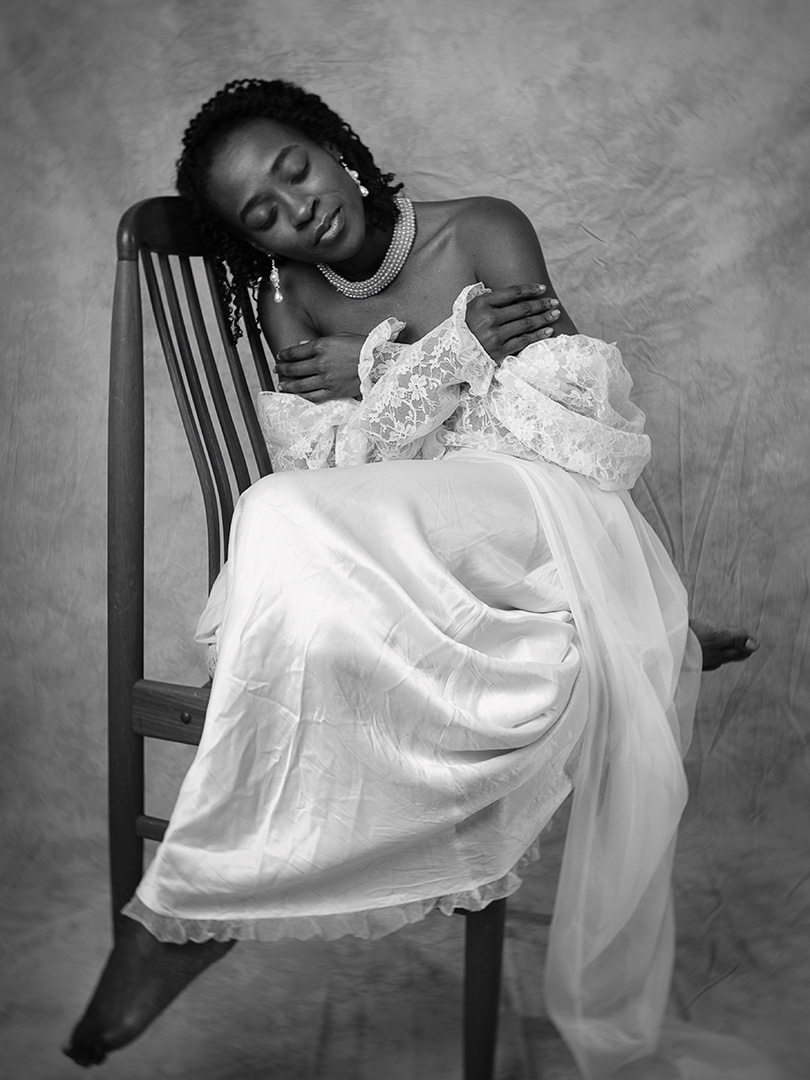
For the photos with Zoe Celesta West, we heading into the studio where Zoe posed in a beautiful 1920s day dress and one of my Kodak folding cameras.
Inspired by the Kodak Girl – Zoe Celesta West © 2019 Patty Hankins
While I had the basic idea for the photographs, I could not have created them without the help of these amazing models. They took a look at my Pinterest board, figured out what outfits they had that fit the theme, and came with ideas on how to pose, etc.
As I create more photos inspired by the Kodak Girls, I’m looking forward to partnering with the models I’ll be working with. Without their help and input, my photos would just be figments of my imagination.
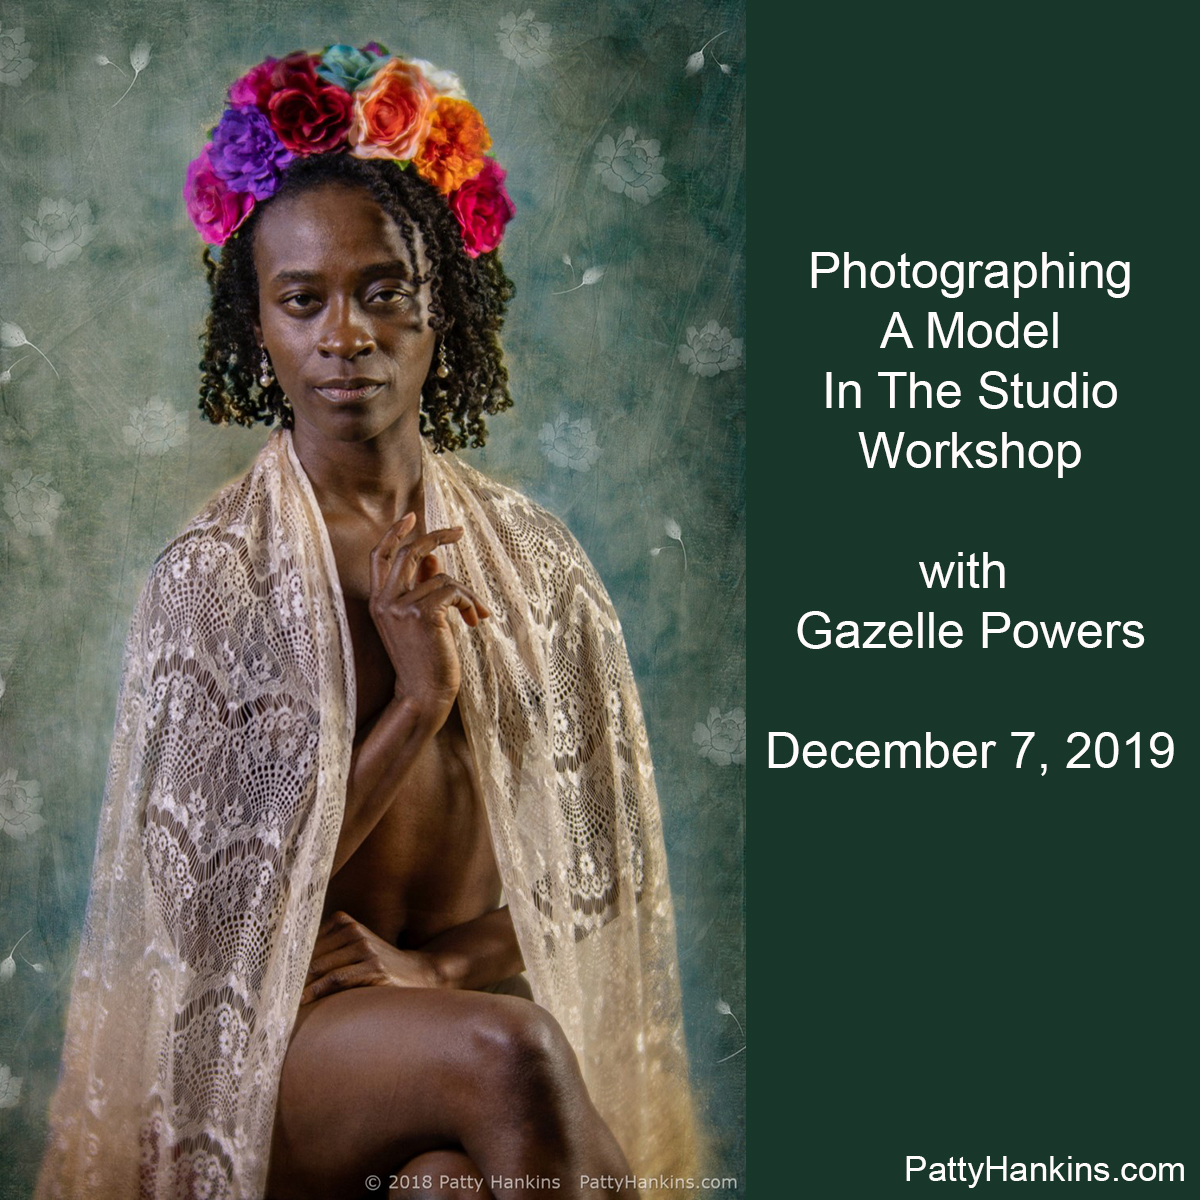
If you’ve been wanting to work with a professional figure model in a studio setting, consider joining us on December 7 for our Photographing a Model in the Studio workshp with Gazelle Powers. Gazelle is a very experienced model. Her poses are always beautiful and elegant. And she is fantastic to work with!!! You will love working with Gazelle.
You can learn more about Photographing a Model in the Studio workshop at https://beautifulflowerpictures.com/store/photographing-model-gazelle-powers-dec-7-2019/
by hankinslawrenceimages | Oct 4, 2019 | Workshops
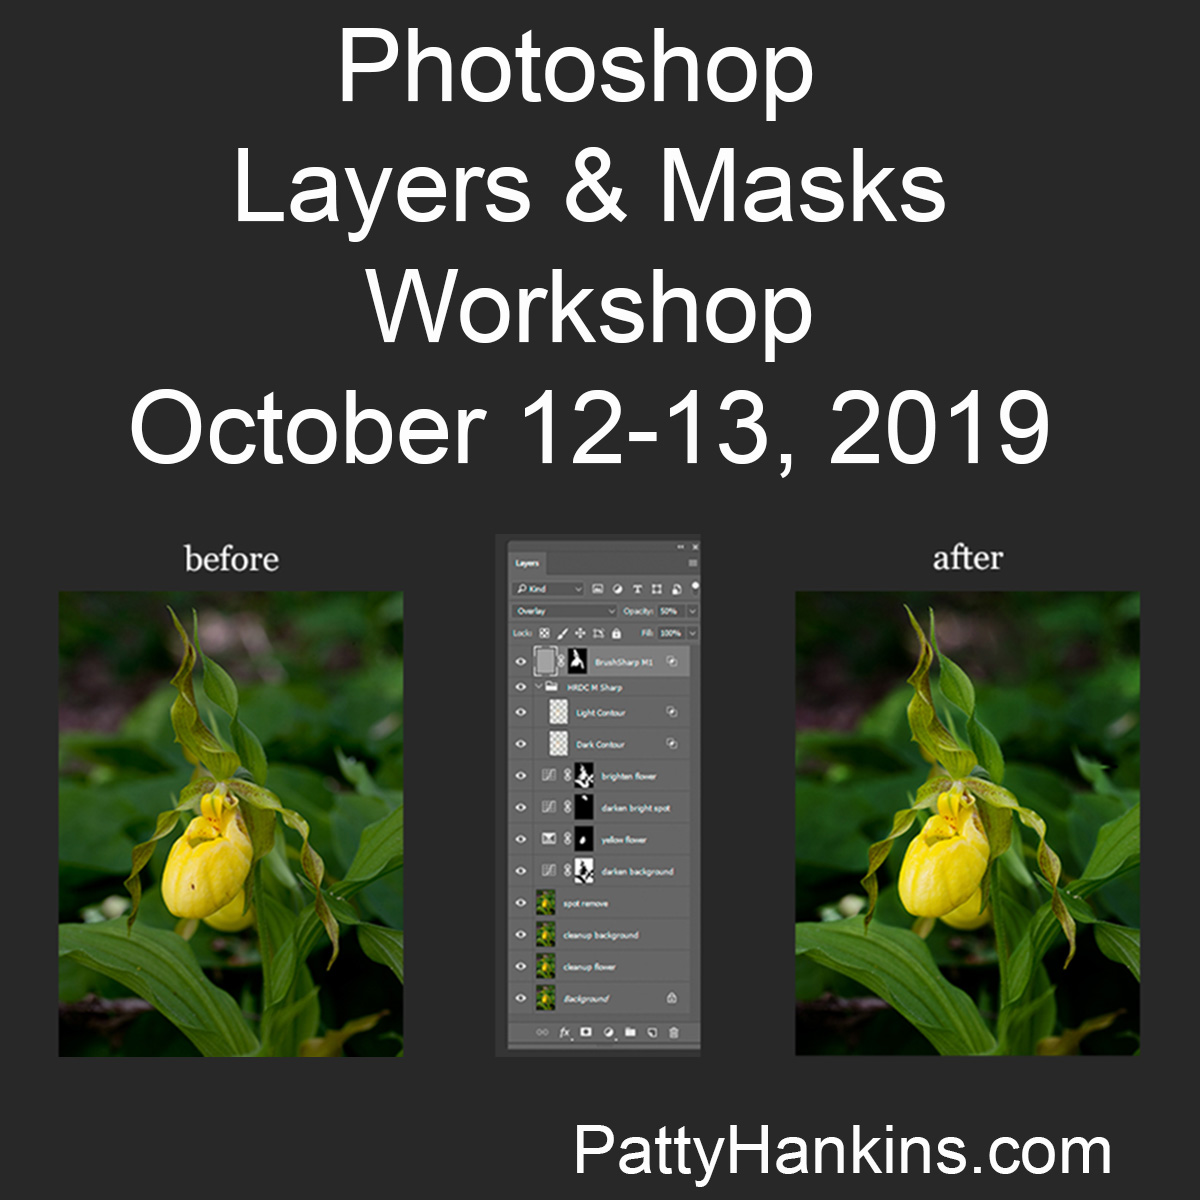
It’s not too late to join us for our Photoshop Layers and Masks workshop next weekend.
During the workshp, we’ll focus on specific Photoshop tools used for cleaning up your image and adjusting contrast and color. Photoshop layers and masks are powerful tools for both global and local changes to your photo. These tools allow you to establish a workflow that helps you create images that share your vision.
We’ll cover a number of tools including curves, levels, hue/saturation, shadow/highlights, cloning, patching, healing and content-aware fill.
This workshop is designed for both people who do their entire editing workflow in Photoshop, or those who use Lightroom for some edits but need more powerful tools to complete their workflow.
The workshop will be held at our home in Bethesda, Maryland. We’re limiting the workshop to 4 participants to make sure we can provide you with any individualized help you need.
You can learn more about the workshop and register at https://beautifulflowerpictures.com/store/photoshop-layers-masks-workshop-october-2019/
We’d love to have you join us
by hankinslawrenceimages | Sep 20, 2019 | Photo Tips, Workshops
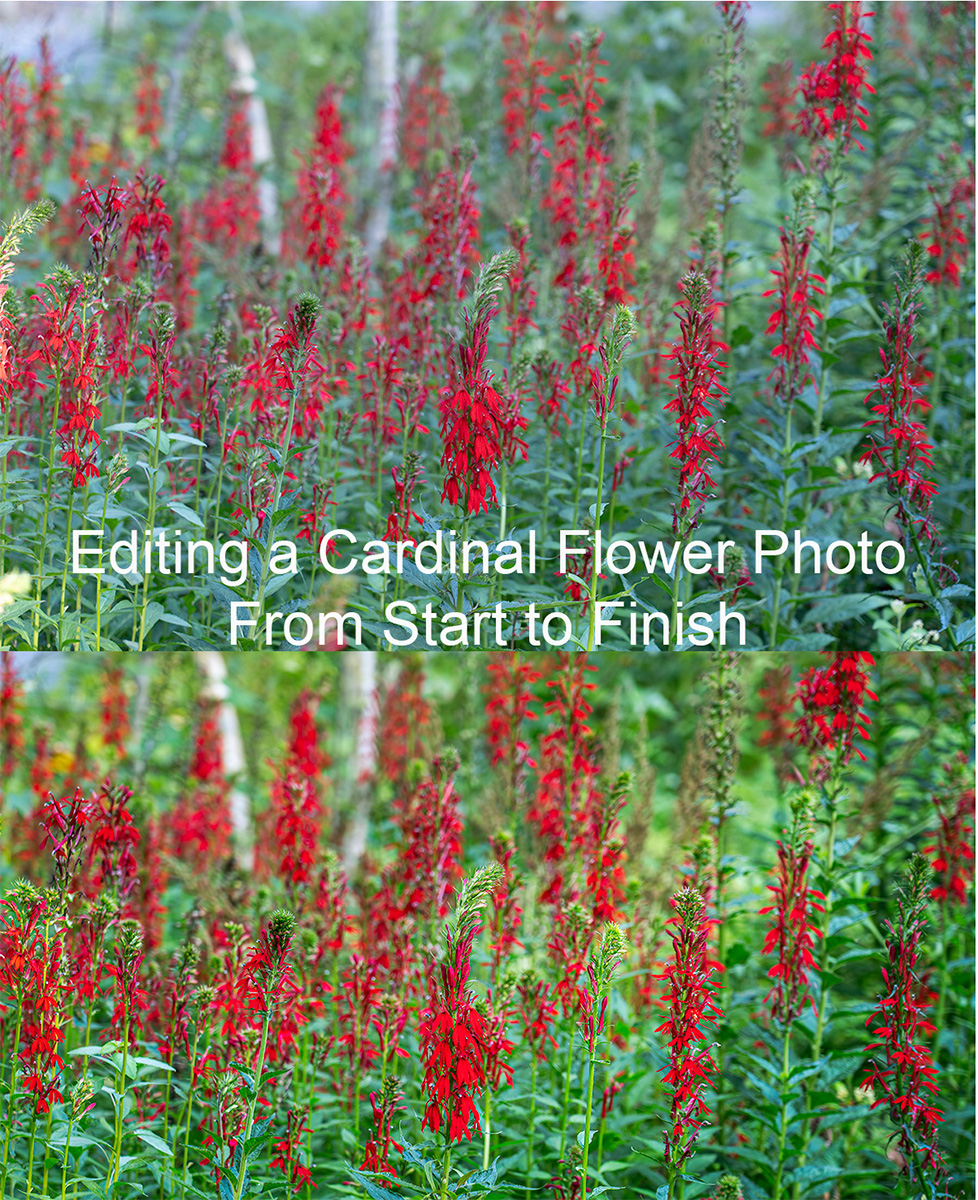
After my last newsletter on why I use Photoshop’s Layers and Masks, I had a few questions about how I use them. So I thought I’d go through the edits on my new Cardinal Flowers photograph in step by step detail.
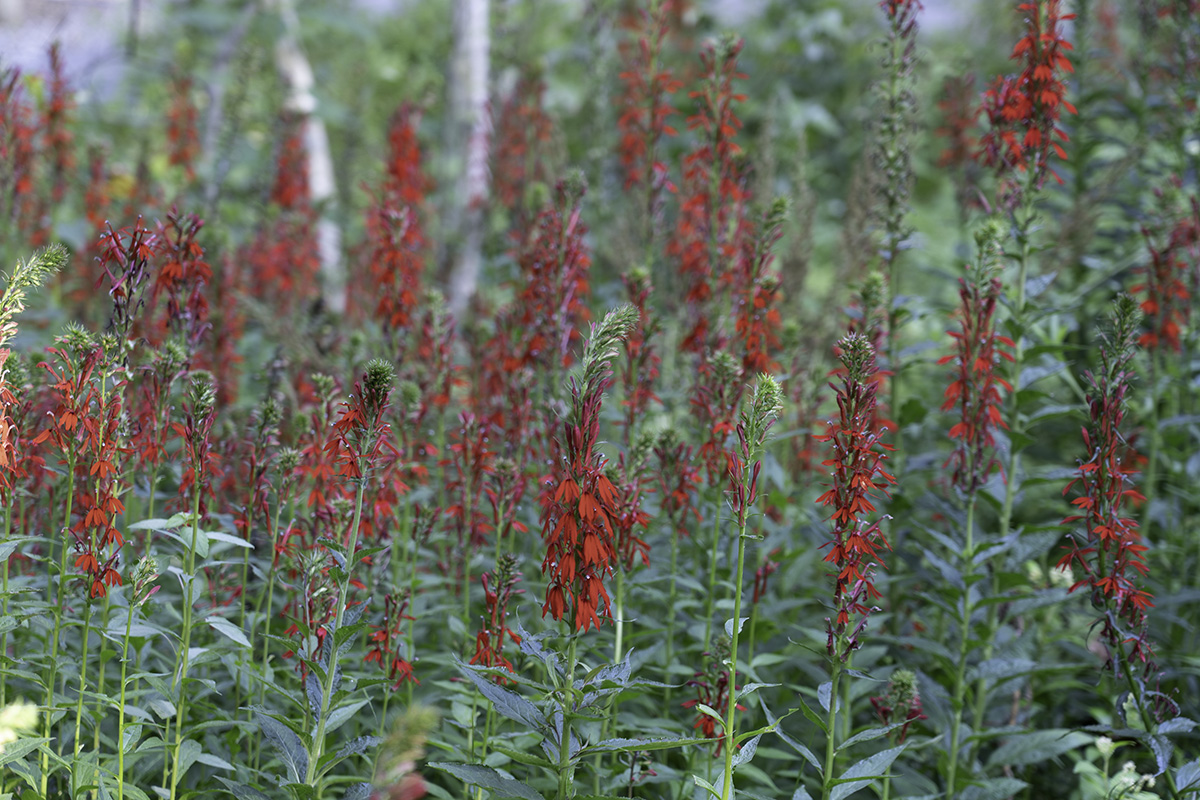
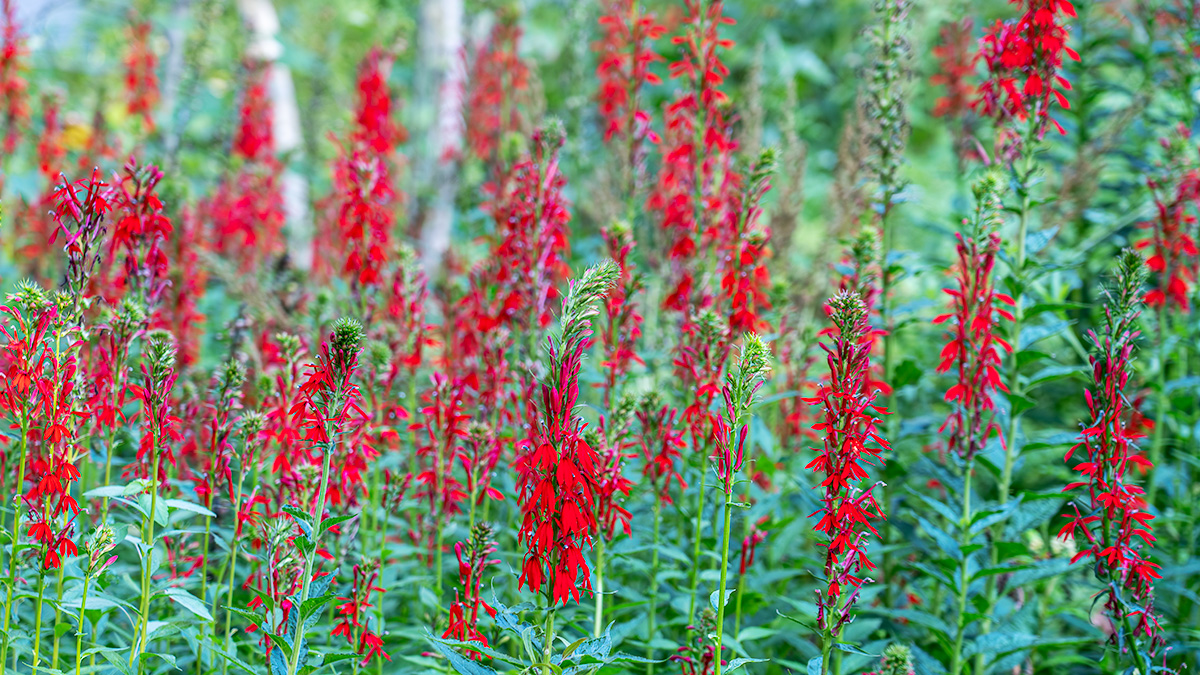
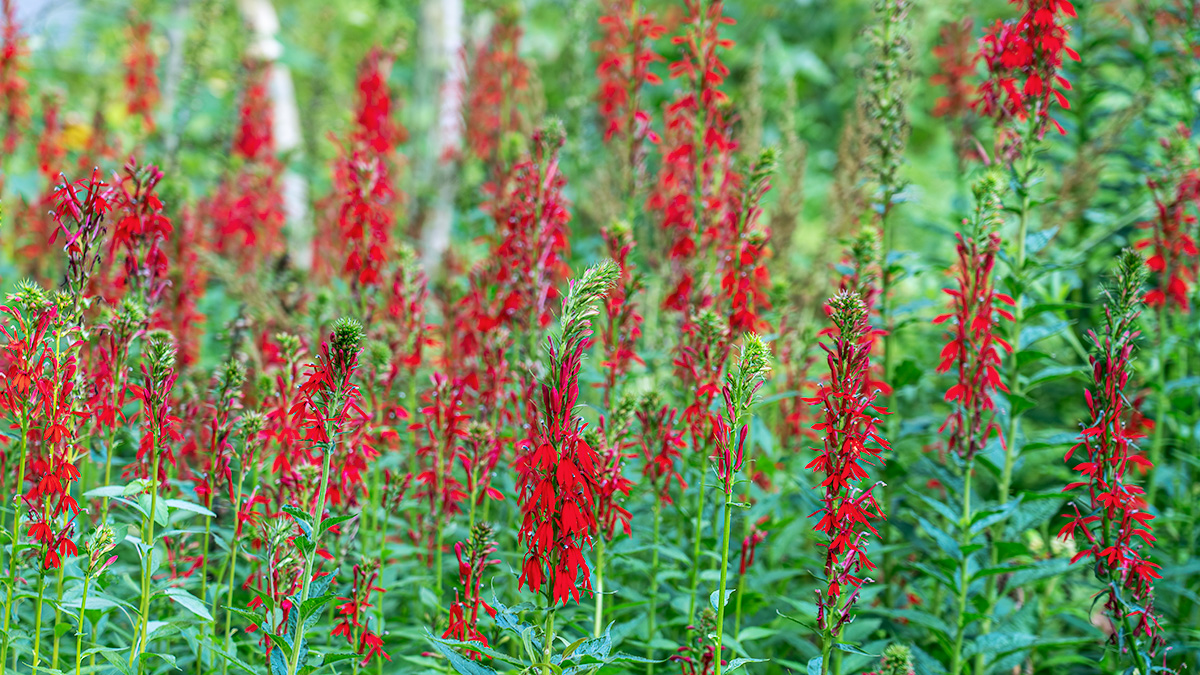
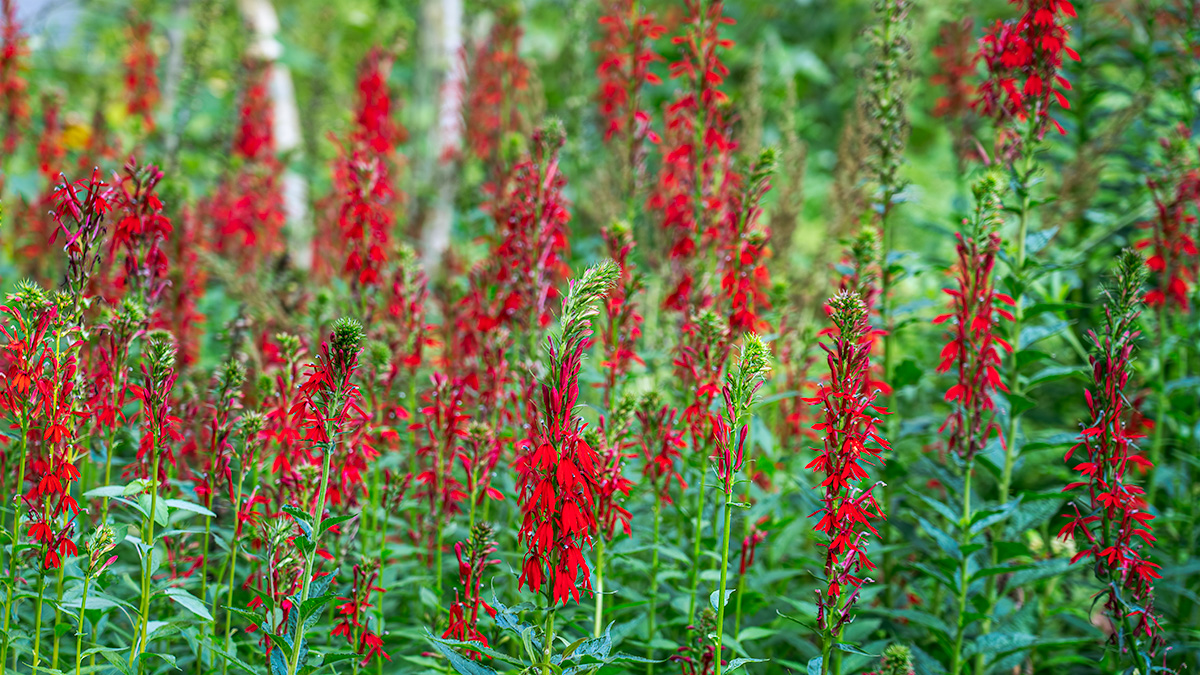
I took the photograph at a local garden earlier this summer. As I walked through a wooded area, I saw a spectacular group of red cardinal flower plants (Lobelia cardinalis) in the green of the woods. In addition to the contrast of the bright reds and greens, there was a tree with white bark that added a nice element to the background of the photo. I knew as I photographed it that I would edit it as a panoramic photograph to give the sense of being among all the cardinal flowers.
The photograph was taken with my Sony A7III camera and my 24-105 lens at 105mm. My settings were ISO 100, aperture of F 4.5 (for a shallow depth of field to blur the flowers in the background), shutter speed of 1/15 of a second. I had my camera on my tripod when I took the photo.
Here is the my initial unedited capture.
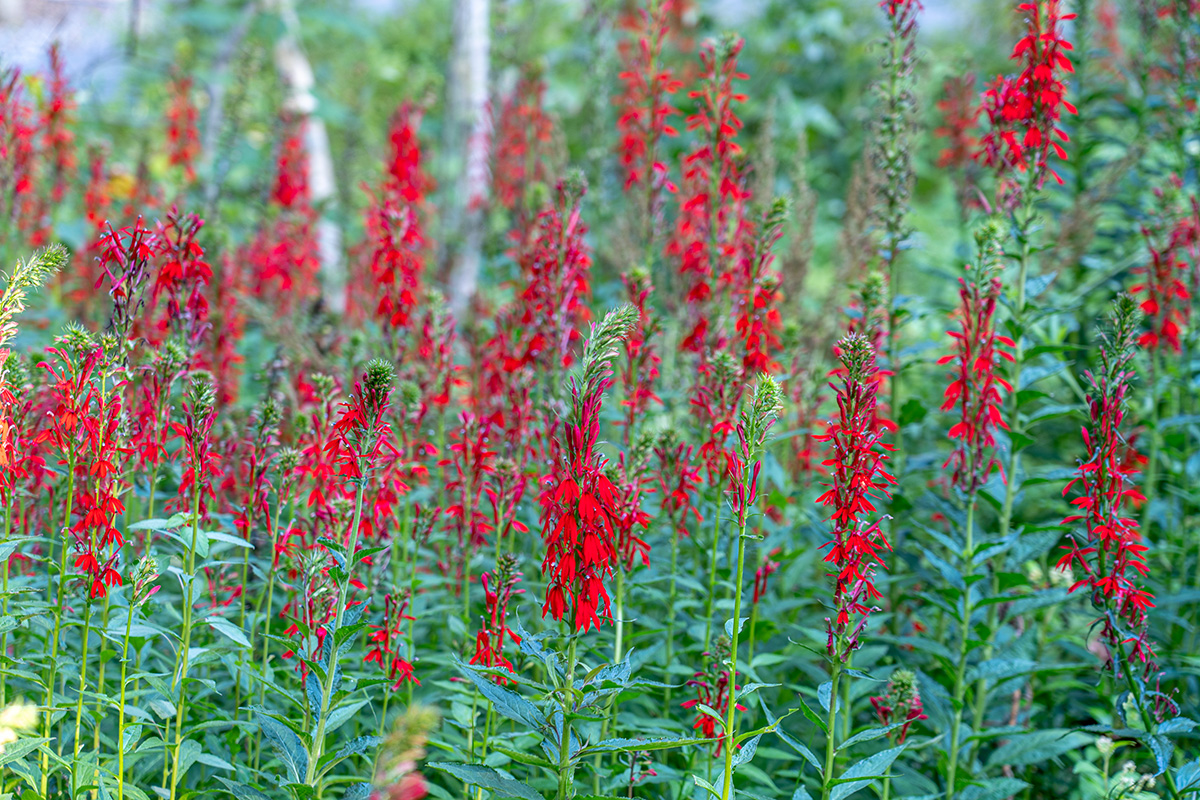
In Lightroom, I made some basic adjustments. I applied the Lens Profile Correction for the 24-105 lens. And made a few adjustments in the Basic Panel: Highlights -100, Shadows +100, Whites +40, Blacks -21, Texture +26 and then exported the photo into Photoshop to start my editing. Here’s my image after the adjustments in Lightroom
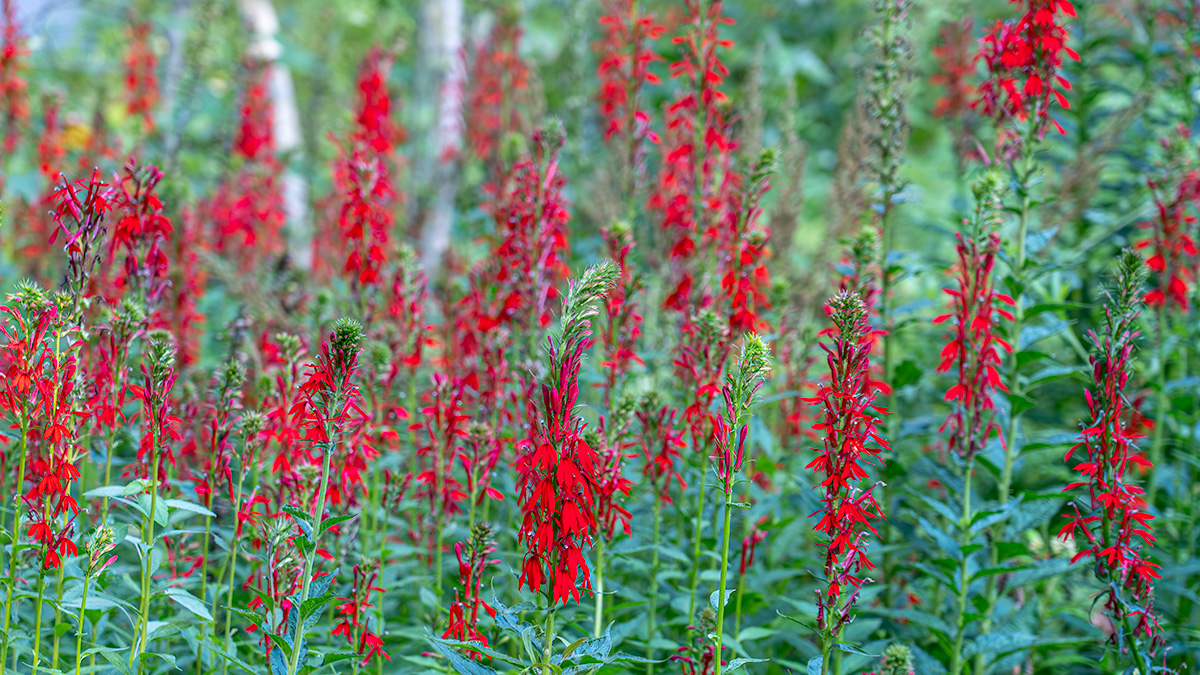
Once I got the image into Photoshop, I cropped it to a 16 X 9 aspect ratio, did a little cleaning up around the edges and used Topaz’s DeNoise AI with the AI Clear option to remove any noise in the image. Here’s the cropped, cleaned up and denoised image.
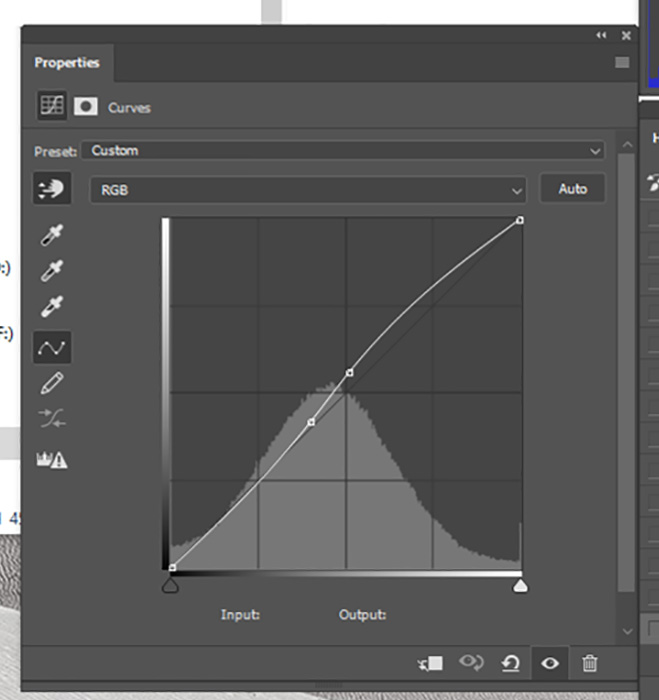
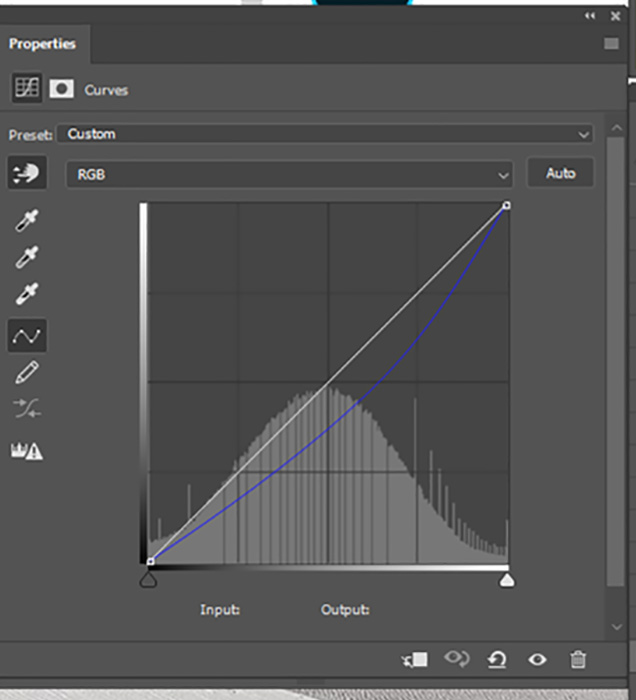
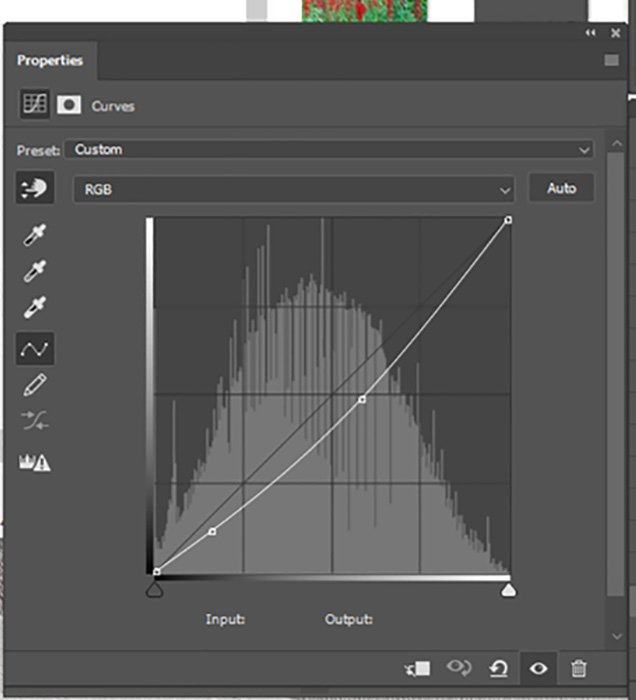
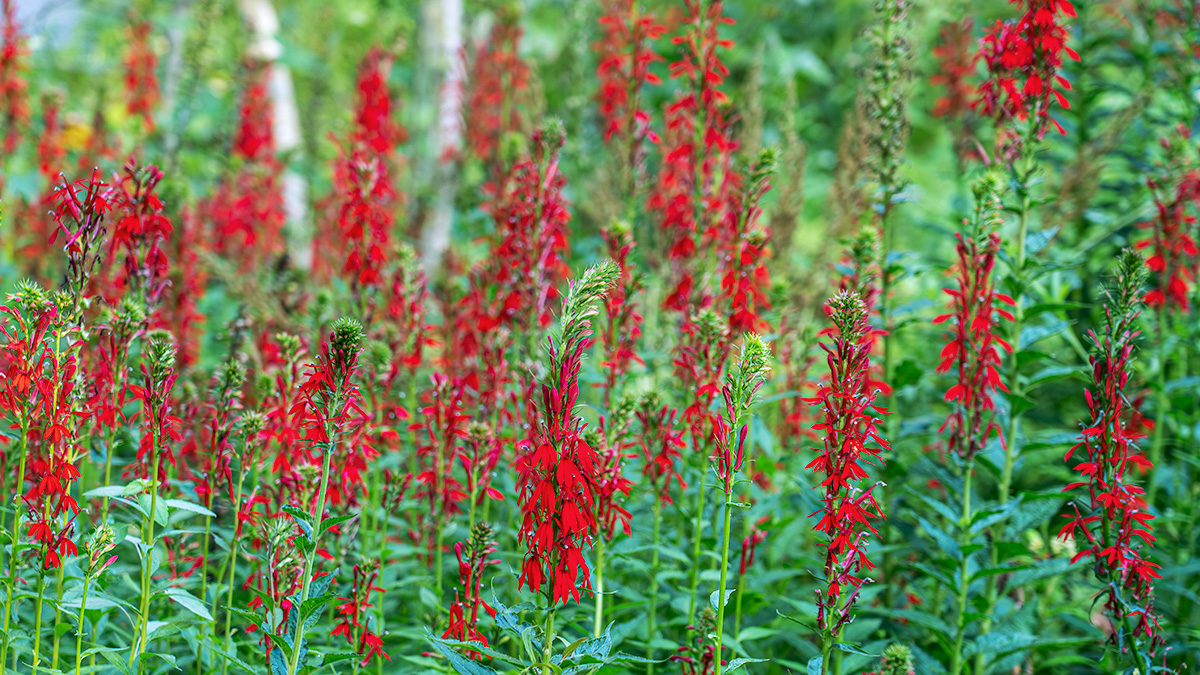
Now it was time to start editing. The first adjustment layer I used was a curves layer to add a little more contrast in the image. Here’s the curve I used and the image with the curve applied.
Next I used another curves layer to decrease the amount of blue in the image. Often times photos taken in gardens or woods with lots of greens have too cool of a look for my taste, so removing some blue warms up the image and brings it closer to what I remember seeing. Here’s the curve showing the changes in the blue channel and the image after the curve was applied.
At this point, I ran my first test print. Things looked pretty good on my monitor – not so great in the print. The reds weren’t printing correctly (they were right at the edge of the colors my printer can print) and I wasn’t clearly drawing the viewer’s eye to where I where I want people to look in the image.
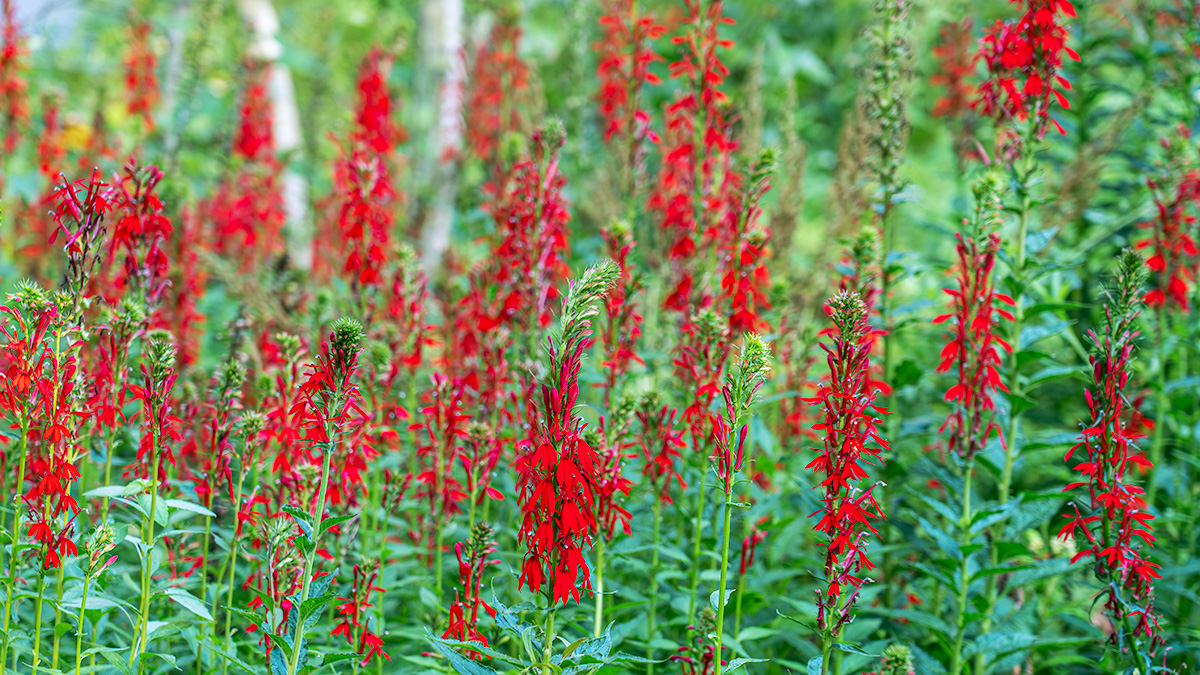
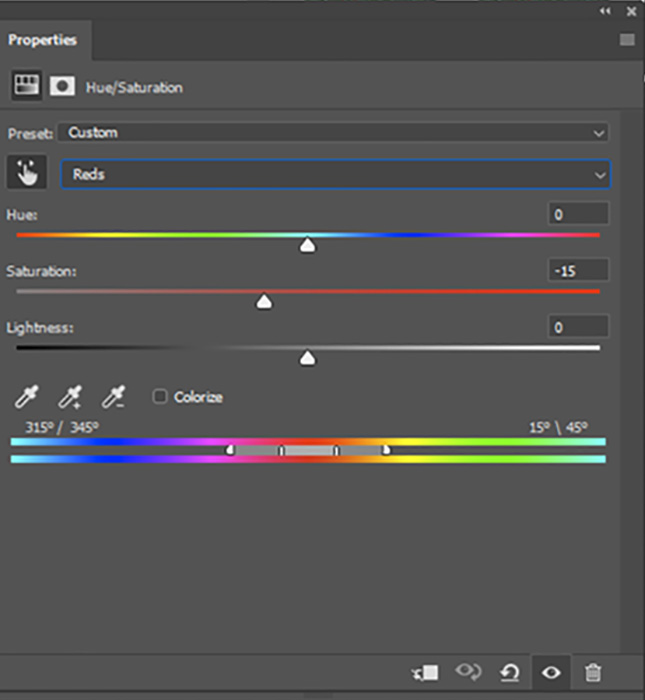
So I used a Hue/Saturation layer and adjusted the reds in the image. Here’s are the settings I used and the image after I desaturated the reds.
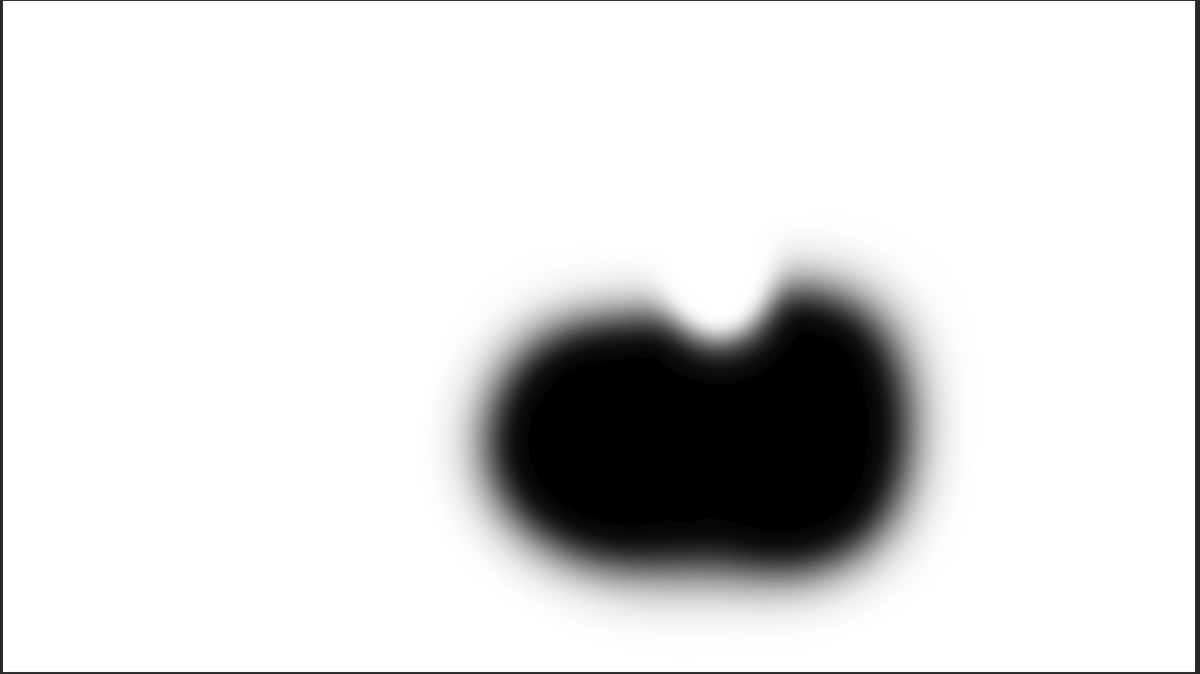
My next step was to use a curves layer to darken the overall image and a mask to turn the adjustment into a local adjustment that affected everything except the flowers in front. That way, your eye would go to the brighter area of the photo first. Here’s the curve I used, the mask and the adjusted image. Remember, when using a mask, White Reveals – Black Conceals – so the change only affects the parts of the image covered by the white areas of the mask.

I then used a Hue/Saturation layer adjustment layer to desaturate and darken the photo except again for the masked flowers in the front. These changes help draw your eye to the front flowers that are now the lightest and most saturated part of the image. My Hue/Saturation settings were: Reds -5 saturation -14 lightness, Yellows -12 saturation -6 lightness, and Blues -3 saturation. Here is the mask I used to control which areas of the photos were affected by the changes and the photo after the darkening and desaturation.

I then made a Stamp layer and used the Camera Raw Filter to add a vignette around the edges to help draw the viewer’s eye in from the corners and into the center of the image.
At this point I sharpened the image and ran a print. When I evaluated the print I was happy with everything except the overall sharpness of the photo. I wanted a little more of a blurred feeling in areas other than the front flowers to increase the sense of depth in the photo. So I added a mask to my sharpening layer so only the front flowers are sharpened to draw your eyes to them. This is the mask I used for the sharpening layer.

And my final image

What my edits were intended to do was take the photo from a nice scene of cardinal flowers in the woods with no real focal point
To an image where the viewer’s eye goes straight to the flowers in the front – they are the brightest, most saturarted and sharpest section of the photograph.
If you’d like to learn more about how I use Photoshop’s Layers and Masks and how you can use them to share your vision for your photographs, please join me for my Photoshop Layers and Masks Workshop on October 12-13 at my home in Bethesda. The workshop is limited to 4 students to ensure you get the personalized assistance you need.
You can read more about the workshop and register at https://beautifulflowerpictures.com/store/photoshop-layers-masks-workshop-october-2019/
by hankinslawrenceimages | Sep 6, 2019 | Photo Tips, Photoshop, Software, Workshops
I’ve had a couple of questions recently about my upcoming Photoshop Layers and Masks Workshop so I thought I’d try to answer them for everyone today. The quesions were what are layers and masks? And why do I use them? Quite simply, layers and masks are the tools that let me take advantage of Photoshop’s photo editing power.
Layers
A layer is just a set of instructions for Photoshop to make a change to your photograph such as adjusting color, contrast or brightness. As you add additional layers of instructions, you are making additional changes to your photograph.
The power in using layers is that you can always go back and change the settings for a specific layer at any time and not lose other edits you’ve made to your photograph. You can also turn your layers on and off for a before/after comparision. You can also rearrange your layers since Photoshop reads the instructions from the bottom of your layer stack to the top.
If you just make adjustments to your photograph without using layers, you can’t go back and change an adjustment without losing all the edits you’ve made since that step.
Layers allow you to edit non-destructively. I almost always have to go back and tweat some of my changes when I’m editing a photo. Using layers allows me to make whatever changes I want to make at any stage of my editing process without losing all of my other edits.
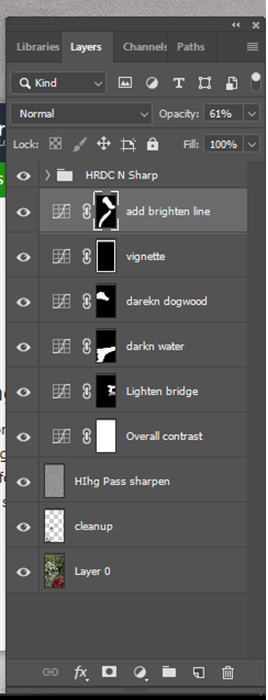
As you can see from this screenshot of the layers panel from a recent photo, I rename my layers so I know what they do in case I do need to go back and make changes at a later date.
Masks
Masks allow you to target your edits to specific sections of your image.
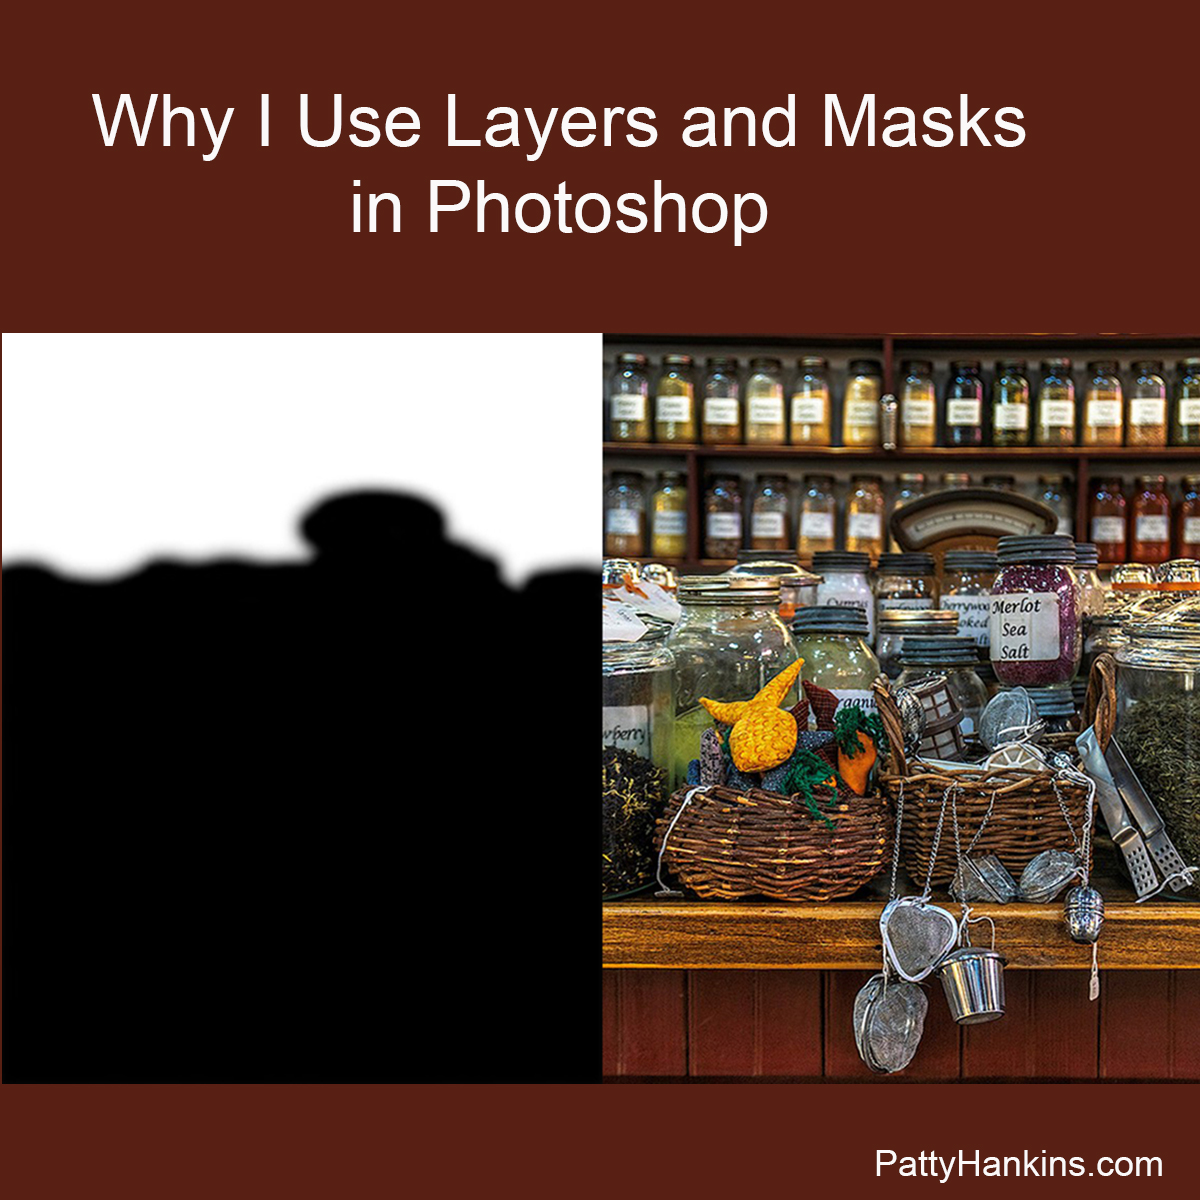
If you look at the photo of my layers, you can see small black and white squares on several of the layers. These are the masks. Where the mask is white, your change will take effect in your photo. Where the mask is black, the change doesn’t affect your photo.
An easy way to remember this is “Black conceals, White reveals.”
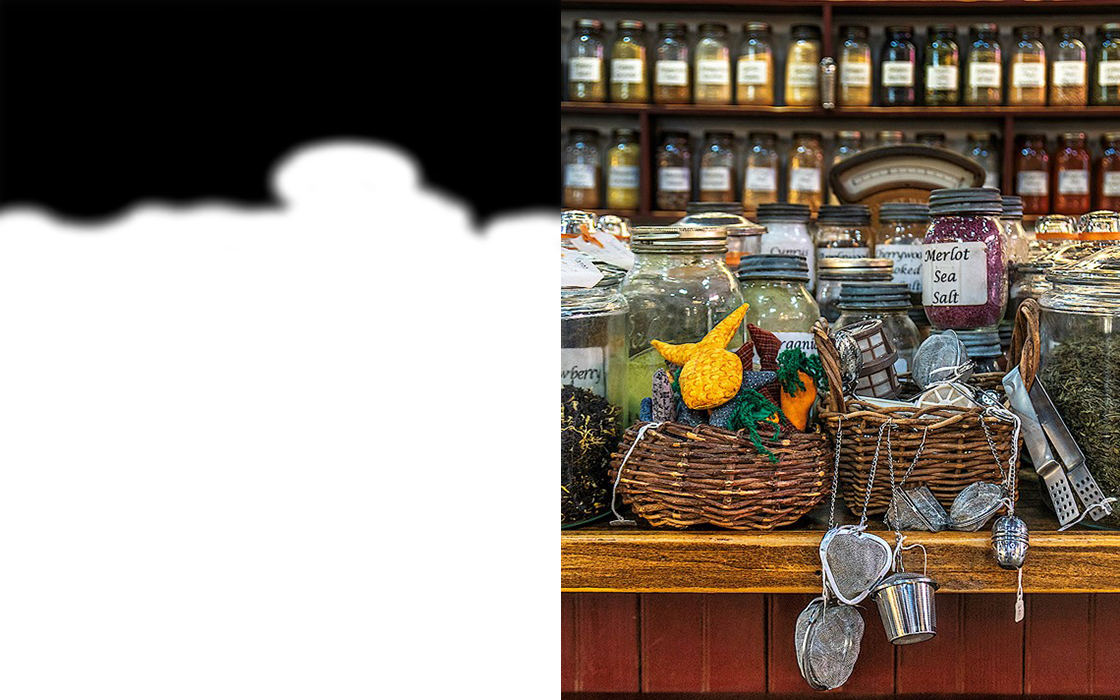
Here’s a photo from the Herb Shop at the Central Market in Lancaster, Pennsylvania after my initial edits. The background shelves were too bright so distracted from the foreground when seemed too dark.
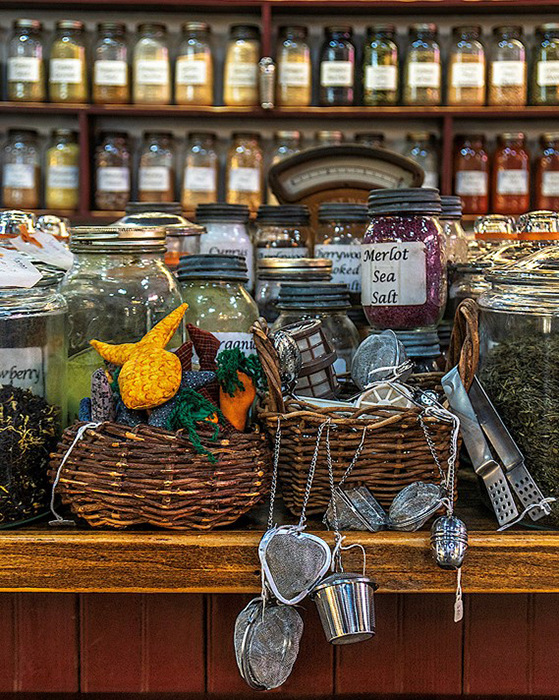
So I used a curves layer to darken the entire photograph by the amount I wanted to darken the background. I then applied a mask where the white area covers the shelves in the background that were too bright so they would be darkened. The rest of the photo isn’t darkened since it was protected by the black area of the mask. 
Then I used another curves layer to lighten the entire photograph by the amount I wanted to brighten the foreground. I then applied a mask where the white area covers the foreground of the photo that was too dark so this area would be lightened. The shelves in the background aren’t brightened in this new layer since the area was protected by the black area of the mask.
As you can see, using layers and masks in Photoshop allow you to make non-destructive edits to your photo, and control exactly what areas of your photo you want to be affect by a specific set of changes.
If you’d like to learn more about the power of Photoshop’s layers and masks, join me on October 12-13 for my Photoshop Layers and Masks Workshop. More information about the workshop is available at https://beautifulflowerpictures.com/store/photoshop-layers-masks-workshop-october-2019/
by hankinslawrenceimages | Aug 2, 2019 | Workshops
Have you ever wanted to learn about studio lighting in a fun relaxing atmosphere? Are you curious about working with a figure model? Have you always wanted to photograph nudes but weren’t sure where to find a female-friendly atmosphere to learn in?
On December 7, Bill and I will be teaching an introductory workshop at our home in Bethesda on photographing a fine art figure model. Not only will talk about how to work with a model and how to photograph with studio flash units but you’ll also have a chance to photograph local fine art figure model Gazelle Powers.
Gazelle is a very experienced model. Her poses are always beautiful and elegant. And she is fantastic to work with!!! You will love working with Gazelle.
The workshop is limited to 4 students to ensure that everyone has plenty of time to work with Gazelle.
More information about the workshop including registration information is on my website at https://beautifulflowerpictures.com/store/photographing-model-gazelle-powers-dec-7-2019/
We’d love to have you join us on December 7.
by hankinslawrenceimages | Jul 12, 2019 | Workshops
One of the questions I get asked on a regular basis is what software should I use to edit my photos? Should I use Lightroom or Photoshop?
My answer is – it depends. I use both at different points in my editing process. It’s really a matter of which program you are comfortable using, and what you want to do.
If you’ve never edited your photos or have been using very basic editing software, I recommend starting with Adobe Lightroom. From the beginning, Lightroom was designed for editing photographs with the input of photographers throughout the process. Once you learn the basics of the Lightroom Develop Module, editing photos is actually very intuitive. If you start at the top of the panel of editing tools and work your way down through them, you will have made a wonderful start on editing any photo you take. Lightroom also has a Library Module which helps you keep your photos organized. It also has dedicated modules for printing, creating slide show and web pages.
For many photographers, Lightroom is the only photo editing program they use.
Photoshop is one of the most powerful photo editing tools on the market. I’ve been known to refer to Photoshop as the world’s most user-hostile program.
The challenge for many photographers is that it is a very complex program. Photoshop started out as a program for graphic designers, so many of it’s tools aren’t very intuitive for photographers. With it’s array of tools, there are usually several different ways to accomplish the same goal in Photoshop, so most photographers discover which tools work for their style of editing and never learn everything the program can do.
For photographers who want to edit their photos in ways that Lightroom isn’t designed to work or who learned on Photoshop so are very comfortable with it, Photoshop may be the only program they use.
Many photographers (including me) use both Lightroom and Photoshop depending on what they want to do with a specific photograph.
Lightroom is the starting point for every photo I edit. After I delete any photos that I know I’ll never edit (wrong focus, wrong exposure or some other fatal flaw), all the keepers get imported into Lightroom where I organize them by category so I can find them again. Then for the ones I want to edit, I head to the Develop Module and start editing. I tend to mainly do global edits (changes that affect the entire photograph) in Lightroom.
For most photos that I’ll just be sharing on the web, I do all of my editing in Lightroom. Once I’ve completed the edits I want, I just export them as JPG files, watermark them, and they’re ready to share.
If I want to do more complex edits or know that I’ll be printing a photograph, once I’ve done my basic editing in Lightroom, I export the photo to Photoshop and complete my editing there. I find it easier to do local edits (changes that affect only part of the photograph) in Photoshop using the various layers and masks. I also find it much easier to “clean up” my photos (removing unwanted objects or more likely dust spots on my sensor) in Photoshop. I also prepare my photos for printing in Photoshop.
Bill on the other hand uses Photoshop almost exclusively. He learned to use it years ago, it makes sense to him, and he finds it easier to use than Lightroom.
Bill and I will be offering a series of photo editing workshops this fall. All our editing workshops are limited to 4 participants.
I know what it’s like to sit in a big room feeling lost as someone tries to explain how to edit photos on a big screen at the front of the room. I usually end up totally frustrated, since I’m still trying to figure out step 2 while they’re talking about what they’re doing in step 10! With 2 instructors and 4 students, our goal is to provide you with the individual help you need so you actually understand what you’re doing by the end of the workshop
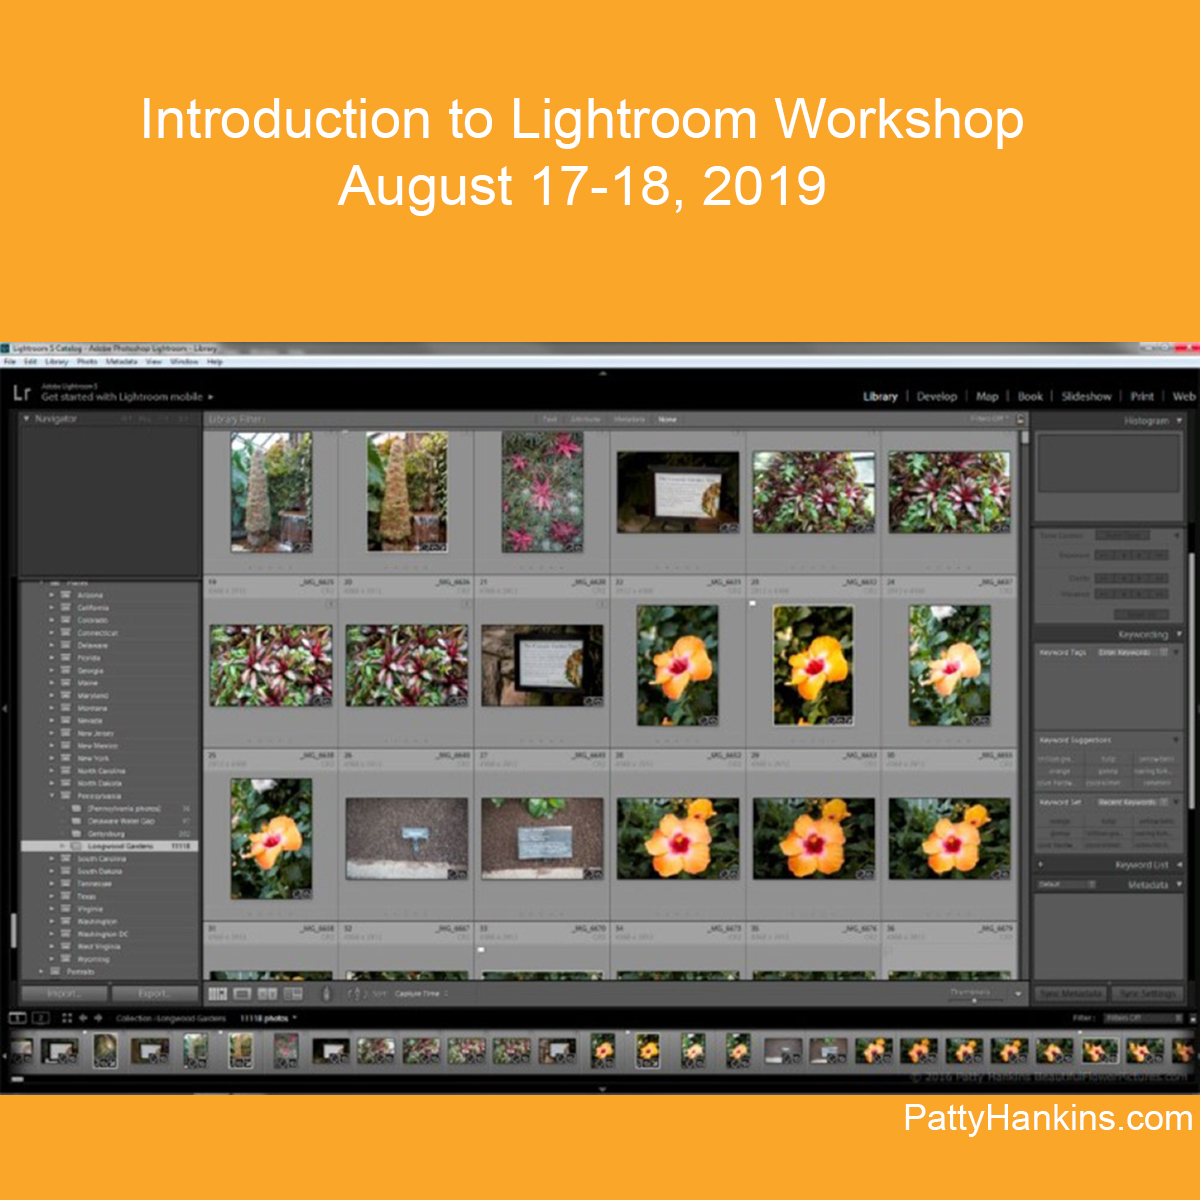
We’ll be teaching our Introduction to Lightroom Workshop on August 17-18. This workshop is really designed for people with little or no experience with Lightroom. Our goal is that by the end of the weekend you’ll know how to import your photos, do basic edits, and export them for print or the web. You can read more about our Lightroom workshop at https://beautifulflowerpictures.com/store/introduction-to-lightroom-workshop-august-2019/

We’ll be teaching our Photoshop Layers and Masks workshop on October 12-13. This workshop is designed for people with basic knowledge of Photoshop. We’ll be focusing on how to use the powerful Layers and Masks in Photoshop to do more complex editing of your photos. Your can read more about our Photoshop workshop at https://beautifulflowerpictures.com/store/photoshop-layers-masks-workshop-october-2019/
If you have any questions about either workshop, drop me a note and we’ll find a time to talk about if either workshop is right for you. We’d love to have you join us for one of our photo editing workshops this fall