by hankinslawrenceimages | Jul 7, 2018 | Photo Tips
A few months ago, I bought a new lens for my camera – a Lensbaby Velvet 56 and to my surprise I’ve fallen totally in love with the lens and the photos I’m taking with it.The Lensbaby Velvets are known for being a soft focus lens. Over the years, I’ve seen so many out of focus poorly exposed photos taken with the Lensbaby lenses that I just figured the lenses weren’t for me. And then I tried one. And discovered that once I took the time to learn how the lens worked, and how it worked with my style of photography – my Lensbaby Velvet has become one of my go-to lenses!

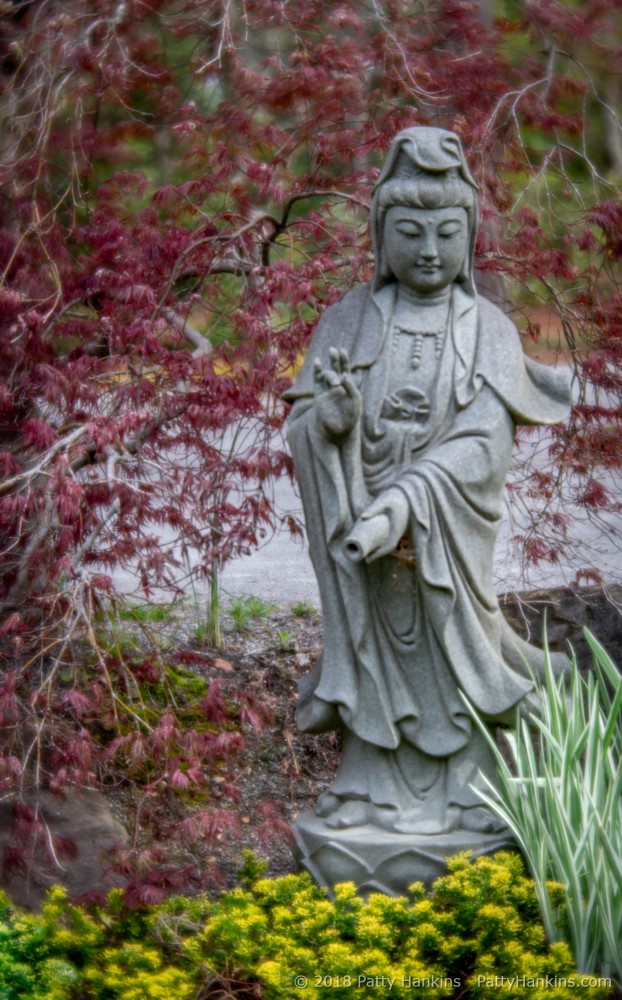
In the Japanese Garden, Gibbs Gardens, Ball Ground, GA © 2018 Patty Hankins
Lensbaby Velvets are a fully manual lens. On my Sony camera, it seems to work best in Aperture Priority mode. I choose the aperture, my camera selects the appropriate shutter speed based on lighting and my ISO – and then I need to focus the lens. The widest aperture on the Lensbaby is f 1.6. Photos taken at f 1.6 will have a shallow depth of field (or a very small front/back area in sharp focus). The rest of the photo tends to be out of sharp focus and often referred to as having a “dreamy” quality. It seems that many of the photos I’d seen that I didn’t like were taken at f 1.6 and it’s just not a look I like.

Lavender & Books Still Life © 2018 Patty Hankins
I’ve found somewhere about f 4 or f 5.6 on the Lensbaby Velvet to be my favorite apertures so far. Photos taken at those apertures have enough depth of field that I can get enough of my subject in sharp focus that I can clearly share what I’m photographing. They also have a shallow enough depth of field that I get the wonderful soft background I’m looking for.
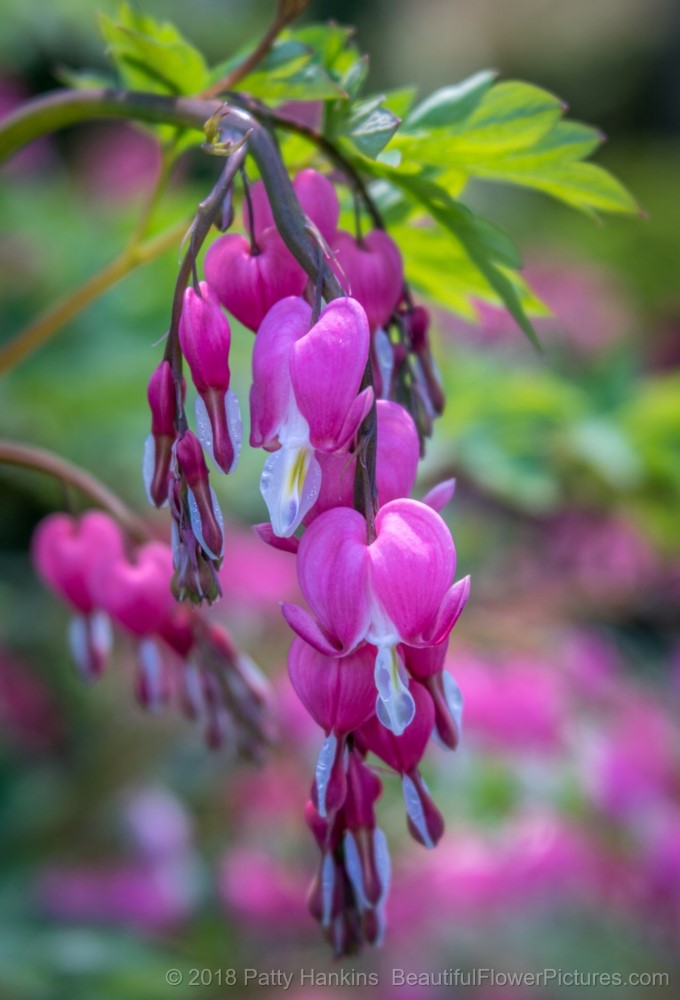
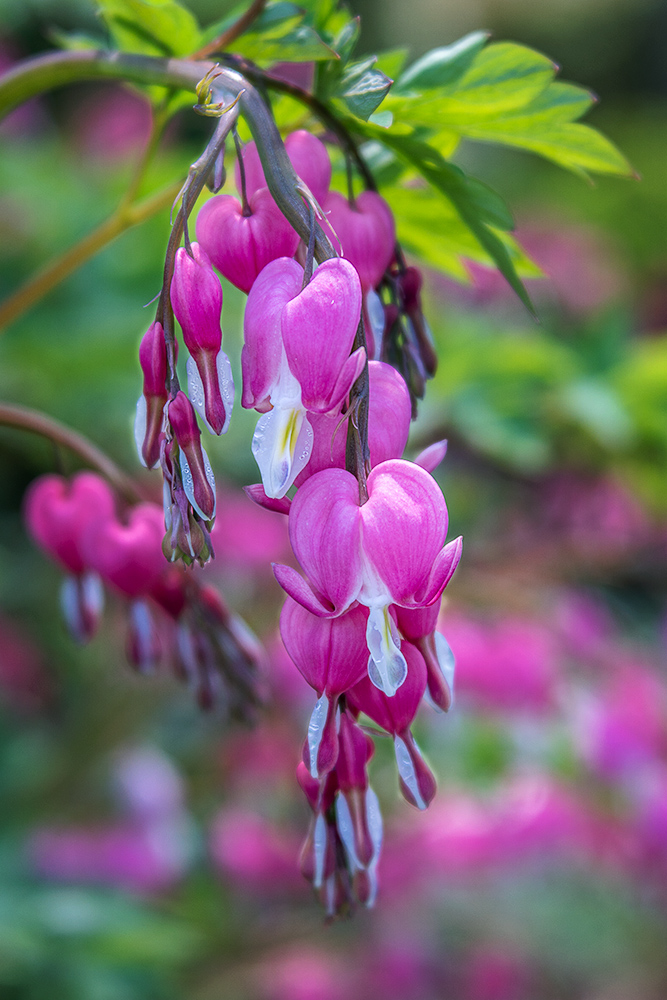
Bleeding Hearts © 2018 Patty Hankins
I figured out which were the “right” apertures for me by spending some time getting to know the lens. When I took it out for practice sessions, I set up my tripod and then took a photo at every f stop the lens has – f 1.6, f 2., f 2.8, f 4, f 5.6, f 8, f11, and f16. Then I’d take a look at the photos to see what I’d gotten – and what I liked. Once I’d reviewed the photos, I moved my camera and tripod closer to the subject – and took another series of photos. And then I moved my camera and tripod further away from the subject – and took yet another set of photos
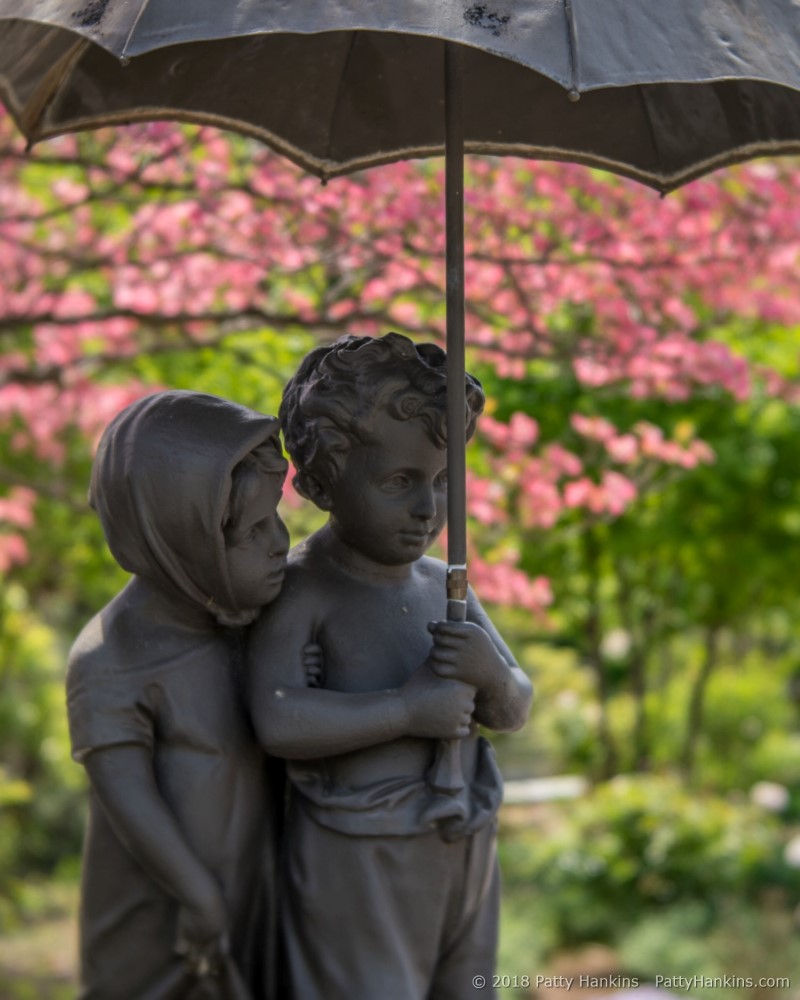
Sculpture with Pink Dogwood, Oakland Cemetery in Atlanta, Georgia © 2018 Patty Hankins
And then I’d find another subject and take several more serieses of photos at all the f stops. After doing this a few times, I got the sense of how the lens worked at various types of subjects and at different distances from the subject. That’s when i figured out which f stops were right for me.
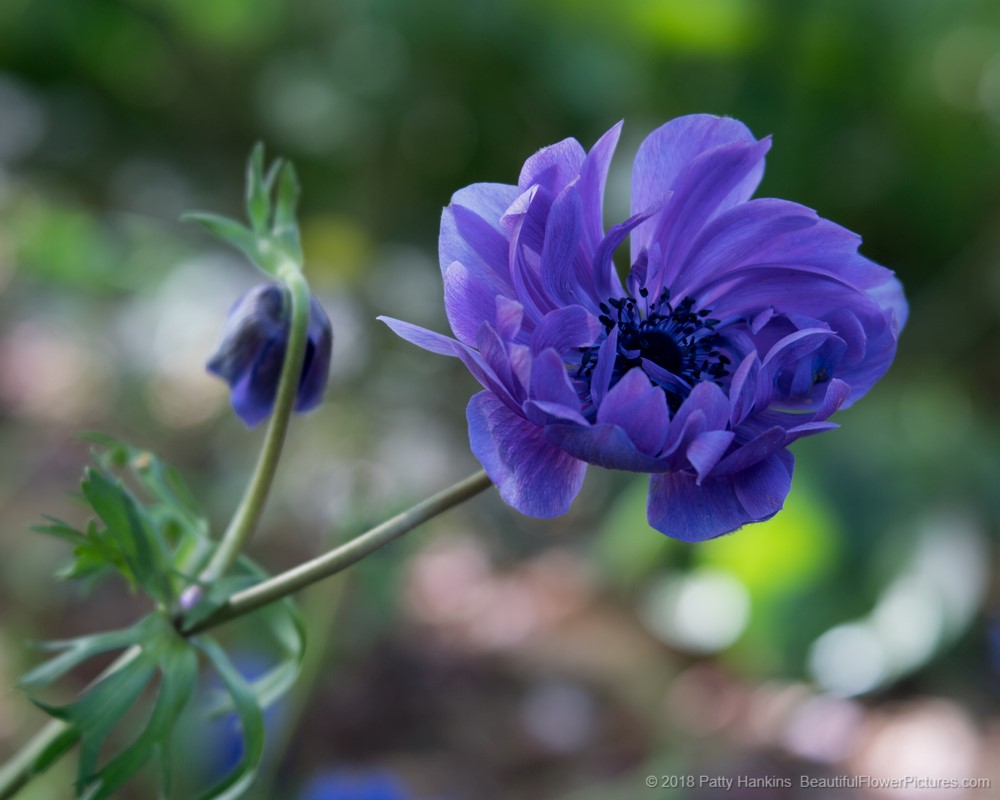
Poppy Anemone © 2018 Patty Hankins
When you get a new lens, it can be a challenge to figure out how to best use it with your style of photography. I’ve recommended to several students that they do what I did with my Lensbaby Velvet – take it out and practice at all the different f stops, at different distances from the subject – and if you are working with a zoom lens – at different focal lenths. That way, you’ll get to know how your gear works with your style of photography and which lens to grab from your pack in a given situation.
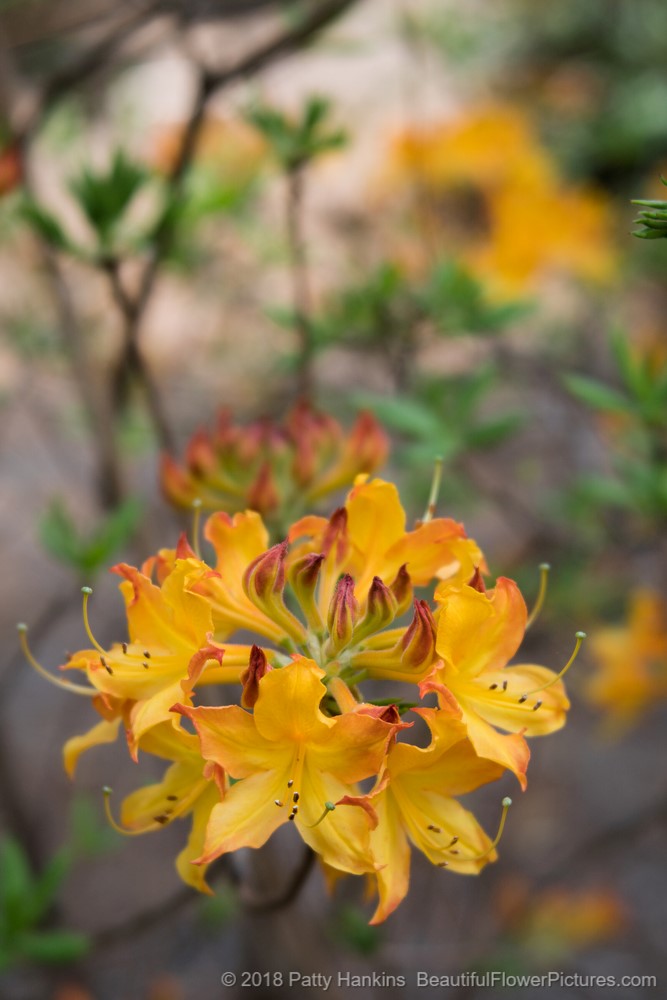
Azaleas at Callaway Gardens, Pink Mountain, GA © 2018 Patty Hankins
Helping students to get comfortable with their gear is something we work on in my field workshops. My next garden workshop is my Morning at Brookside Gardens workshop on July 26. The workshop is limited to 6 students to make sure I’m able to give you the individualized help you need. More information about the workshop is on my website at https://beautifulflowerpictures.com/morning-at-brookside-gardens-july-26-2018/


by hankinslawrenceimages | Jun 1, 2018 | Photo Tips
Wow! Thanks for the great response to last week’s newsletter about why I use a tripod. Over the weekend, several people contacted me asking what tripod I would recommend for them to get – either for flower or landscape photography. And rather than try to guess what tripod would work for a specific individual, I promised I’d write an article about what to think about when buying a tripod.
Choosing the right tripod can be a major decision for a photographer. If the tripod you have isn’t right for you, then you’re not likely to become comfortable using it and it can become more of a barrier to getting the photos you want than a useful tool.
WEIGHT:. If your tripod is too heavy for you to carry comfortably, then you’re more likely to leave it at home or in the trunk of the car, than to take it with you into the field. Tripods are available in a number of materials including aluminum, stainless steel, wood and carbon fiber. Depending on what type of photography you do, and how far you are likely to have to carry your tripod, weight can become a major issue.
HEIGHT: When the legs of your camera are fully extended, your camera should at least be level with your eyes. That way, you don’t have to constantly bend over to adjust your tripod as you compose your images. You shouldn’t have to raise the center post on your tripod to get your camera to eye level. You tripod won’t be able to hold your camera as stable with the center post extended as it can without it extended.

STURDINESS: Your tripod needs to be able to easily support your heaviest camera body and lens combination. If it doesn’t then you risk having it collapse and damaging your camera and lens when they crash to the ground.
FLEXIBILITY: Some of my best flower photographs were taken with my camera at the same height as the flowers which means I need a tripod that can as low to the ground as possible. If your camera has a center post, The height of your center post is the lowest height you can photograph from. Tripods without a center post or with a swing arm generally can get much closer to the ground than ones with a center post.


PRECISION: If you photograph smaller subjects like flowers, having a tripod head that you can make precise adjustments on can make life a whole lot easier when trying to get your camera in just the right place for photograph. There are several types of tripod heads – pan and tilt heads (good for photographing landscapes and shooting video), gimbal heads (good for photographing wildlife), ball heads (good for most types of photography) and geared heads (good for situations such as macro where precise small movements are important)
COMPACTNESS: If you travel with your camera gear, be sure your tripod fits in your suitcase. And if you check your bag with your tripod in it, don’t be surprised to see a note from TSA when you reach your destination.

COST: How much are you willing to spend? You knew I had to get to this point eventually. You can spend as little as $ 15 on a cheap light tripod with a hard to control pan head for about $ 15. Of course, if you put a DSLR with a macro lens on it, it very well may collapse and destroy your camera and lens. Or you can head to the B&H website and search for the most expensive tripod head and legs combination and easily spend over $ 5000. I can guarantee that a $ 5000 tripod will support your gear, it’s also very likely way more tripod than you’ll ever need.
When you are ready to purchase a tripod, don’t just order one off the web. If you have friends who use tripods, ask them what they use, what they recommend and if you can try theirs out to see if you like it. Then I’d recommend visiting a good independent camera store and seeing what brands they carry, and what they recommend. If they have the right tripod for you, buy it from them.
If you’d like to see what Bill and I are using for tripods these days, join us at our Morning on the Soleado Lavender Farm workshop on June 23. We’ll bring our tripod collection with us so you can see what some of the options are and figure out what might be right for you.
You can read more about our June 23 workshop at https://beautifulflowerpictures.com/morning-on-the-lavender-farm-workshops-2018/

by hankinslawrenceimages | May 25, 2018 | Photo Tips
I recently taught a flower photography workshop for a gardening group. We spent a lot of time talking about tripods and why I used one. I realized that I’d shared that same info a few years ago in a blog post. I thought I’d reshare it today for those of you are wondering why I (and other photographers) still use tripods.
When I’m out photographing I’m always surprised when people ask me why I still use a tripod. After all, in the digital age, we have image stabilized lenses and cameras that can shoot at very high ISO’s – so some people think we don’t still need to use a tripod.
At least in my case, I find that using a tripod makes me a better photographer.
One of the things I really like about using a tripod is that it allows me to slow down and think about the image I want to create. I find that when I’m hand holding my camera, I tend to just start shooting right away. When I’m using my tripod, I have to take a few moments to set up my camera and tripod – expand out the legs, get it to the right height, get it in the right position, and attach my camera to my tripod. While I’m doing that, I’m also looking at the scene and deciding how I want my photograph to look. I take more time composing my photo and deciding on the correct exposure and focal point. I end up taking better photographs because I spent time thinking about my photograph while setting up my tripod.
Another reason I use a tripod is that it holds my camera rock steady. When I’m photographing flowers with my macro lens, the slightest movement will often show up in my photographs. If I’m handholding my camera, just breathing and pushing the shutter release will move my camera a tiny bit. And that little bit of movement can dramatically affect how my photos look. When I use my tripod my camera stays exactly where I want to be. If I use a shutter release or wireless remote, I don’t have to touch my camera to take a photo – so I don’t add any motion to my image.

Siberian Iris (c) 2018 Patty Hankins
A third reason I use a tripod is that it lets me focus my camera manually. I’ll admit it – my eyesight is not good enough for me to focus through the camera’s viewfinder. For me to accurately focus, I need to use Live View on the LCD screen. If I’m photographing flowers and handholding my camera, I can’t hold it steady enough to focus manually. I have to use Auto-Focus. On a tripod, once I switch on Live View, I can manually focus my camera and choose exactly the part of the flower will be the focal point of the image.

Echium (c) 2018 Patty Hankins
Another reason I use a tripod is that it lets me use longer exposure time. When I’m photographing flowers I usually want a reasonably fast shutter speed – just so I don’t have to worry about the flower moving in the wind. However, I often want a longer shutter speed when I’m photographing landscapes – especially if I’m photographing a sunrise or moving water. I used a shutter speed of 20 seconds for this photo of Middle Prong of Little River in the Great Smoky Mountains National Park.. I don’t know about you, but I can’t hold a camera steady for that long without a tripod.

Middle Prong Little River, Great Smoky Mountains National Park © 2015 Patty Hankins
The final reason I like using a tripod is that it makes it easier to check my image and if it’s not right, make adjustments as necessary. Once I take a photo, I like to review it on the back of my camera to see if I captured what I wanted to. If I didn’t, then I need to figure out what changes I need to make to capture the image I wanted to. If my camera is on a tripod, I know exactly where my camera was for the previous image, so can make adjustments based on that information. If I’ve been handholding my camera, I have to make my best guess as to where I was holding my camera for the previous image, and make adjustments based on a guess. I’ve found I’m much more successful making changes and getting the image I want when I use my tripod than when I’m handholding my camera.
So, that’s why I continue to use a tripod whenever possible.
Using a tripod is one of the skills I work with my students on in my workshops. My next workshop is on my Morning on the Soleado Lavender Farm workshop on June 23. If you’d like to learn more about using a tripod , join me on June 23. More information (including registration info) is on my website at https://beautifulflowerpictures.com/morning-on-the-lavender-farm-workshops-2018/

by hankinslawrenceimages | May 18, 2018 | Papaveraceae Family, Photo Tips, Uncategorized
A couple of months ago, I shared how I edited one of my landscape photographs from start to finish. Several people asked me shortly thereafter how do I edit my flower photographs? And do I do it differently than I edit my landscape photographs.
The answer is – I don’t really have a “standard” set of edits that I do on my photographs. Instead, I make the edits I need to share with you what I saw and felt when I captured the image.
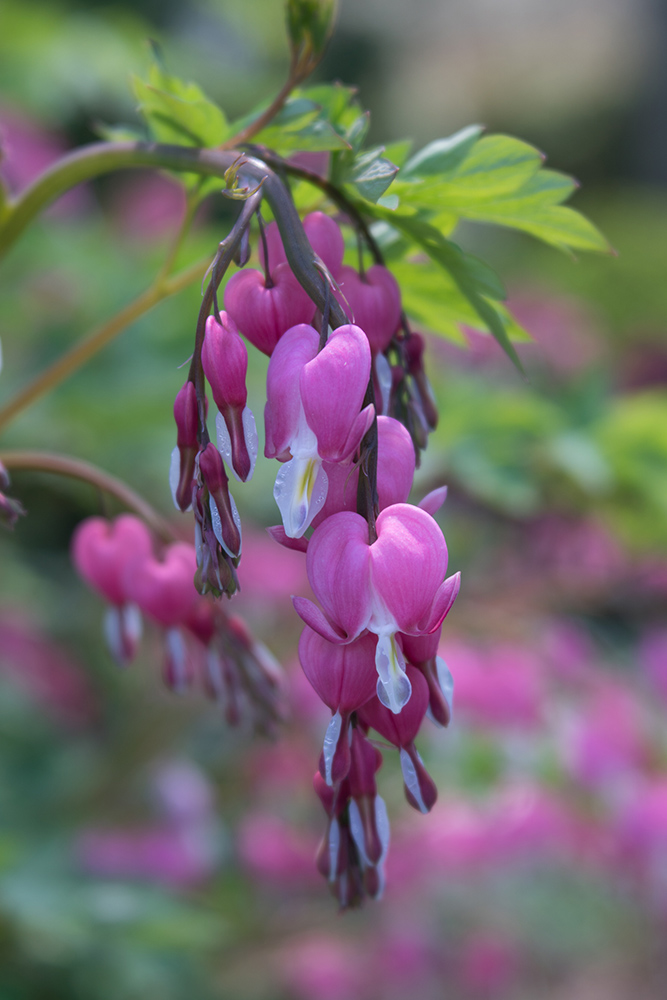
So today I thought I’d take you through how I edit one of my bleeding heart photos from start to finish. I captured the photograph earlier this month at Longwood Gardens. What caught my eye was the group of bleeding heart blossoms coming towards me, with all the other blossoms further behind. I knew that if I photographed the scene with everything in sharp focus, the front flowers wouldn’t stand out the way I wanted them to. So for this photo the lens I pulled out of my pack was my Lensbaby Velvet 56 which is designed to be a soft focus lens which I knew would give me the lovely blurred background I was looking for.
The settings on my Sony a6500 were ISO 100, 1/200th of a second for my shutter speed and probably f 4 for my aperture. The Lensbaby Velvet is a manual lens so my camera doesn’t record data for the aperture. My camera was on my tripod for the photo.
Here’s my initial capture for the image. While the composition was close to what I wanted to share, the colors didn’t reflect what I saw on a that bright sunny day in the gardens.
Then in Lightroom I did some initial edits making some changes in the Basic Panel of the Develop module adjusting Highlights, Shadows, Blacks, Whites and Clarity (mid-tone contrast) and applying a correction for distortion added by the lens. My goal was to have a well-exposed file to take into Photoshop.
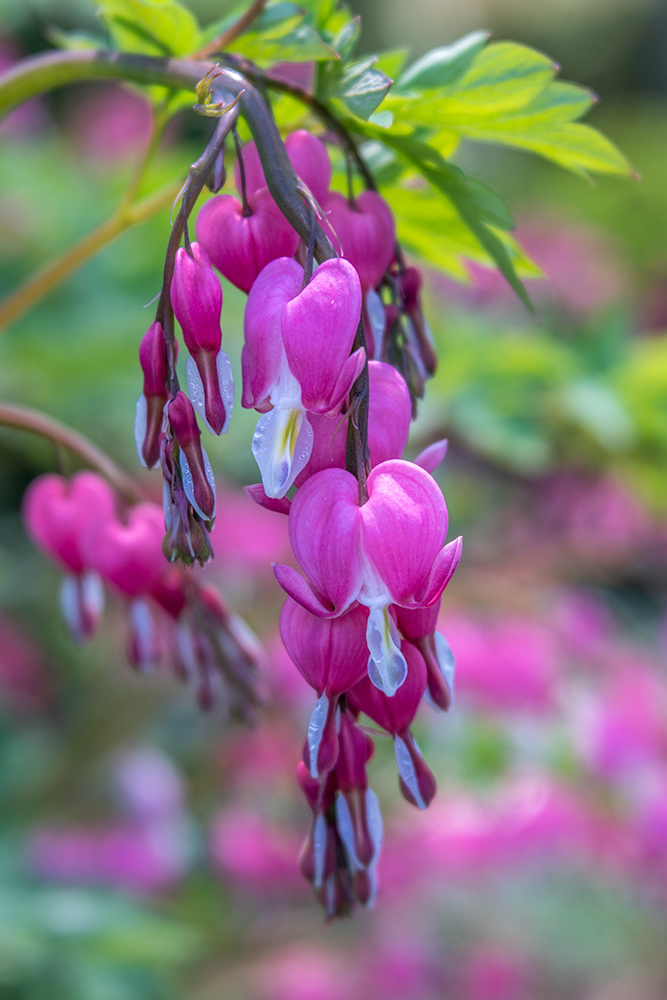
Once I had my image open in Photoshop, I made my next set of edits. I cropped the image a bit, keeping the same aspect ratio, to emphasize the front flowers. Next, I ran a high pass filter to add a bit of contrast/sharpness around the front flowers to help them stand out. I then used a pair of curves layers to darken the background a bit, and to brighten up the front flowers. Finally I added a vingnette to draw your attention into the center of the image.
Now that I’d completed my first set of edits, I printed a copy and Bill and I took a look at it. I’ve found it really helps to have someone else review my prints as I’m working on a photo. Bill often sees things that I don’t see – since I took the photo and know what I want it to look like – whereas he is looking at it with fresh eyes.
Overall, while the image on the monitor looked great, the print looked flat and boring. The problem was the pinks just didn’t look quite right. It turns out that the many of the shades of pink in my image were outside the gamut of printer – in other words – my printer couldn’t print the colors in my photo accurately so it printed them all the same shade.
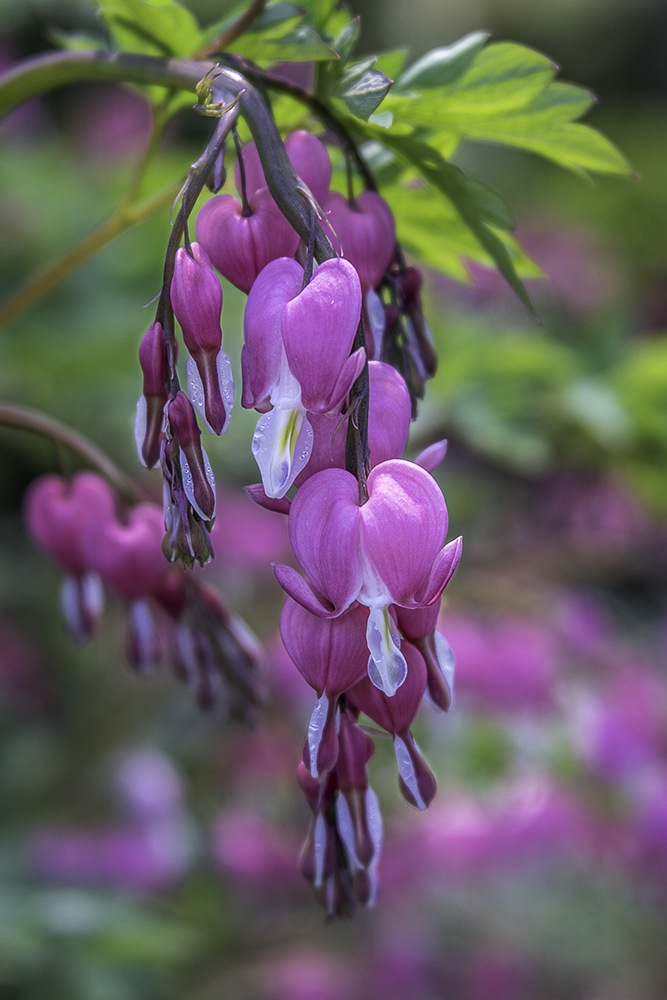
So I had to make some changes to the photo to bring the pinks to a color I could print on my Epson 3880 printer. The first edits I made at this point were to darken the front flowers a bit which changed the shade of pink a bit. Then I went into the Magentas in a Hue/Saturation layer and darkened then a bit. Finally, I used a Color Balance layer to decrease the overall amount of magenta in the image by adding a bit of green. And then I ran a new print.
When we took a look at this second print, most of the shades of pink were within the printer’s print gamut so the photo looked much better. Some tones still weren’t printing the way I imagined they would look, but they were close. And my only options were to present it as it was, made more changes to get the pinks into gamut but then the rest of the photo didn’t look right, or invest a new printer with a wider print gamut on the chance that it could print a few more shades of pink.
I decide that I was happy with the photo the way it was.
One of the realities of digital printing is that the human eye can see, and a good monitor can display, many more shades of color than even the best photo printers can print. So it’s a matter of getting the colors as close to what I remembered seeing in the field as I can in my prints. And of course – always hoping that maybe someday some new technology will let me print a few more shades of pink and purples than I can print now.
If you have any questions about how I edited my new bleeding hearts photo, drop me a note and I’ll try to answer them in a future newsletter.
If you’d like to learn more about editing and printing your digital photographs, I am in the process of scheduling my fall workshops. I am also happy to work privately with students here in Bethesda if that works better for you than a small group workshop. If you’d like to know more about working privately with me or my upcoming workshops, drop me a note and we’ll find time to talk.
And if you like y new bleeding hearts photograph, it is available on my website as a matted print at https://beautifulflowerpictures.com/store/bleeding-hearts-1/
by hankinslawrenceimages | Jan 5, 2018 | Photo Tips
If you follow me on social media, you’ve probably noticed I’ve been sharing more photos of flowers photographed in my studio than I usually do. It’s part of my process for deciding on what photos I’ll be including in my Petals show at Artists and Makers Studios in Rockvillle, MD next month (don’t forget – the opening reception is on February 2!). Once I’ve taken a set of photos in my studio, I’ll choose my favorites and do some quick edits to them up for sharing on my blog and social media. As I see the response to the photos, and have a chance to sit with them, I decide which ones I want to edit for print. And then from the ones I’ve edited for printing, I’ll choose the photos for the show.
A couple people have emailed me asking how I choose how I want to light my studio photos – and I’ve directed them to an article I wrote a couple years ago. Based on their responses to me – I thought I’d share it with all of you in case you’ve wondered how I light photos in my studio.
One of the main reasons I photograph in the studio is that I can control the light on my subject. When I’m photographing at a garden or in a park – I have to work with the light I find – and sometimes it’s just not very conducive for creating the photos I want to create.
In the studio, things are totally different. By using multiple lights, I can control which areas of the flowers are in light and which are in the shadows. I can also control how deep the shadows are.
Rather than spend more time trying to explain it – I thought I’d just show you some examples of how different combinations of light make a difference in my photos.
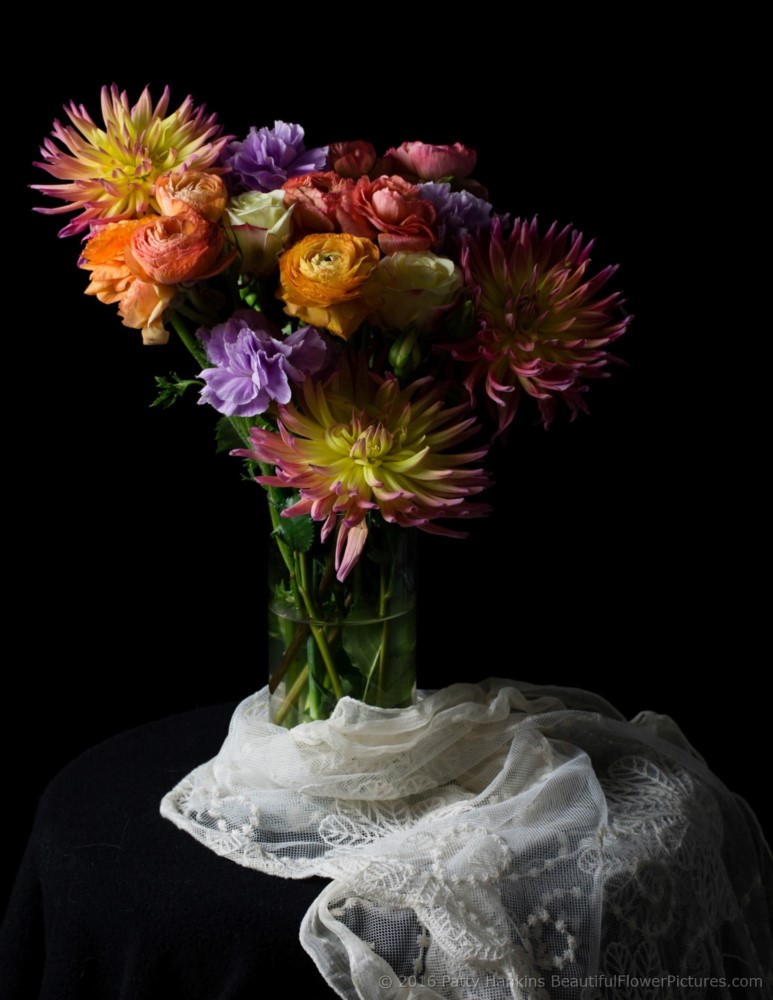
I usually have one light as my main light for the overall brightness of the scene, and then a second light down a stop or two to create some interesting shadows and sense of depth in my photos.
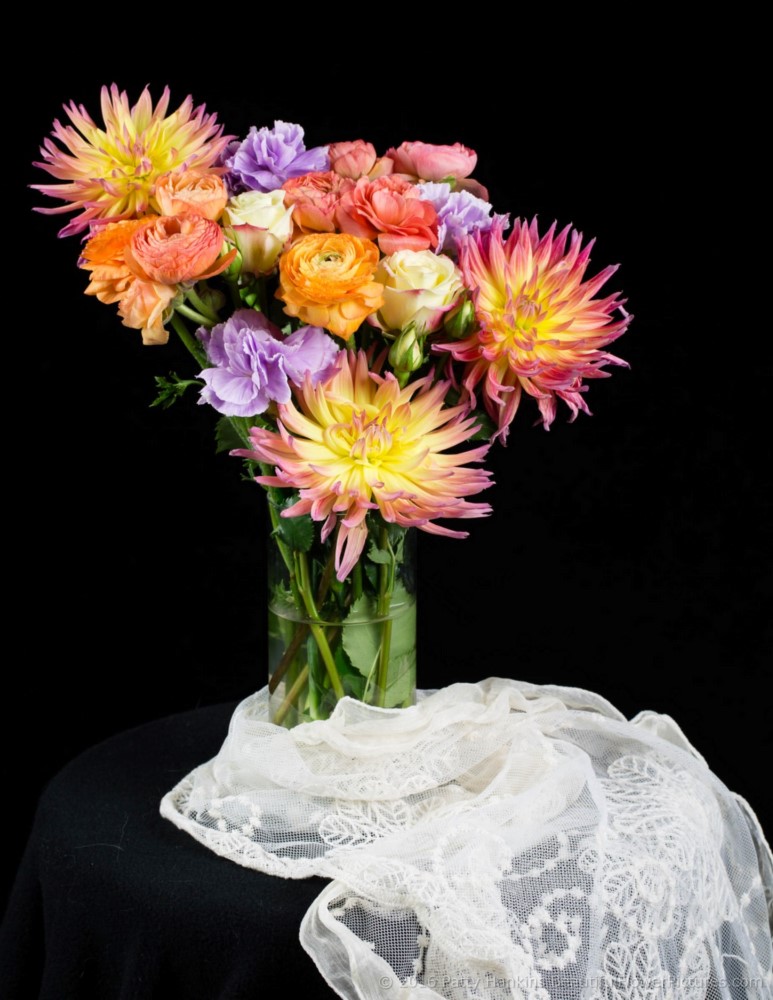
This first set of photos were taken under two lights in my studio – one to the right of the floral arrangement and one to the left. For all four photos, my camera settings were ISO 100, f 11, 1/15 sec. The only change I made to the photos in Lightroom were a bit of cropping and converting them from RAW files to JPGs.
In this first photo, both lights are at full power.
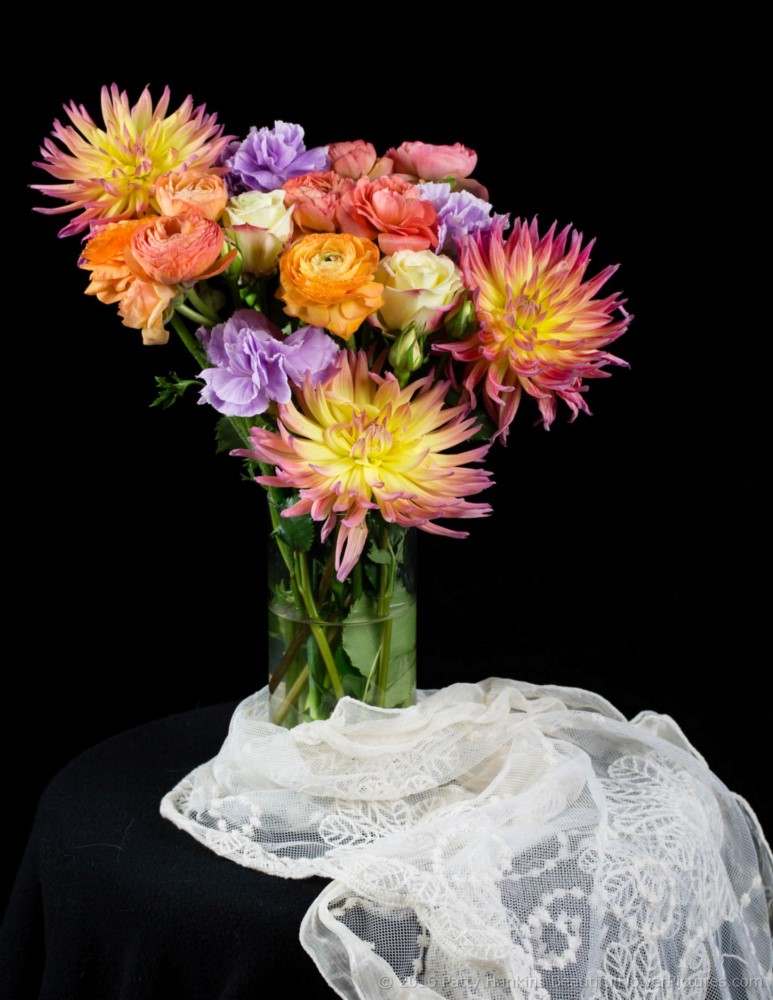
In the second photo, the light to the right is at half power, while the light on the left is still at full power. You can start to see more shadows in this photo compared to the first one.
In the third photo, the light on the right is at minimal power, while the light on the left is still at full power. The difference in the photos becomes more dramatic as the difference in the light levels increases.
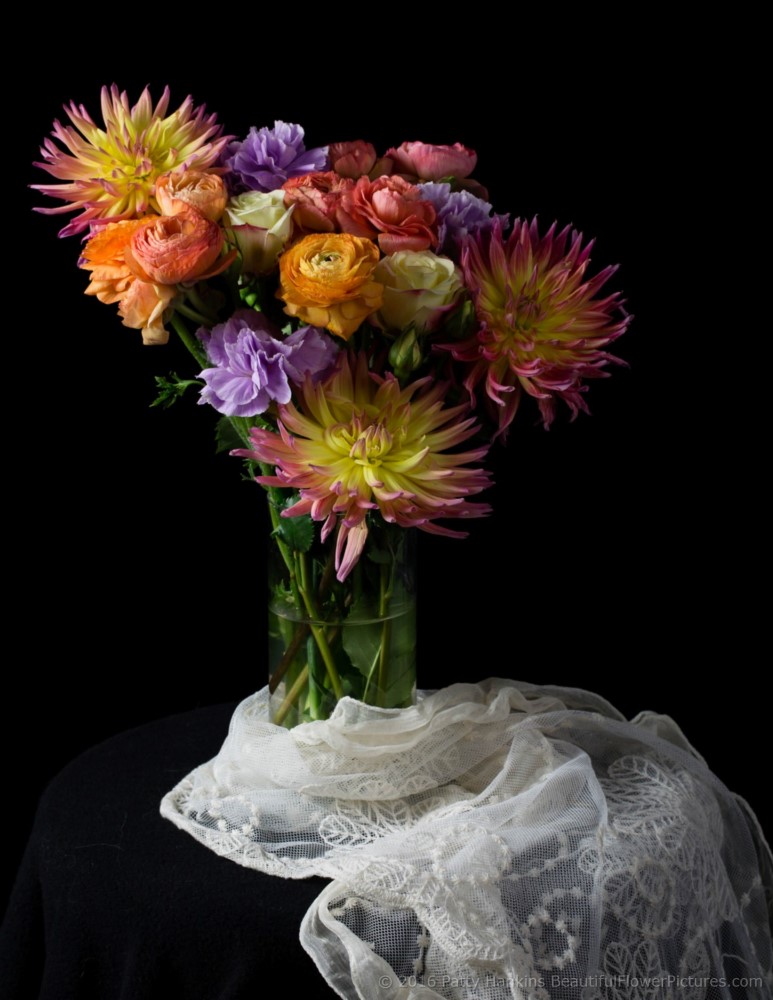
And in the fourth photo, the light on the right is off, while the light on the left is still at full power. This gives a very directional feel to the light in the photo, similar to light coming through a window into a darkened room.
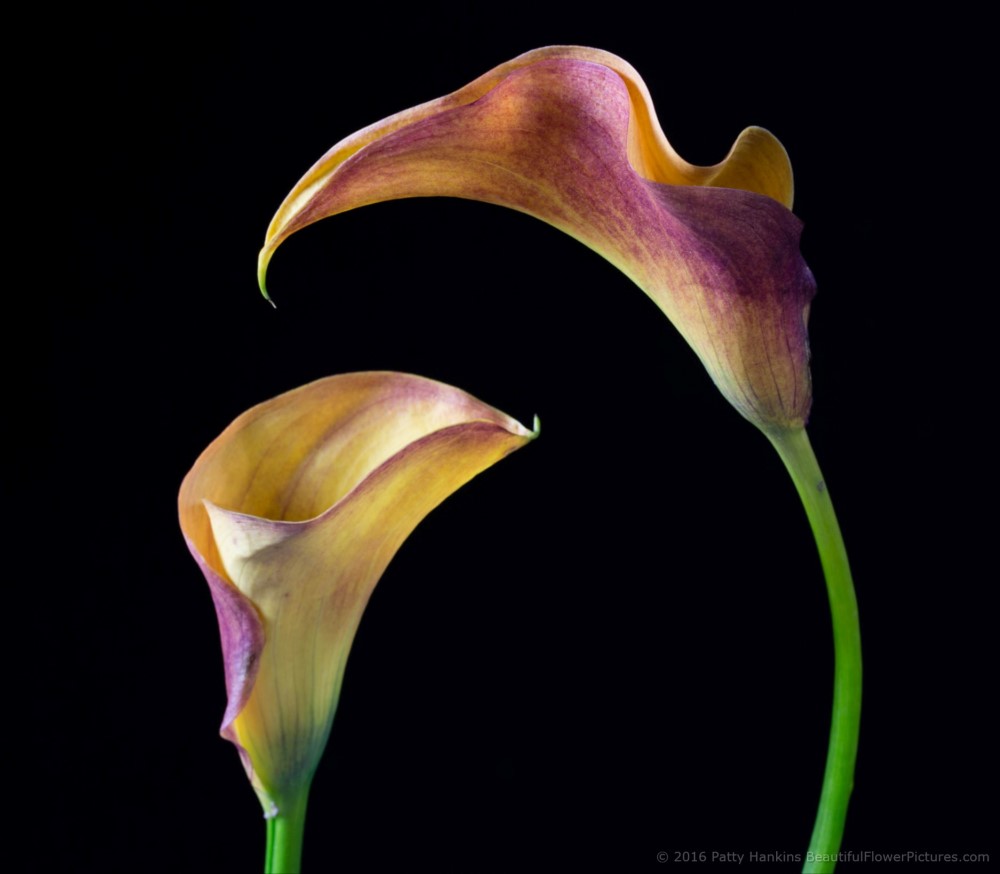
As another example, I photographed a pair of papaya calla lilies to show how changing the light levels on different sides can create very different looks. All of these photos were taken at ISO 100, f 16, 1/3 sec. Again the only edits made in the Lightroom were cropping the photos and converting from RAW to JPG.
Both lights at full power

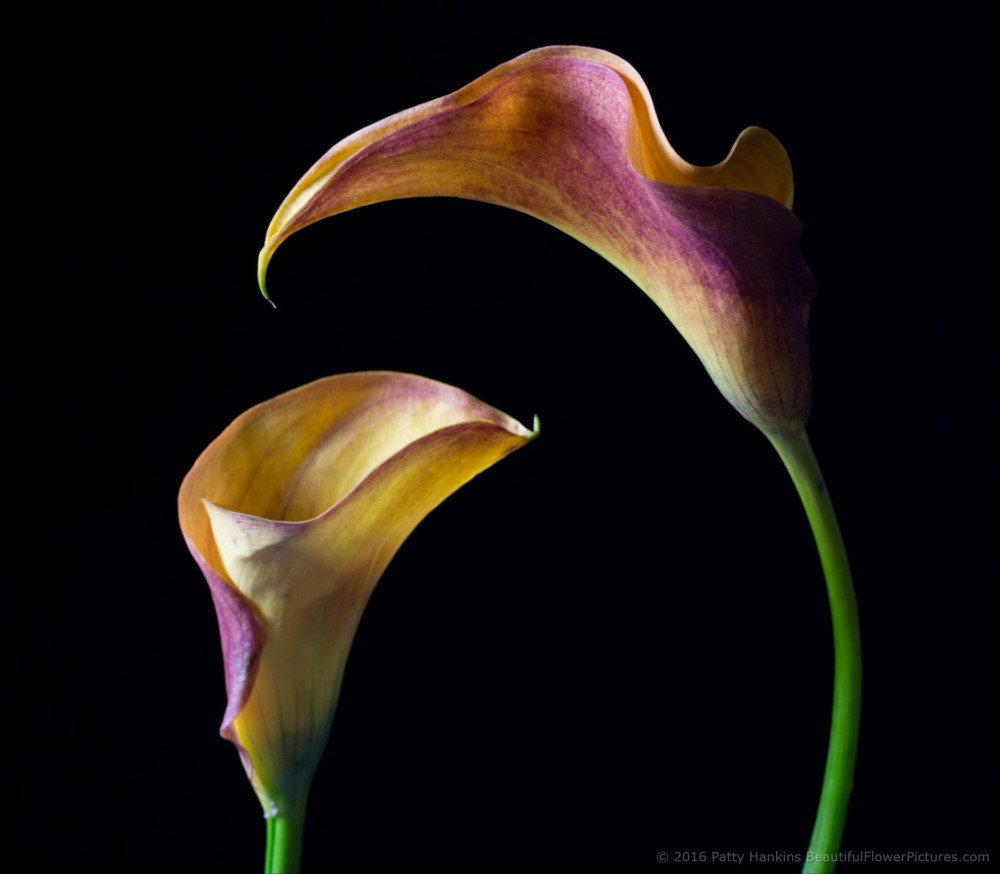
Light to the right at full power, light to the left at half power.

Light to the right at full power, light to the left at low power.

Light to the right at full power, light to the left turned off.

Light to the left at full power, light to the right at half power.

Light to the left at full power, light to the right at low power.
Light to the left at full power, light to the right turned off.
As you can see, choosing different levels of light on your subject can create very different looks in your final photos.
On March 17, you’re invited to our home (and studio) in Bethesda to learn first-hand how to work with studio lighting to create the light you want in your photos. Bill and I will be teaching our Photographing Flowers in the Studio where you’ll get hands-on practice using both strobes and continuous lights to photograph flowers. You can learn more about the workshop, including registration info on my website at https://beautifulflowerpictures.com/photographing-flowers-studio-workshop-2018/
I’d love to have you join me for the workshop. Feel free to email me if you have any questions about the workshop.
by hankinslawrenceimages | Oct 6, 2017 | Photo Tips
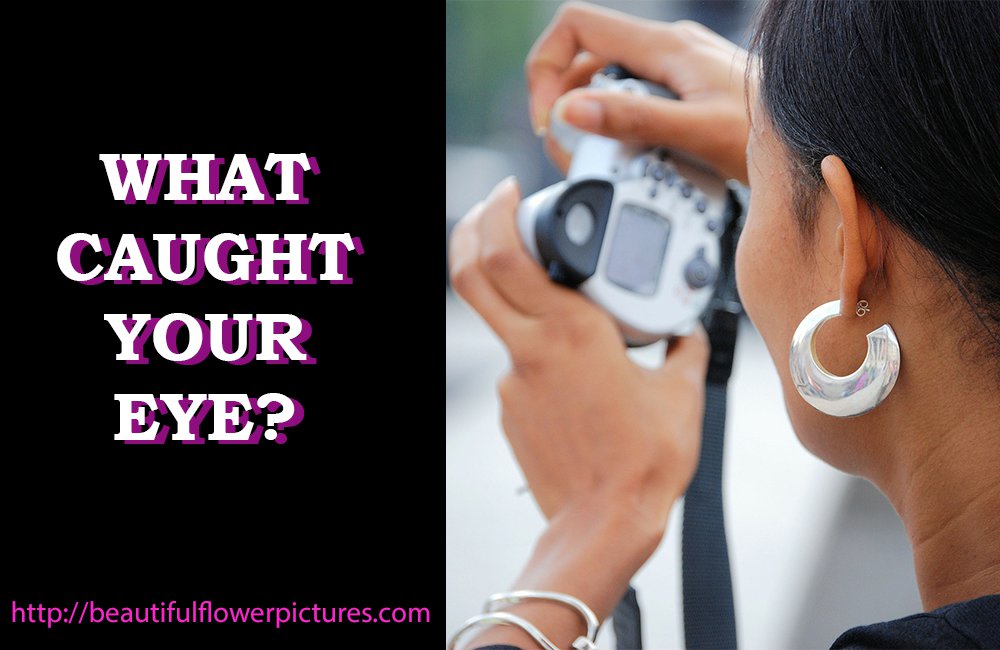
One of the questions I get asked occasionally is how do I know how to compose my flower photos? I’ve realized that the first thing I think about when planning a photograph is why am I stopping here to take a photo? Why here and not over there? Why this flower and not that flower? In other words – what caught my eye?
Over the years, I’ve realized that there are several things that catch my eye and make me want to stop and take a photo.
Sometimes it’s a single perfect flower
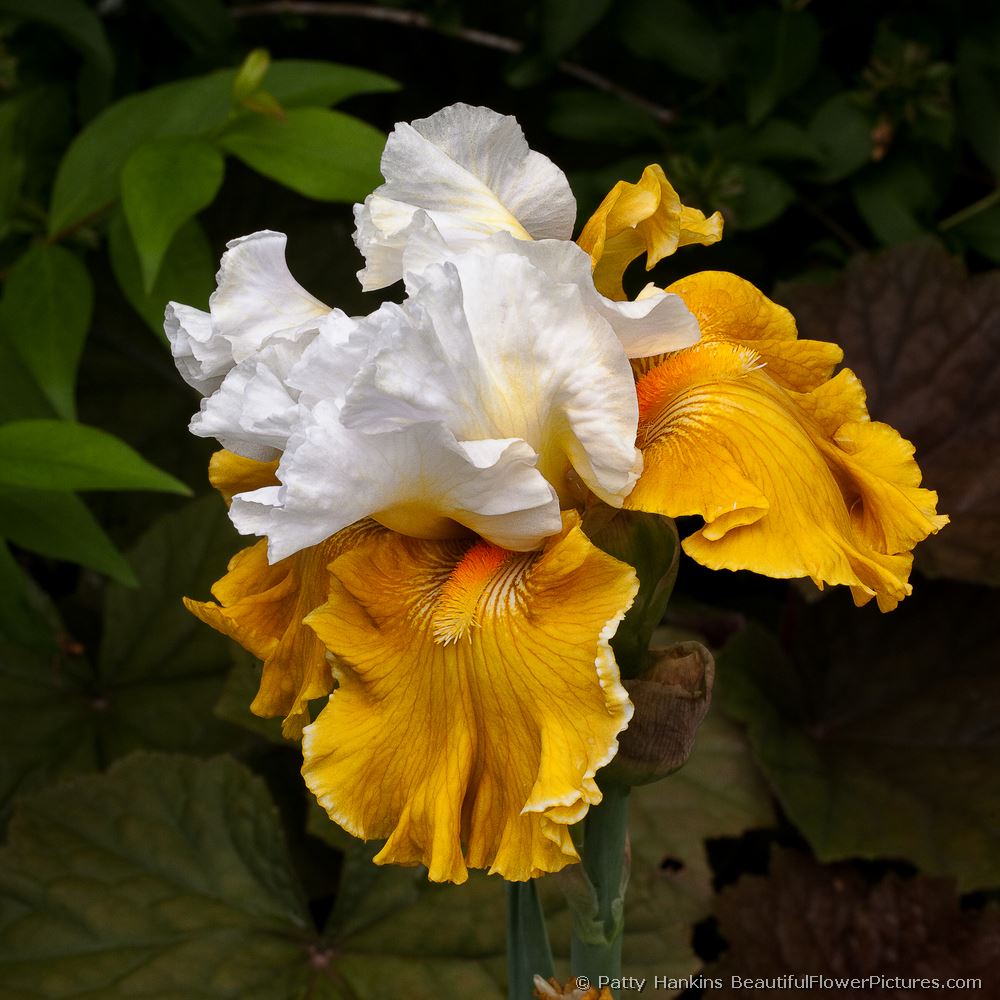
Tour de France Bearded Iris © 2010 Patty Hankins
Other times it’s a combination of flowers
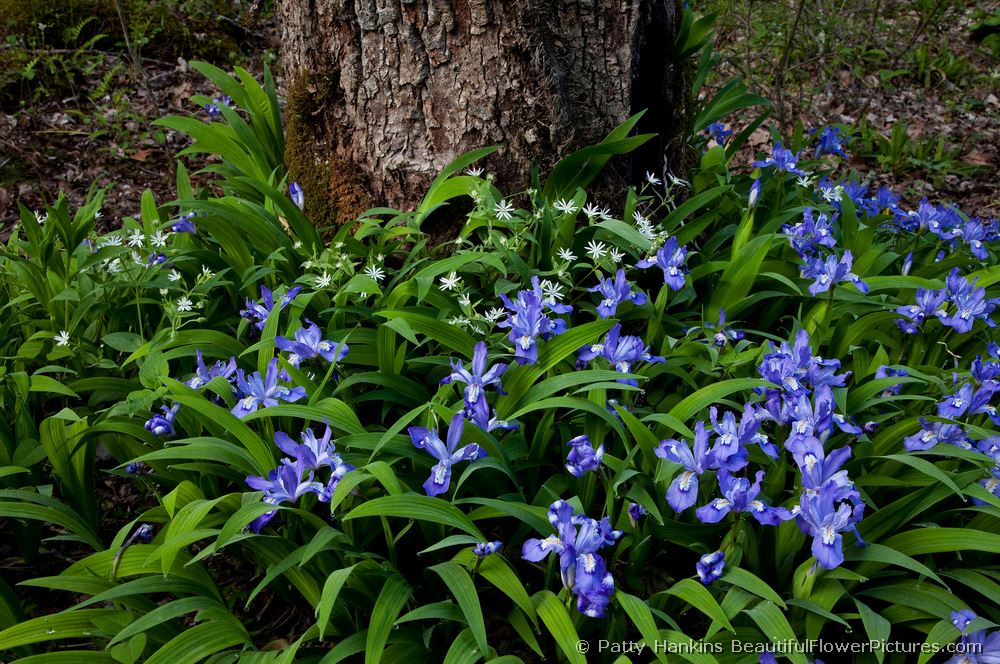
Crested Dwarf Iris & Star Chickweed © 2009 Patty Hankins
Or it could be several of the same flower
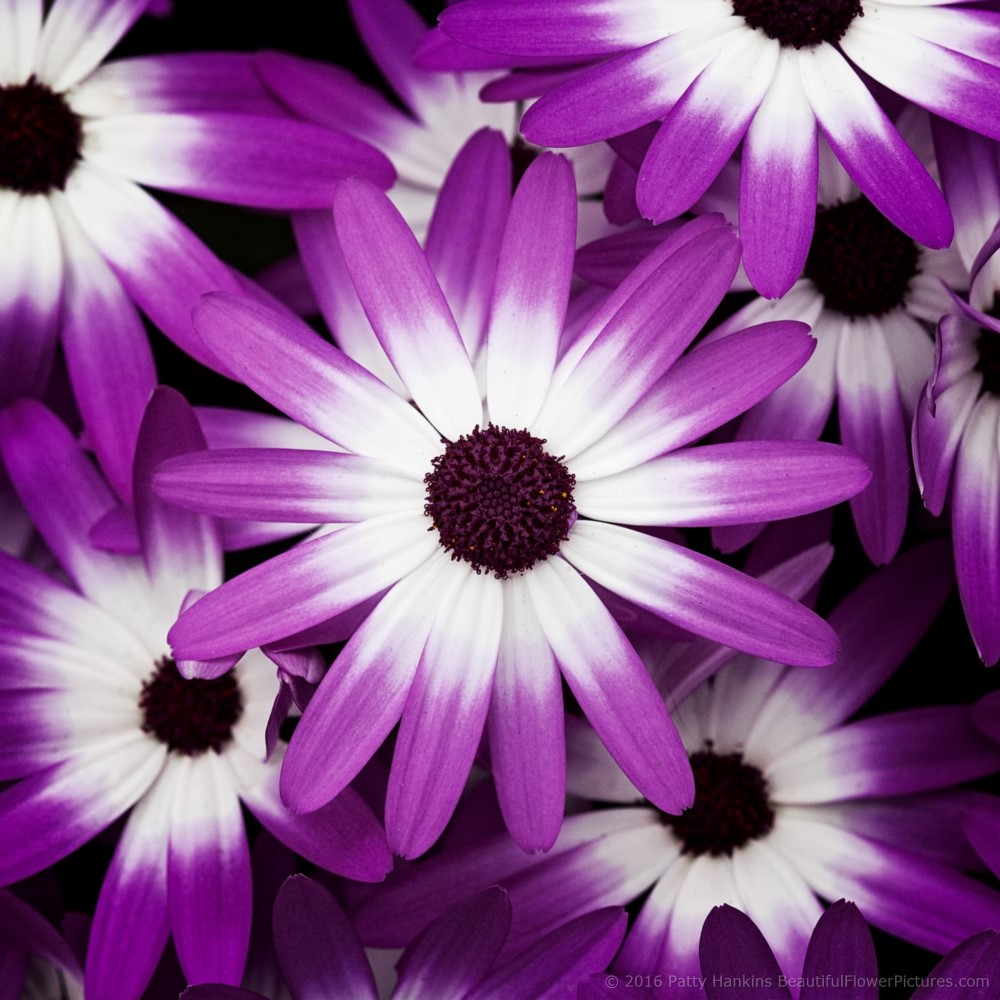
Sunserba Cineraria © 2016 Patty Hankins
Sometimes it’s a single color – like the shades of blue in these blue hydrangeas
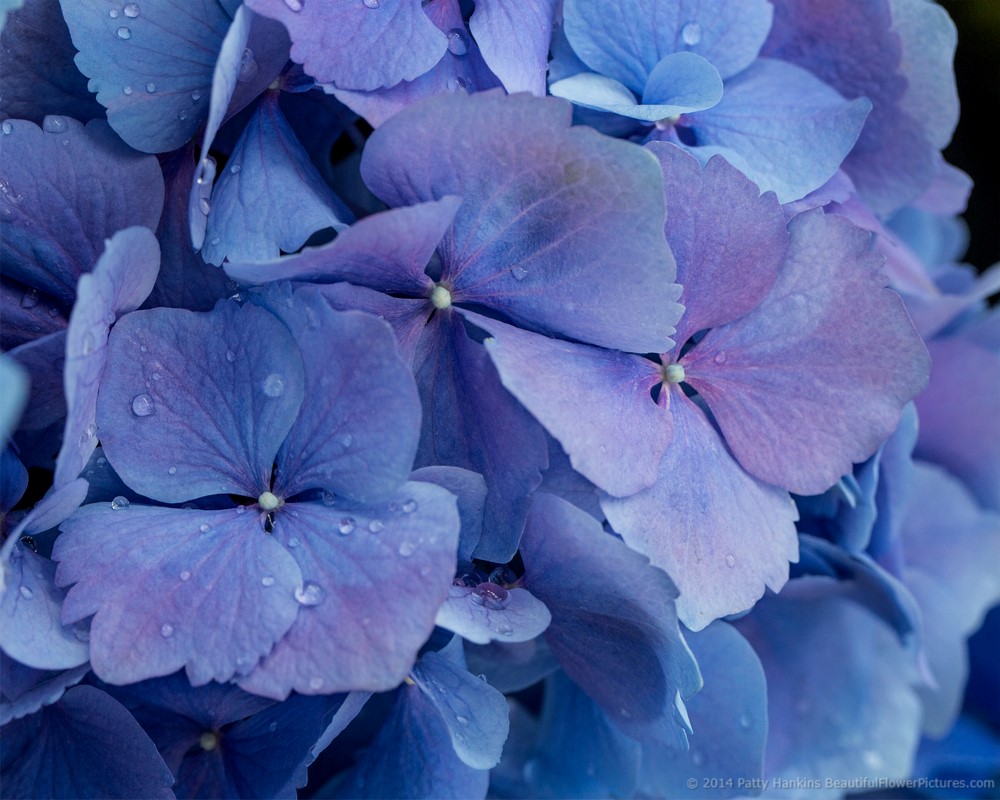
Blue Bigleaf Hydrangea Blossoms © 2014 Patty Hankins
Or it could be a combination of colors – like the purple and yellows in the wildflowers

Yellow Trillium & Purple Phacelia © 2009 Patty Hankins
Sometime it’s the details – like the center of a sunflower

Sunflower © 2015 Patty Hankins
Or it can be the whole scene in front of me
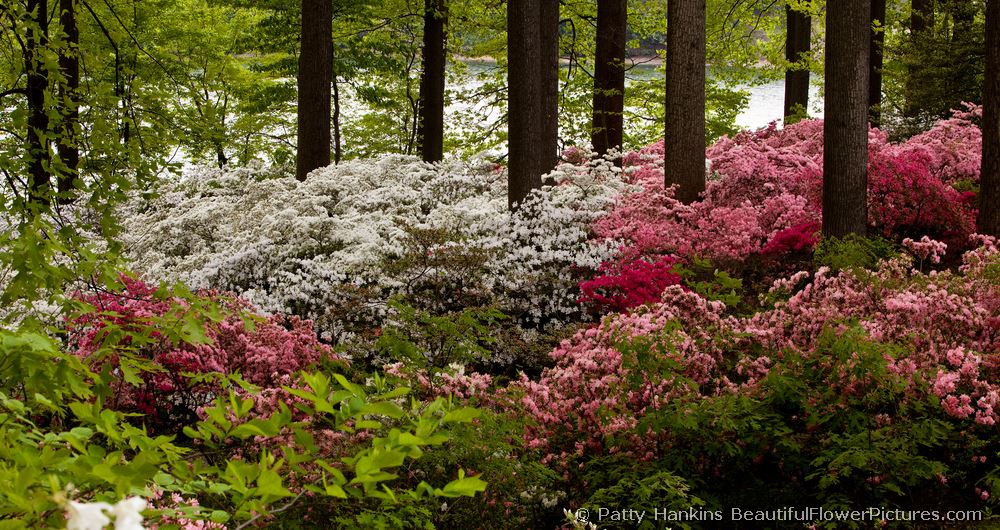
Azaleas in the Wood ©2009 Patty Hankins
Sometime it’s a line
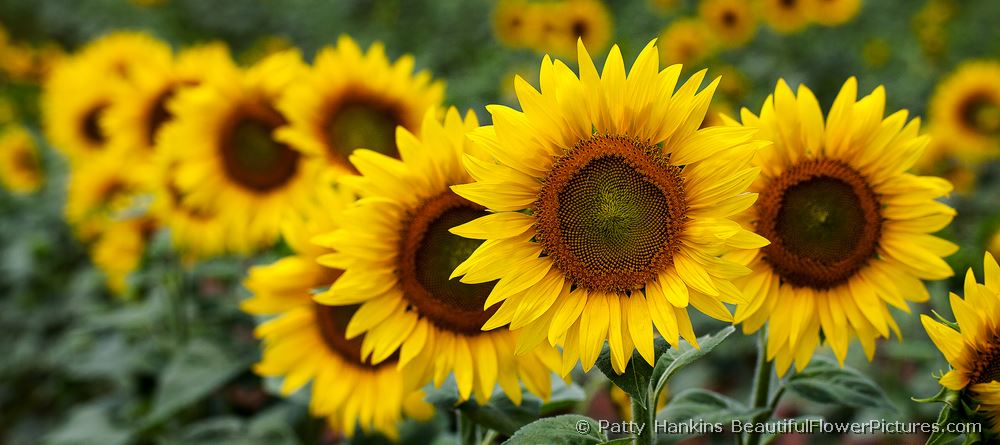
Sunflowers All in a Row © 2011 Patty Hankins
And sometimes it’s just something unexpected
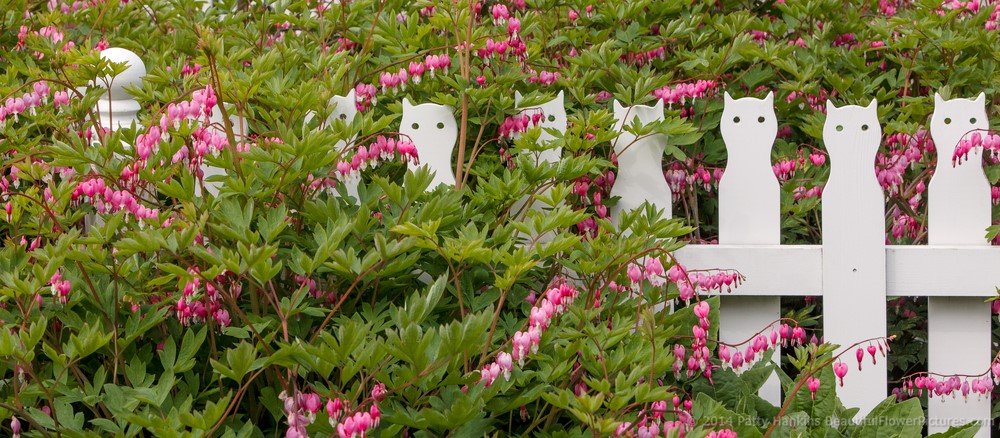
Along the Fence © 2014 Patty Hankins
So when you’re out photographing – be sure to take a moment to think about what caught your eye. It will help you create the photos you want to create.
Identifying what caught your eye and deciding how to capture that in your photo is one of the things we talk about in my workshops. I’m still finalizing plans for my 2018 workshops. I’ll be announcing them here in my newsletter and adding them to my website as I get things scheduled.
You can see the workshops I currently have scheduled for the remainder of this year at https://beautifulflowerpictures.com/2017-workshops/ and next year at https://beautifulflowerpictures.com/2018-workshops/.