
A couple of months ago, I shared how I edited one of my landscape photographs from start to finish. Several people asked me shortly thereafter how do I edit my flower photographs? And do I do it differently than I edit my landscape photographs.
The answer is – I don’t really have a “standard” set of edits that I do on my photographs. Instead, I make the edits I need to share with you what I saw and felt when I captured the image.
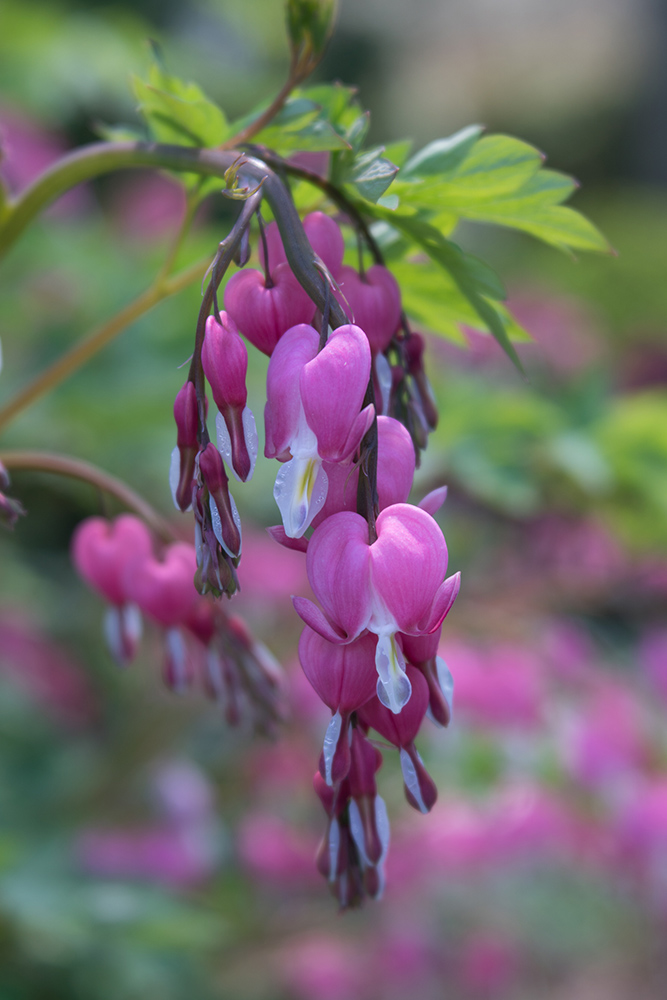
So today I thought I’d take you through how I edit one of my bleeding heart photos from start to finish. I captured the photograph earlier this month at Longwood Gardens. What caught my eye was the group of bleeding heart blossoms coming towards me, with all the other blossoms further behind. I knew that if I photographed the scene with everything in sharp focus, the front flowers wouldn’t stand out the way I wanted them to. So for this photo the lens I pulled out of my pack was my Lensbaby Velvet 56 which is designed to be a soft focus lens which I knew would give me the lovely blurred background I was looking for.
The settings on my Sony a6500 were ISO 100, 1/200th of a second for my shutter speed and probably f 4 for my aperture. The Lensbaby Velvet is a manual lens so my camera doesn’t record data for the aperture. My camera was on my tripod for the photo.
Here’s my initial capture for the image. While the composition was close to what I wanted to share, the colors didn’t reflect what I saw on a that bright sunny day in the gardens.
Then in Lightroom I did some initial edits making some changes in the Basic Panel of the Develop module adjusting Highlights, Shadows, Blacks, Whites and Clarity (mid-tone contrast) and applying a correction for distortion added by the lens. My goal was to have a well-exposed file to take into Photoshop.
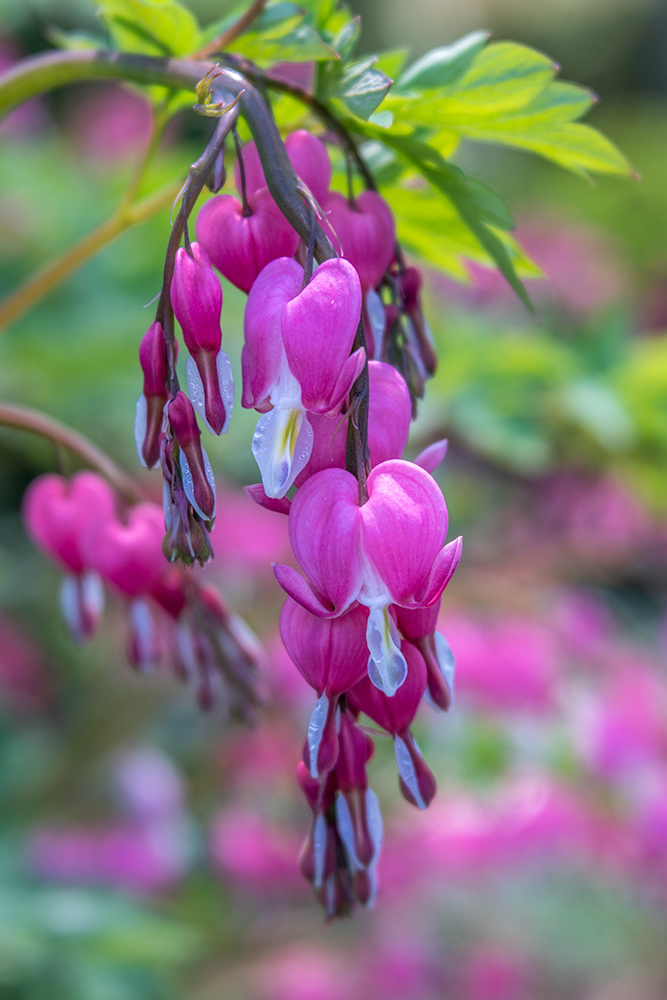
Once I had my image open in Photoshop, I made my next set of edits. I cropped the image a bit, keeping the same aspect ratio, to emphasize the front flowers. Next, I ran a high pass filter to add a bit of contrast/sharpness around the front flowers to help them stand out. I then used a pair of curves layers to darken the background a bit, and to brighten up the front flowers. Finally I added a vingnette to draw your attention into the center of the image.
Now that I’d completed my first set of edits, I printed a copy and Bill and I took a look at it. I’ve found it really helps to have someone else review my prints as I’m working on a photo. Bill often sees things that I don’t see – since I took the photo and know what I want it to look like – whereas he is looking at it with fresh eyes.
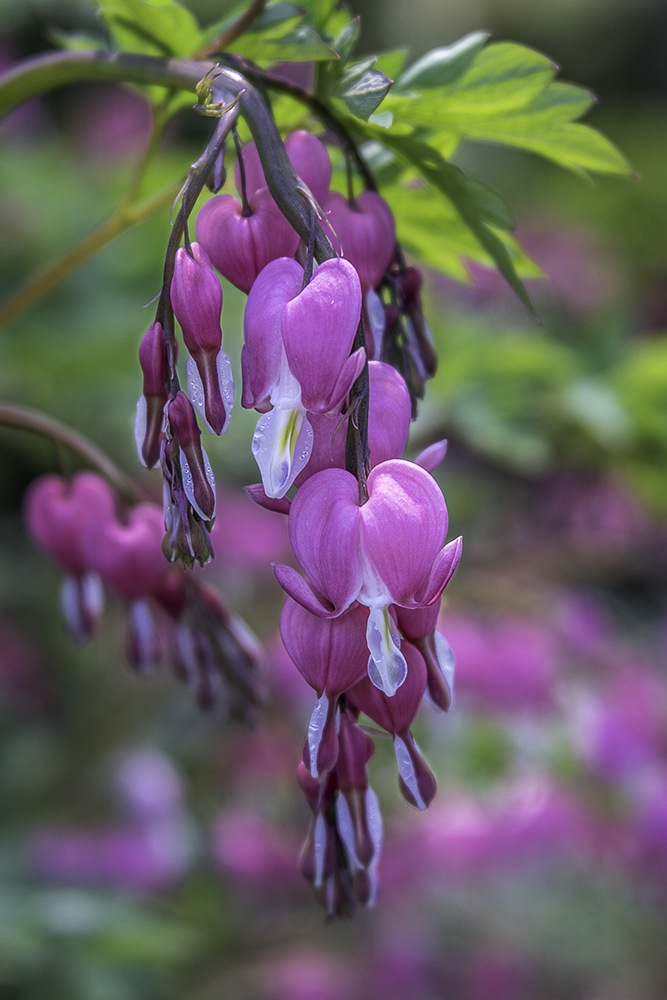
Overall, while the image on the monitor looked great, the print looked flat and boring. The problem was the pinks just didn’t look quite right. It turns out that the many of the shades of pink in my image were outside the gamut of printer – in other words – my printer couldn’t print the colors in my photo accurately so it printed them all the same shade.
So I had to make some changes to the photo to bring the pinks to a color I could print on my Epson 3880 printer. The first edits I made at this point were to darken the front flowers a bit which changed the shade of pink a bit. Then I went into the Magentas in a Hue/Saturation layer and darkened then a bit. Finally, I used a Color Balance layer to decrease the overall amount of magenta in the image by adding a bit of green. And then I ran a new print.
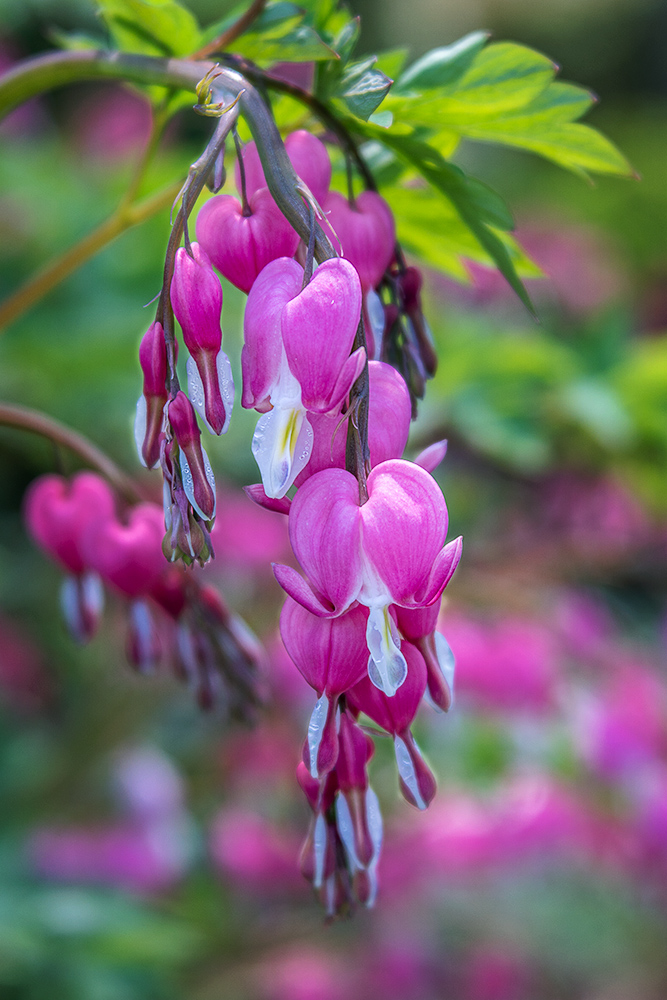
When we took a look at this second print, most of the shades of pink were within the printer’s print gamut so the photo looked much better. Some tones still weren’t printing the way I imagined they would look, but they were close. And my only options were to present it as it was, made more changes to get the pinks into gamut but then the rest of the photo didn’t look right, or invest a new printer with a wider print gamut on the chance that it could print a few more shades of pink.
I decide that I was happy with the photo the way it was.
If you’d like to learn more about how I edit my photos in Photoshop, please join me for my Photoshop Layers and Masks workshop on June 6-7. You can read more about the workshop at https://beautifulflowerpictures.com/store/photoshop-layers-and-masks-workshop-june2020/