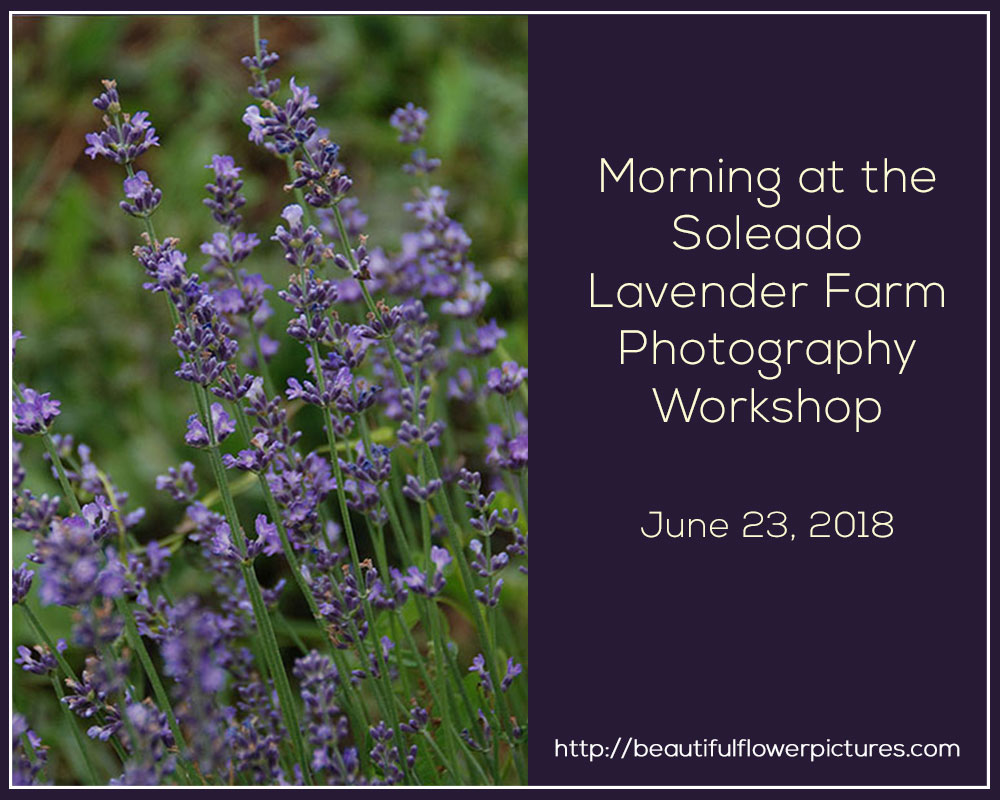
by hankinslawrenceimages | Mar 20, 2018 | Workshops
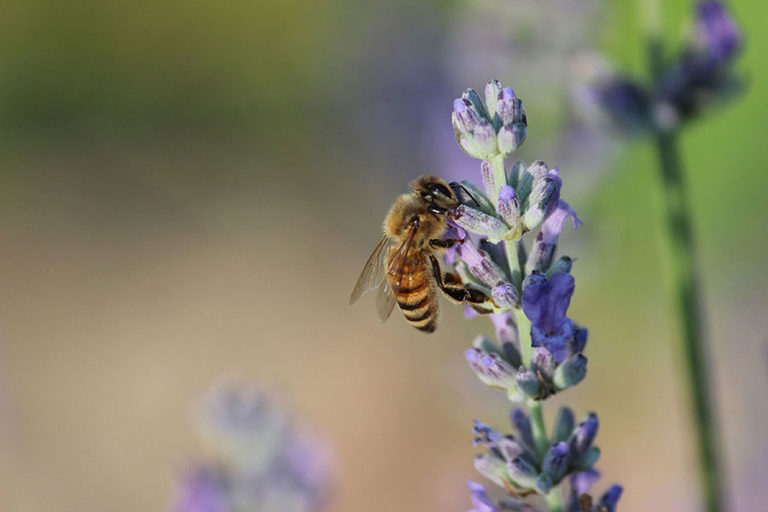
Imagine spending a morning photographing and spending time with other flower lovers on the largest lavender farm in Maryland!
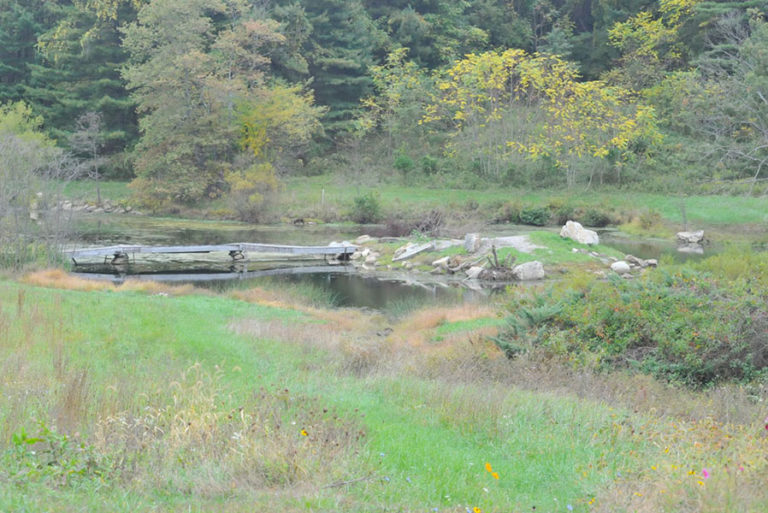
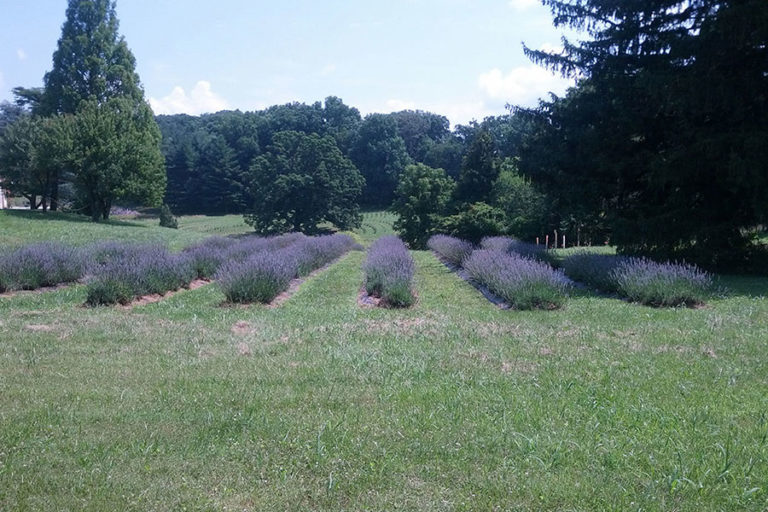
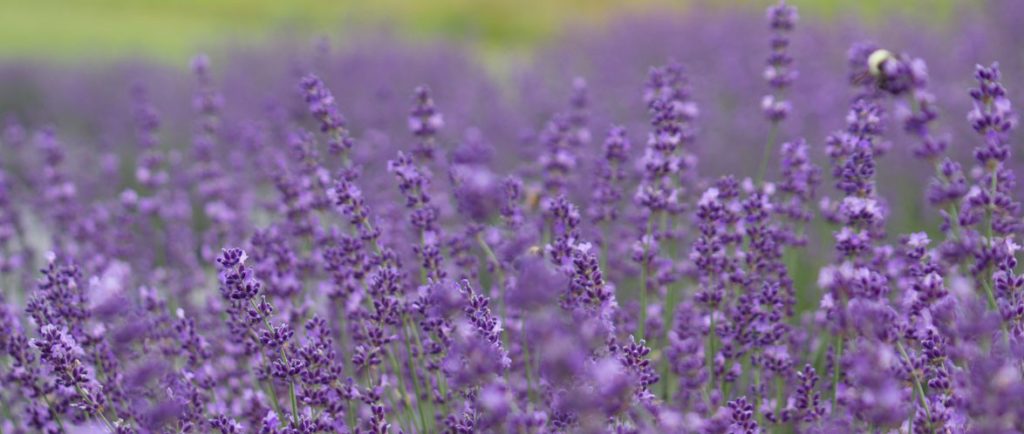
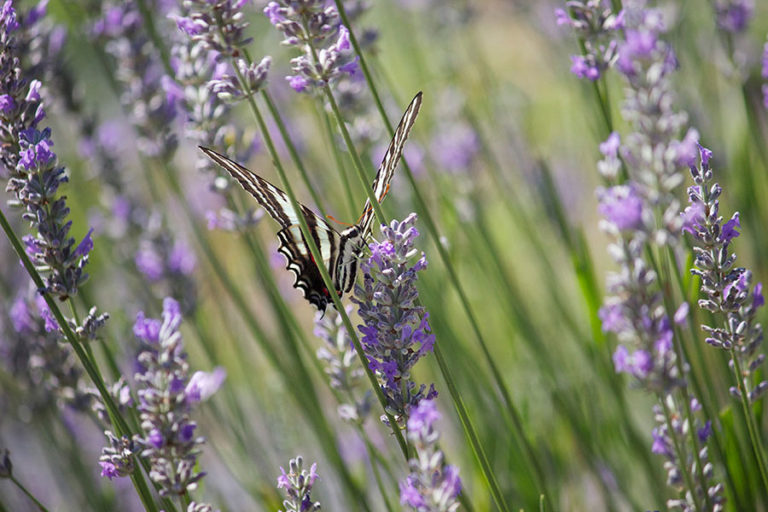
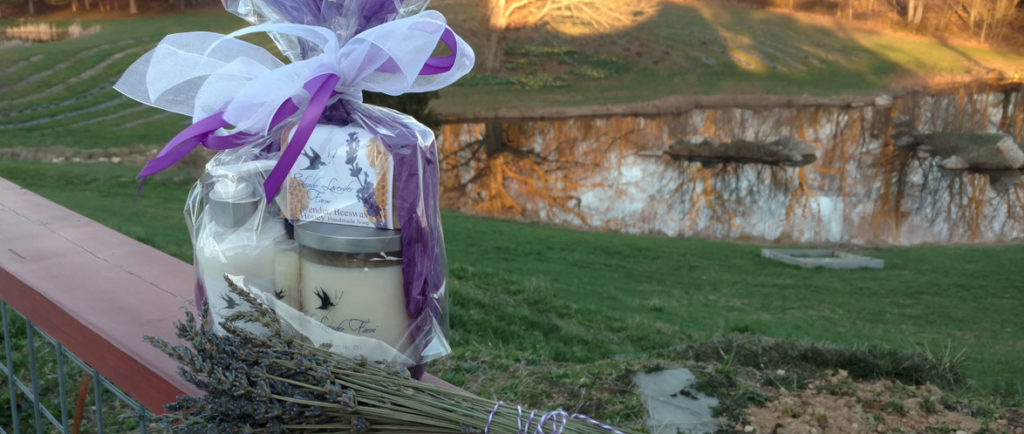
Imagine yourself photographing among rows of lavender plants in full bloom. Smelling the wonderful aromas. Hearing the songbirds in the woods. Learning how to take better photographs from a professional flower photographer. Shopping for handmade luxury bath products created with lavender from the farm and for beautiful flower photographs.
You can do all this — and more – by joining me for one of my morning photography workshops at Soleado Lavender Farm in Dickerson, Maryland (less than an hour from DC).
The workshop will run from 7 – 10 AM. During that time, we’ll have a brief discussion of flower photography and then head into the lavender fields to photograph. I’ll be with you in the field all morning helping you create wonderful photographs.
You can use any camera from a simple point-and-shoot camera to the latest DSLR or mirrorless camera. If you have a macro lens and/or a tripod – bring them along. You may find them helpful for photographing during the workshop. But if you don’t have them, please DO NOT go out and purchase them just for this workshop
Not sure if this workshop is right for you? Drop me an email and we can find a time to talk.
Registration for the workshops is $ 75.00. Workshop is limited to 15 students, so I can make sure I can give you the personalized attention you need. Purchase a ticket for the workshop on the Soleado Lavender Farm website at http://soleadolavender.com/event/morning-lavender-farm-photography-workshop/
Included in your workshop registration is
- A three-hour photography workshop at Soleado Lavender Farm with instruction provided by Patty Hankins of BeautifulFlowerPictures.com
- A copy of Patty’s ebook Wildflower Meditations: A Gift for the Spirit that features 90 of her wildflower photographs and 90 inspirational quotations
- A 10% off coupon for purchases at the Soleado Lavender Farm store
- A 10% off coupon for purchases of photographs, books and notecards from Patty Hankins
- An invitation to join a private Facebook Group for Patty Hankins’ workshop participants
I’d love to have you join me for a morning photographing at the Soleado Lavender Farm. If you have any questions about the workshop, drop me an email and we can find a time to talk.
All photographs courtesy of Soleado Lavender Farm

by hankinslawrenceimages | Oct 6, 2017 | Photo Tips
One of the questions I get asked occasionally is how do I know how to compose my flower photos? I’ve realized that the first thing I think about when planning a photograph is why am I stopping here to take a photo? Why here and not over there? Why this flower and not that flower? In other words – what caught my eye?
Over the years, I’ve realized that there are several things that catch my eye and make me want to stop and take a photo.
Sometimes it’s a single perfect flower
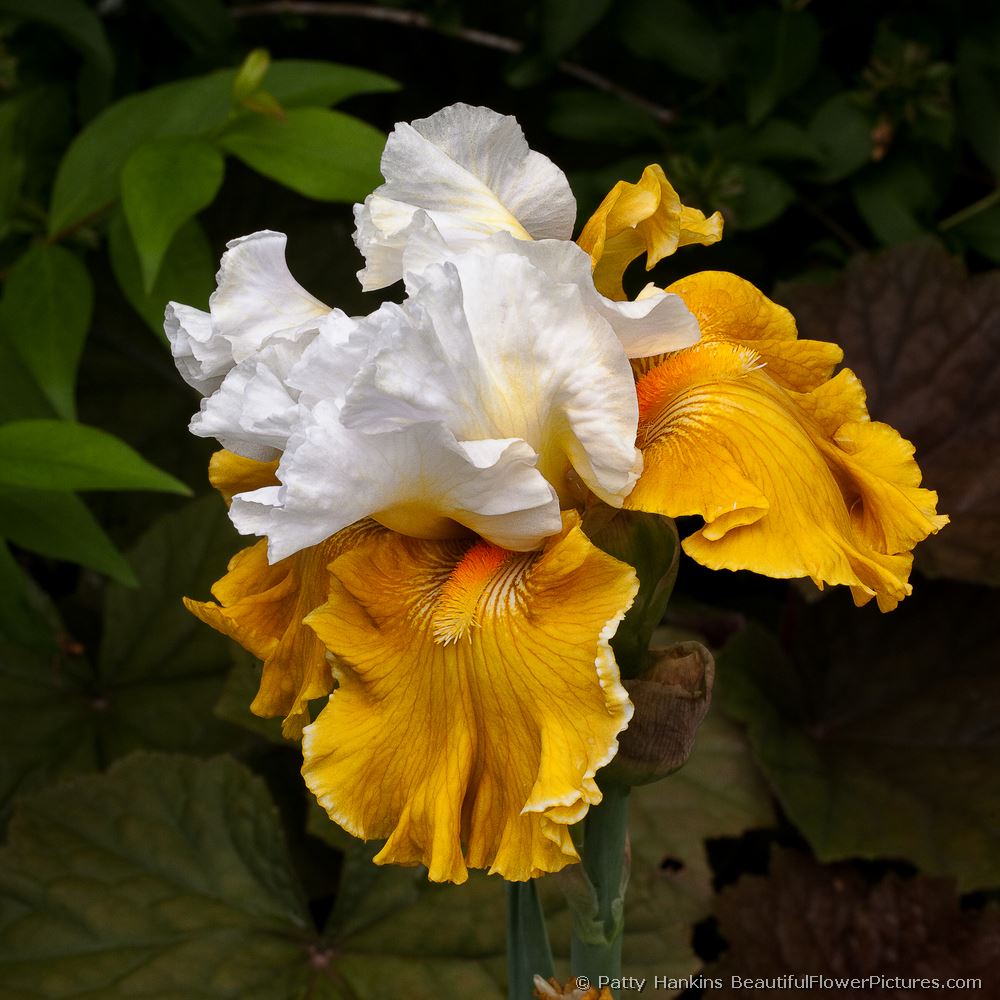
Tour de France Bearded Iris © 2010 Patty Hankins
Other times it’s a combination of flowers
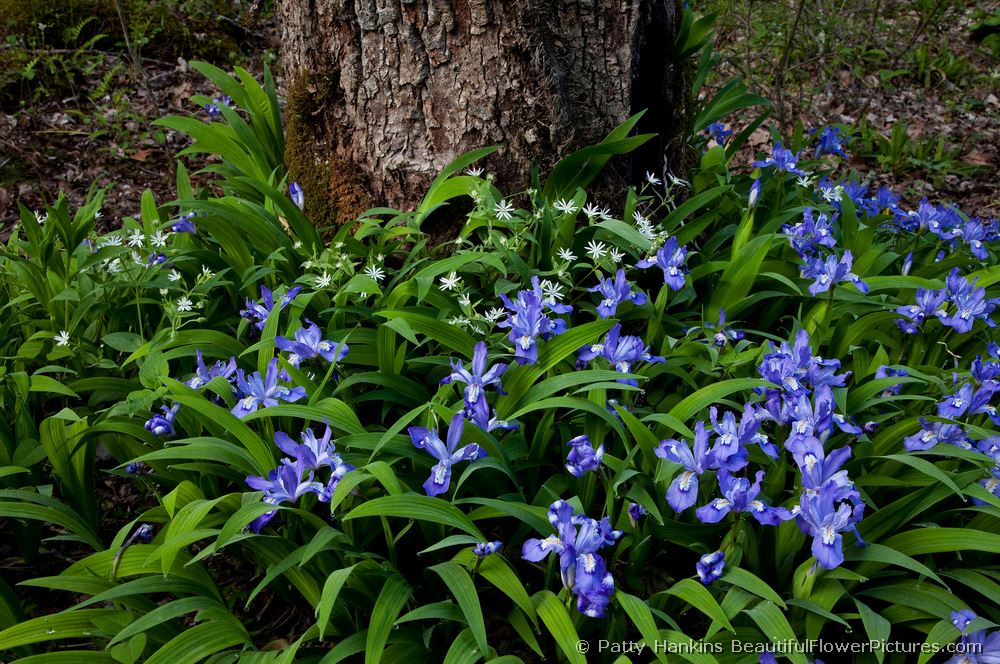
Crested Dwarf Iris & Star Chickweed © 2009 Patty Hankins
Or it could be several of the same flower
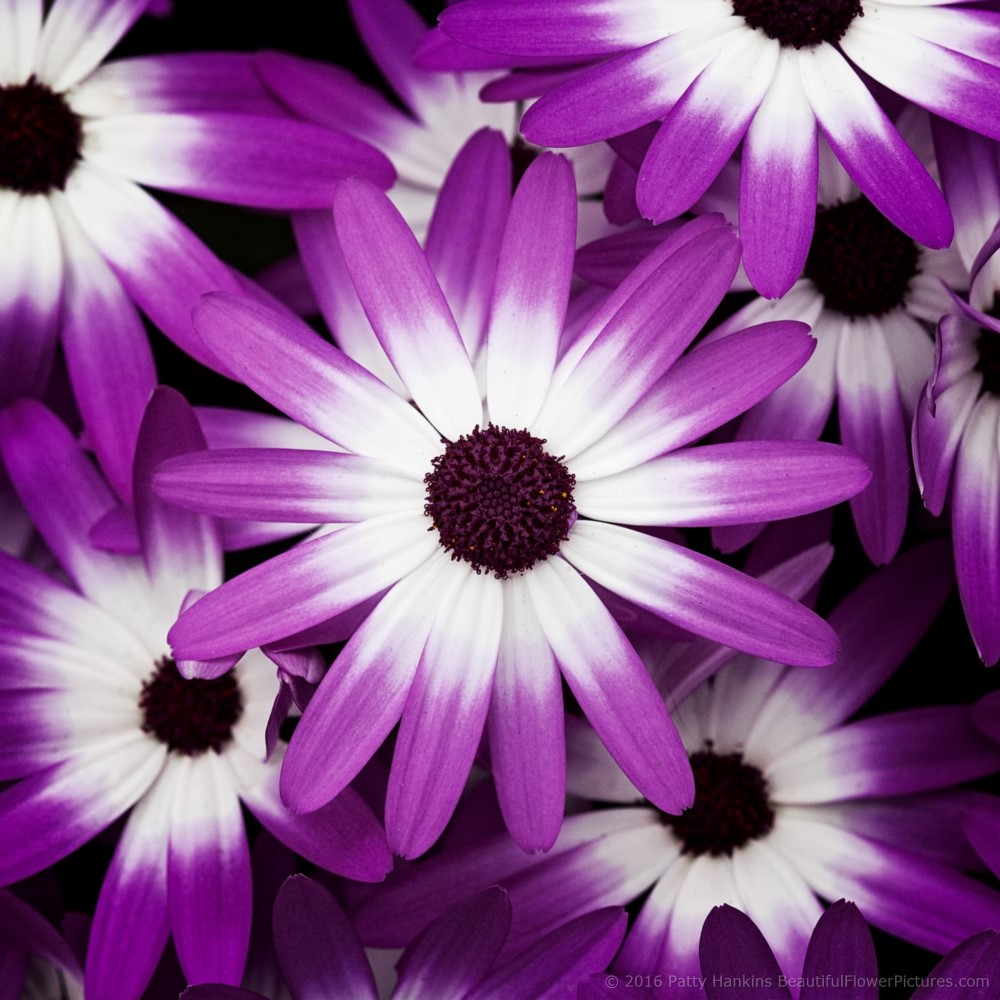
Sunserba Cineraria © 2016 Patty Hankins
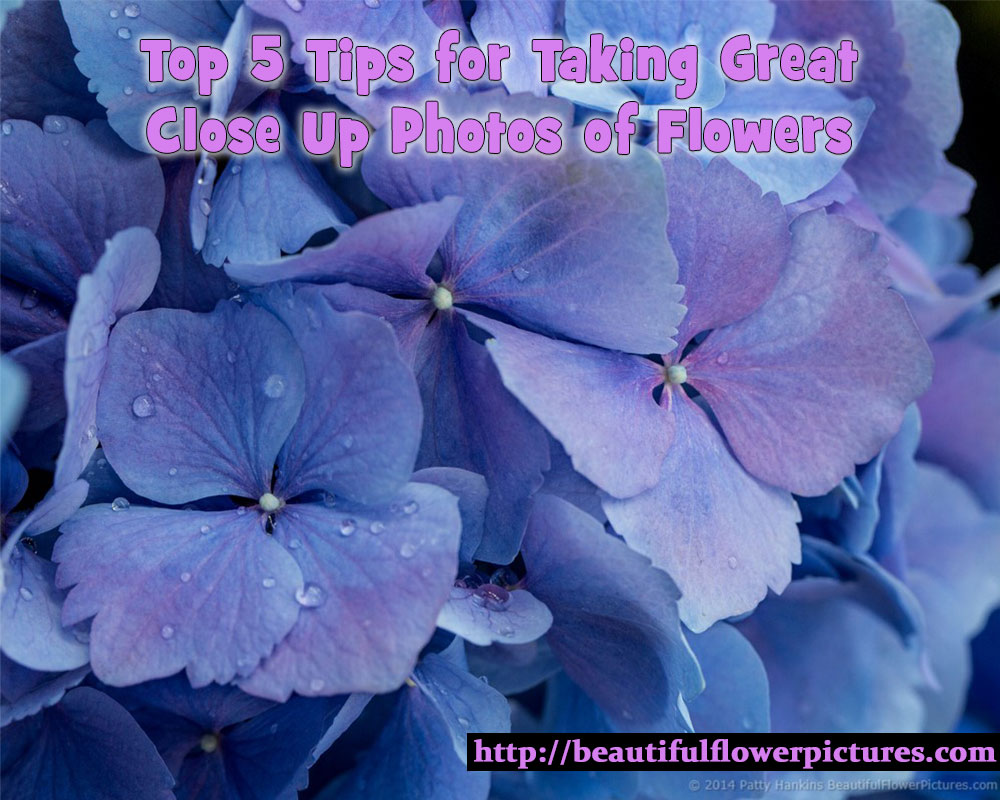
Sometimes it’s a single color – like the shades of blue in these blue hydrangeas
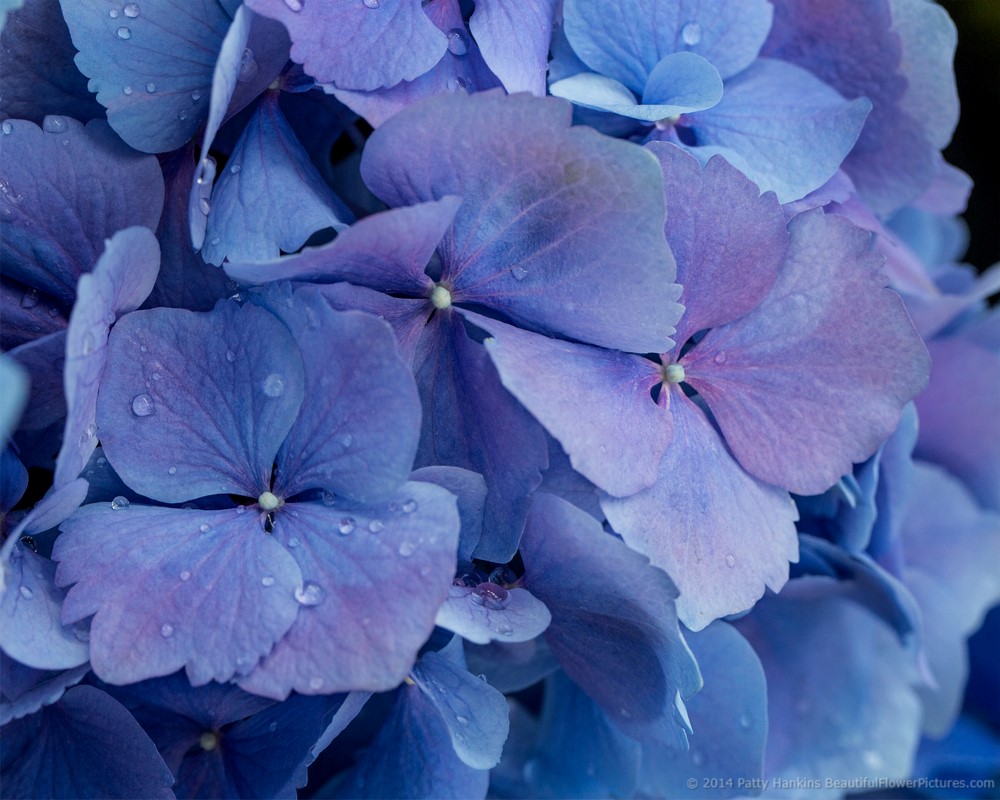
Blue Bigleaf Hydrangea Blossoms © 2014 Patty Hankins
Or it could be a combination of colors – like the purple and yellows in the wildflowers

Yellow Trillium & Purple Phacelia © 2009 Patty Hankins
Sometime it’s the details – like the center of a sunflower

Sunflower © 2015 Patty Hankins
Or it can be the whole scene in front of me
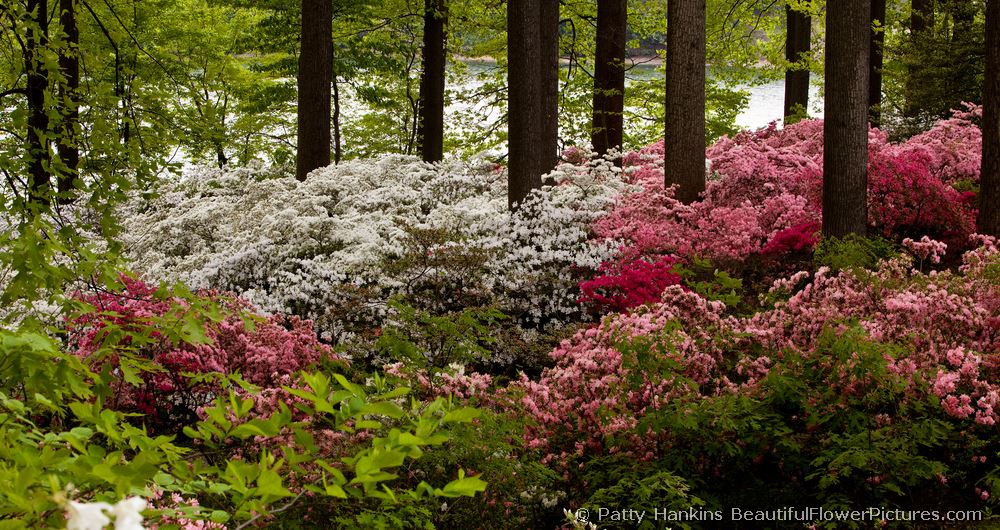
Azaleas in the Wood ©2009 Patty Hankins
Sometime it’s a line
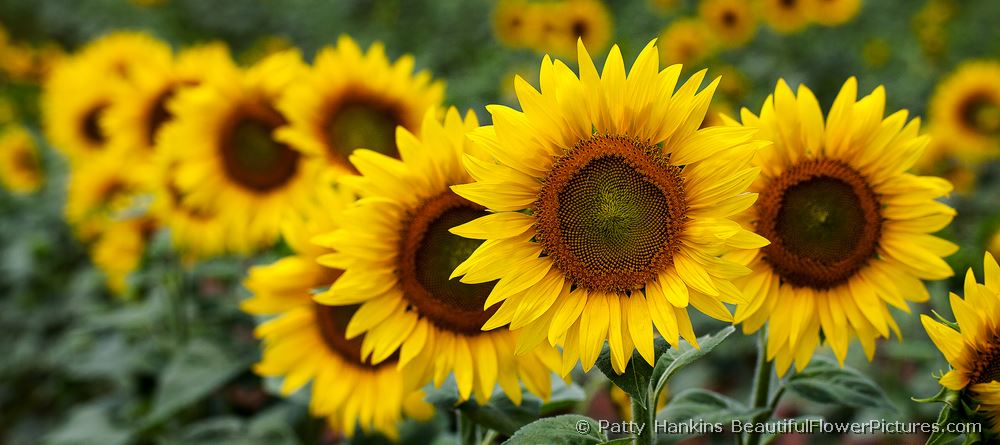
Sunflowers All in a Row © 2011 Patty Hankins
And sometimes it’s just something unexpected
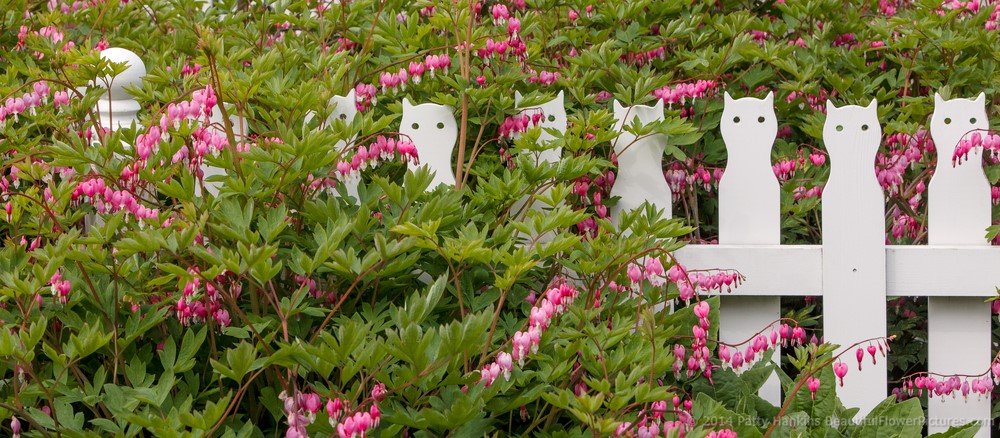
Along the Fence © 2014 Patty Hankins
So when you’re out photographing – be sure to take a moment to think about what caught your eye. It will help you create the photos you want to create.
Identifying what caught your eye and deciding how to capture that in your photo is one of the things we talk about in my workshops. I’m still finalizing plans for my 2018 workshops. I’ll be announcing them here in my newsletter and adding them to my website as I get things scheduled.
You can see the workshops I currently have scheduled for the remainder of this year at https://beautifulflowerpictures.com/2017-workshops/ and next year at https://beautifulflowerpictures.com/2018-workshops/.
by hankinslawrenceimages | May 13, 2016 | Photo Tips
A few months ago I shared an article about Working the Scene where I talked about trying different compositions when you’re in the field photographing the landscape. Since then, I’ve gotten a few questions asking if I do the same thing when photographing flowers. And the answer is yes.
I do the same three things photographing a flower at a garden as I do when I’m photographing a landscape.
- Try different focal lengths. If you’re looking through a telephoto lens, you will get very different compositions then when you are using a wide angle lens. I often start with a wide angle lens, and then pull out my macro lens. Sometimes I’ll even pull out a longer telephoto lens if that’s what I need to get the photo I want.
- Try portrait and landscape compositions. The change from horizontal to vertical orientation of your camera will force you to include and exclude different parts of the scene, and will help you to think about the scene in different ways.
- Move around and try again. When I first see a flower or group of flowers I want to photograph, I usually see what I think is the perfect image in my mind. So I’ll set up my tripod and grab the lens I need, and create that photo. Then I’ll take a moment and review the image on the back of my camera to see if it’s what I want and more importantly, is it the best image I can create. If not, I’ll take another look at my subject and see if there is composition I like better, move my tripod, reassess my lens choice and take that photo. Re-evaluate and set up another shot if I still don’t have what I want. Most of the time I’ll create 4 or 5 very different compositions of a specific flower or group of flowers before deciding that I’ve what I’m looking for. Moving my tripod up or down, a few inches to the left or to the right can make all the difference in the world.
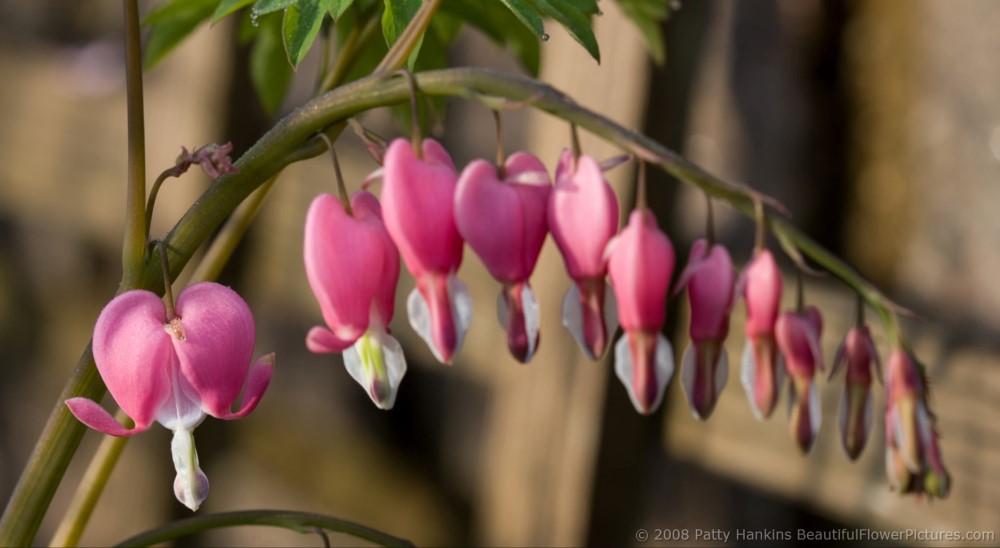
Here are some of my photos of a bleeding heart plant I took several years ago that illustrate how I work a scene with flowers
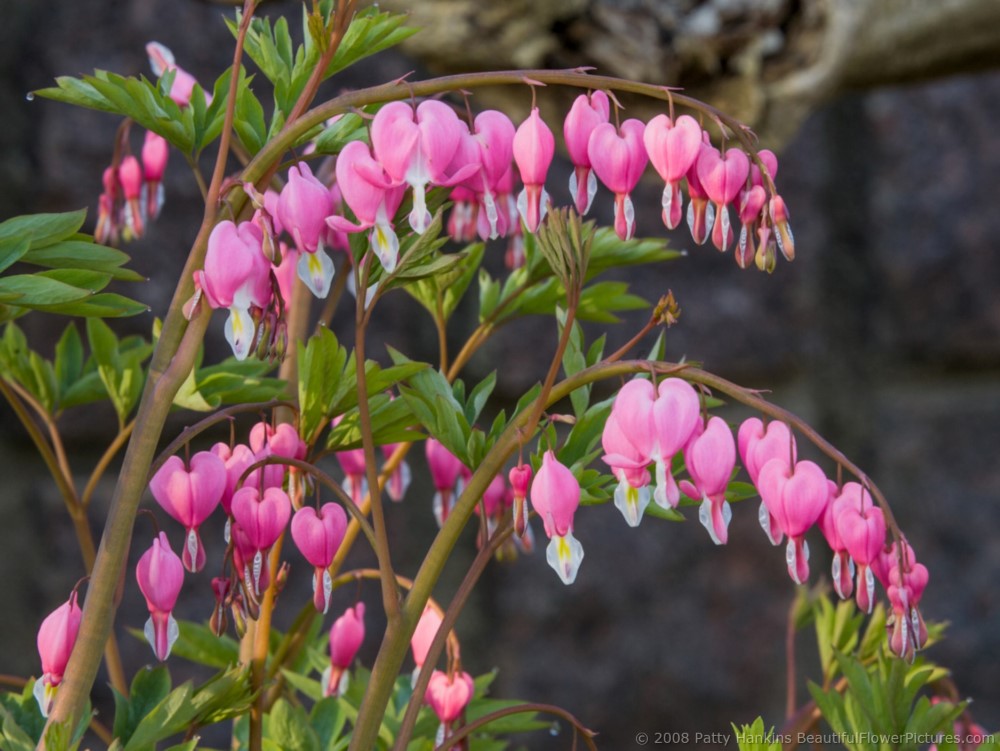
One photo I took was of the whole bleeding heart plant in front of a tree trunk and wall. Decided it was too busy and didn’t really show off the heart shaped flowers.

Bleeding Hearts © 2008 Patty Hankins
So I moved in closer to just included a few of the branches. I also changed my aperture so that the wall and tree trunk were no longer in sharp focus. Still not right.
Bleeding Hearts © 2008 Patty Hankins
So next I moved my tripod around to another side of the plant, framed up just one branch of blossoms with a very shallow depth of field so only one flower was in sharp focus. Still not right.
Bleeding Hearts © 2008 Patty Hankins
So I switched to portrait orientation and moved in closer so I only had a few flowers in my photo. I also switched to my macro lens. Just didn’t like the light wood background or that the flowers in the upper right were in front of the main subject and out of focus. Still not right.
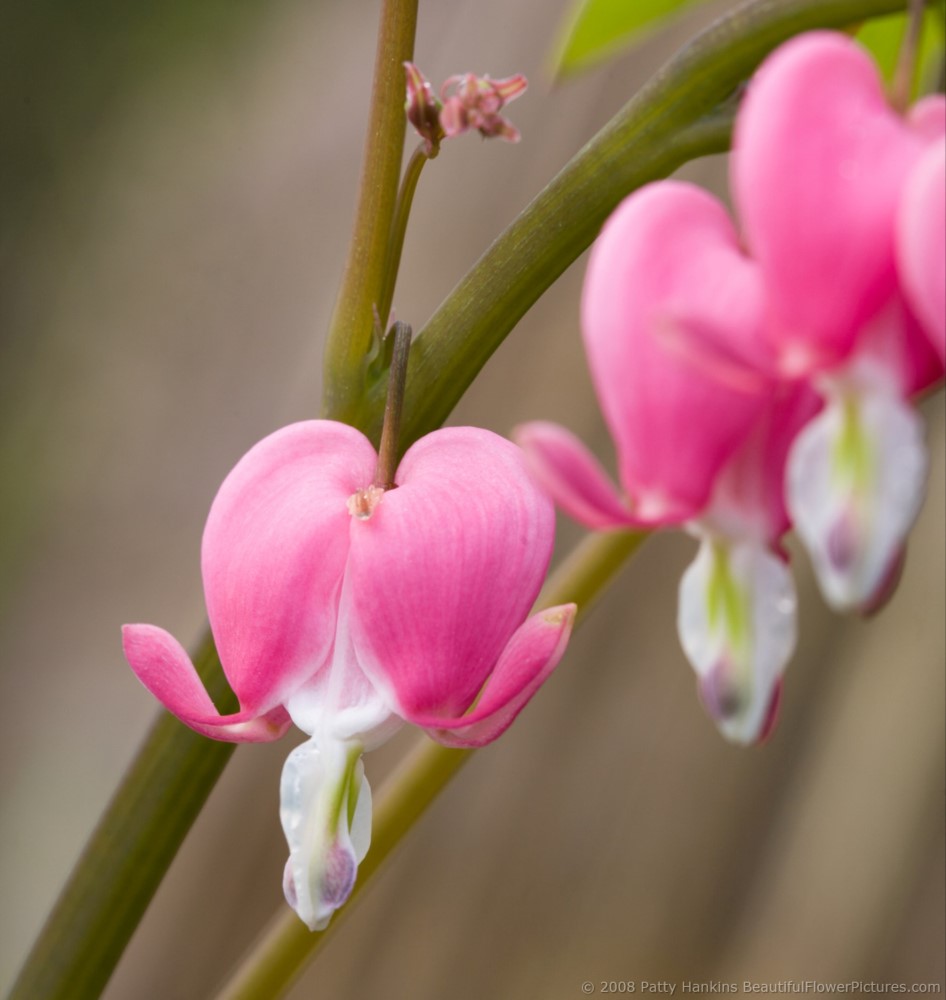
Bleeding Hearts © 2008 Patty Hankins
So I moved my tripod again so that the flowers were backed by green leaves instead of the brown wood and that I was further away from the bleeding hearts. This gave me the opportunity for a wider angle photo showing an entire branch of the flowers including the buds at the end. Better – but still not quite what I wanted.
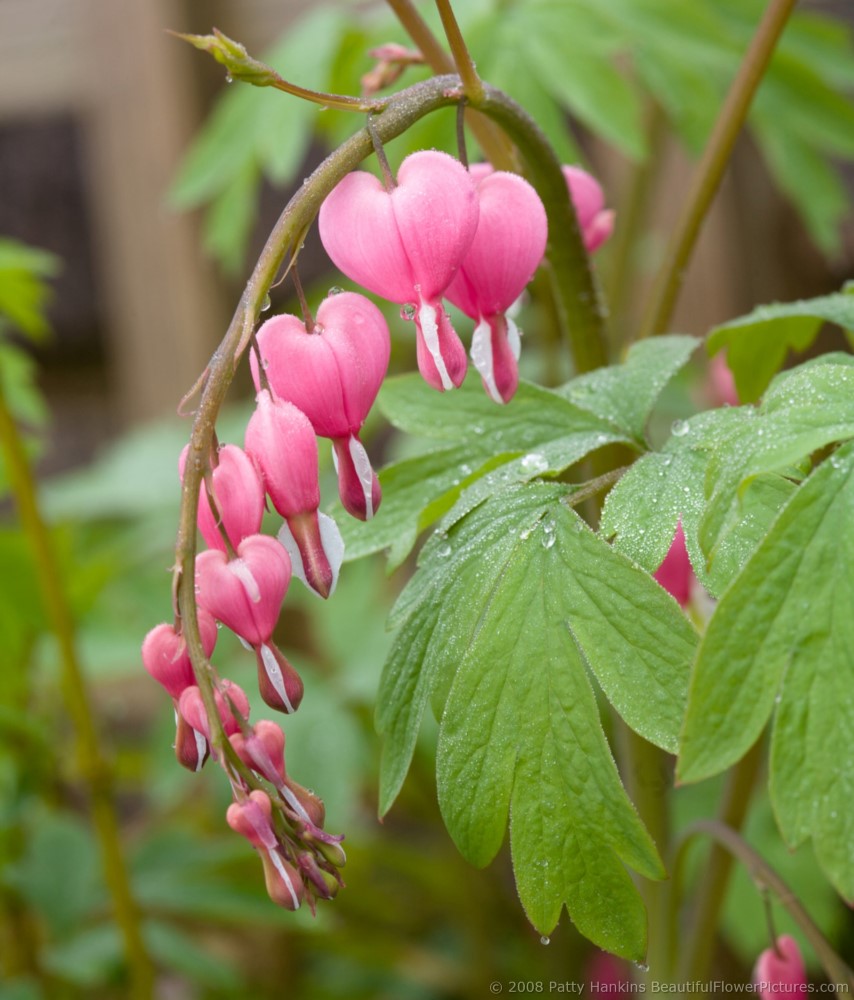
Bleeding Hearts © 2008 Patty Hankins
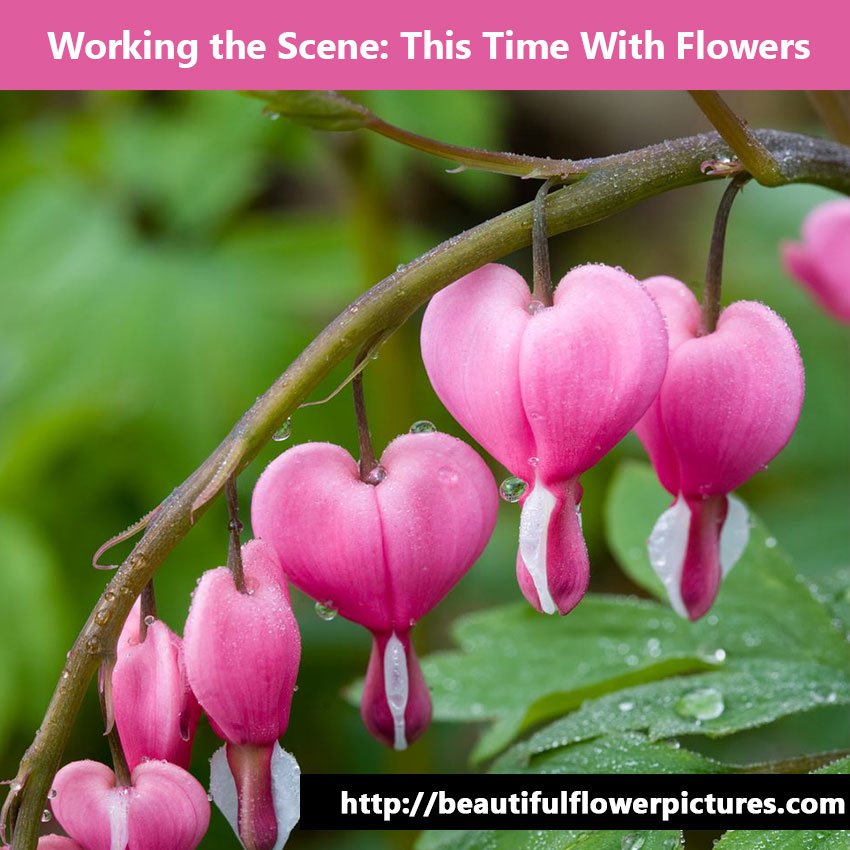
So I moved my tripod one more time – this time in a little closer and switched back to landscape orientation knowing I’d crop to a square for the final photo. I focused in on just a few of the heart shaped blossoms, made sure the water droplets were in sharp focus, and that the branch would act as a leading line to draw your eye through the photo. Finally I had my photo – and this has been one of my best selling photos over the years.
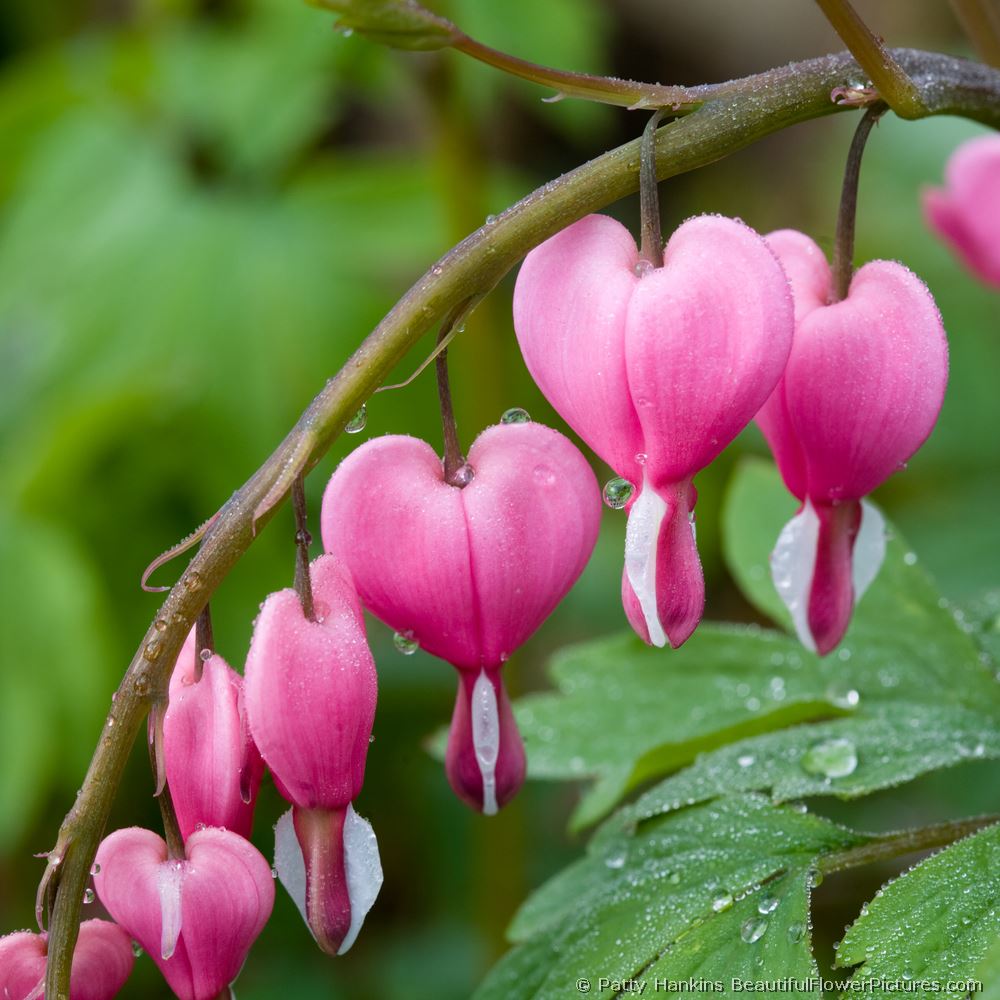
Bleeding Hearts © 2008 Patty Hankins
And if you are photographing at a botanical garden there’s one more photo you really should take when you are working the scene – a photo of the identification sign so you know what flower you’ve been photographing.
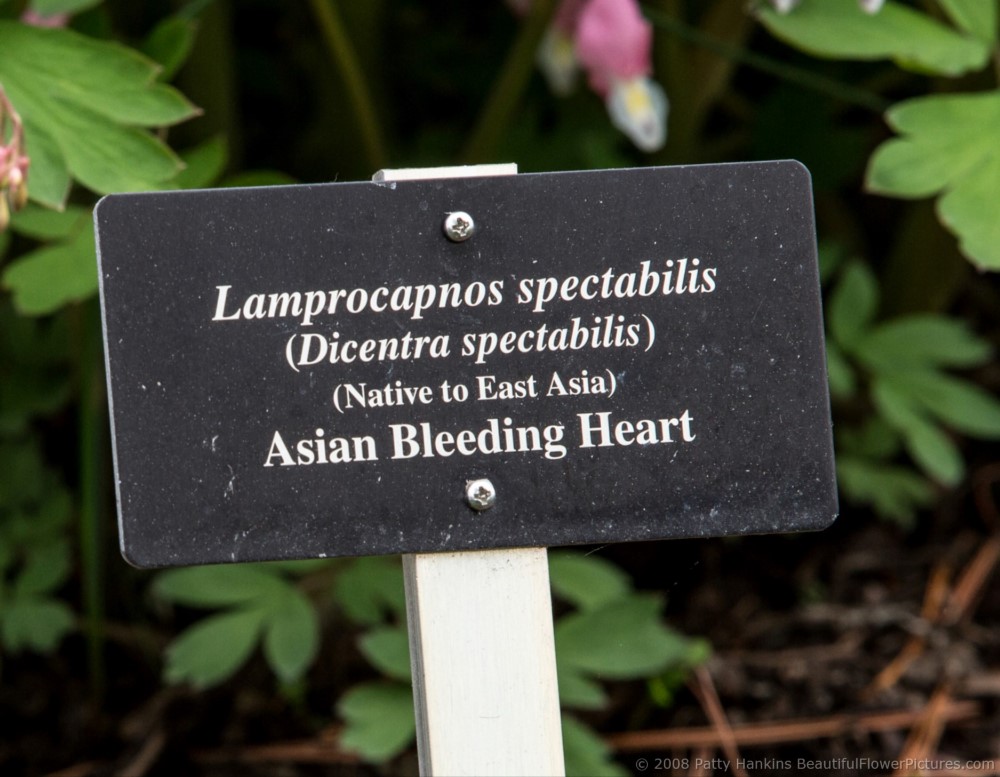
Bleeding Hearts © 2008 Patty Hankins
Working the scene is one of the ideas we’ll be talking about and practicing during my July 15-17 workshop – Photographing Flowers (Without Swearing at Your Camera). There are still a few spaces open in the workshop. I’d love to have you join me for a weekend of photographing flowers.
All the details about the workshop and registration information is at http://beautifulflowerpictures.com/photographing-flowers-without-swearing/.
by hankinslawrenceimages | Apr 8, 2016 | Flowers, Photo Tips
Spring is in full bloom here in the Washington DC area – even if we are having a bit of a cold spell this week. I can still see a few cherry blossoms on the tree in my front yard, the Virginia Bluebells are blooming at local parks and tulips are blooming at local gardens. As I’m photographing flowers on almost a daily basis, I’m noticing that I’m taking many more close up photos of flowers than I have in the past – especially when I’m in my studio. Many of the photos show only part of a flower — not even a whole blossom. The close up photos have gotten a great response from people who have seen them — and lots of questions about how I take them. So I thought I’d share a few tips on taking great close up photos of flower with you today.
1. Think about What Caught Your Eye: Before you click the shutter, think about what it is about the flower that caught your eye and made you want to photograph it. Was it the color, the shape, the dewdrops or the way light is striking the flower? Now compose your photos to highlight what caught your eye.
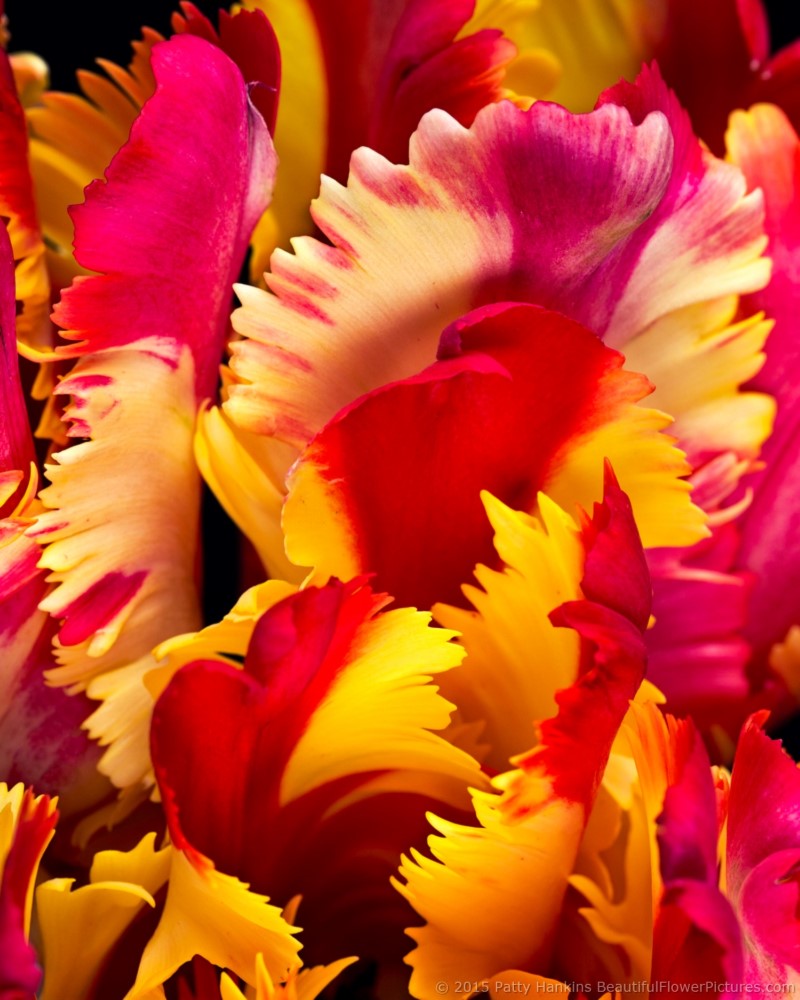
Petals of a Flaming Parrot Tulip © 2015 Patty Hankins
2. Use a Macro Lens (or Macro Setting on Your Camera) For close up photos you want to be able to get as close to your subject as possible. Macro lenses or the Macro Setting on your camera (often symbolized by a little flower) allow you to get much closer to a subject and still have it in focus than using either a non-macro lens or setting
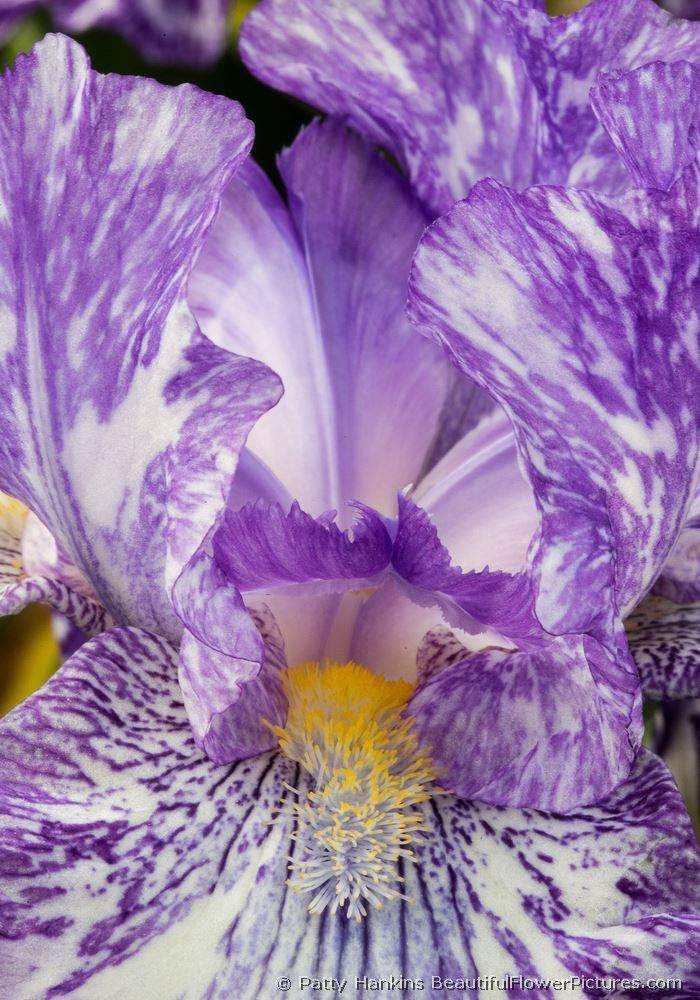
Purple Streaker Iris © 2013 Patty Hankins
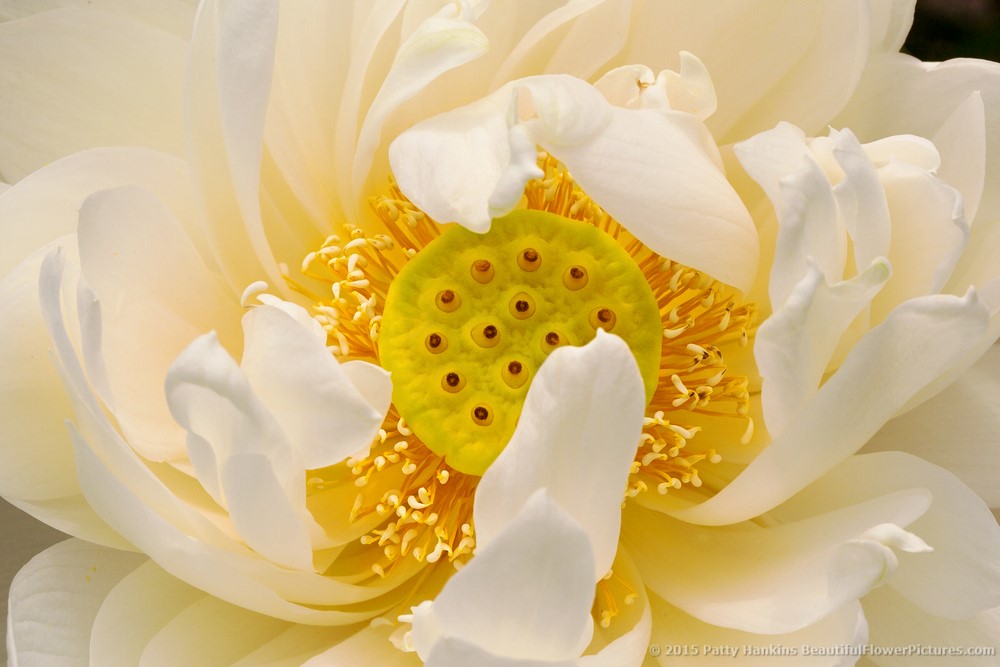
3. Use a Tripod.I know — we live in an age of image stabilization/vibration reduction cameras and lenses, to say nothing of high ISO cameras so we can get faster shutter speeds — so a lot of the time we can get away with not using a tripod. But when it comes to close up photos I really recommend using one. When you are focused in on a very small area, the slightest motion of the camera (including that caused by clicking the shutter button) can introduce motion blur and lack of clarity in your focus. So if you want to take really crisp clear close up photos — use a tripod
Bob Trickett Water Lily © 2015 Patty Hankins
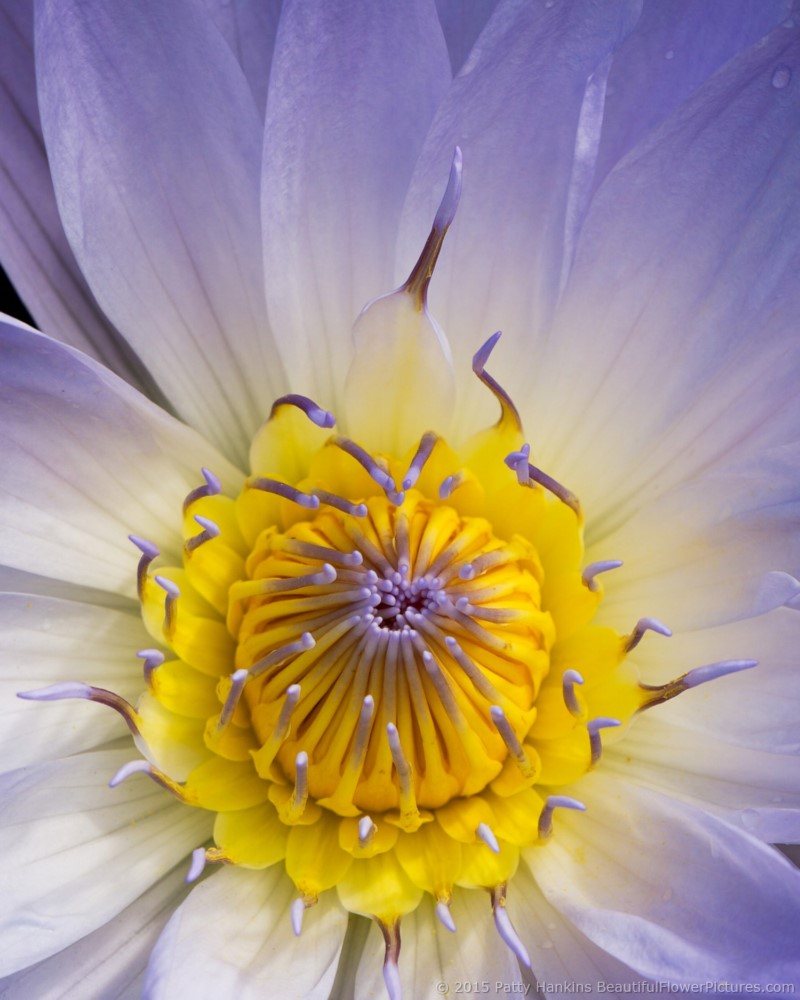
4. Try Different CompositionsDon’t photograph the flower from just one angle. Move around and see what else you see. Try taking photos of the center of the flower, or the petals, or just one specific detail. If you’re photographing with a digital camera there is basicly no additional cost to taking more than one photo of a scene. So go ahead — try different compositions. Who knows — you may discover you like the petals of the flower better than the center!
White Lotus © 2015 Patty Hankins
5. Try Different AperturesIf you are photographing in Aperture priority, try changing the aperture (f-stop) you’re using and see what this does to your photo. You may be surprised to find that sometimes a narrow depth of field gives you the look you want — and at other times, a larger depth of field is perfect for what you’re trying to show in the photo
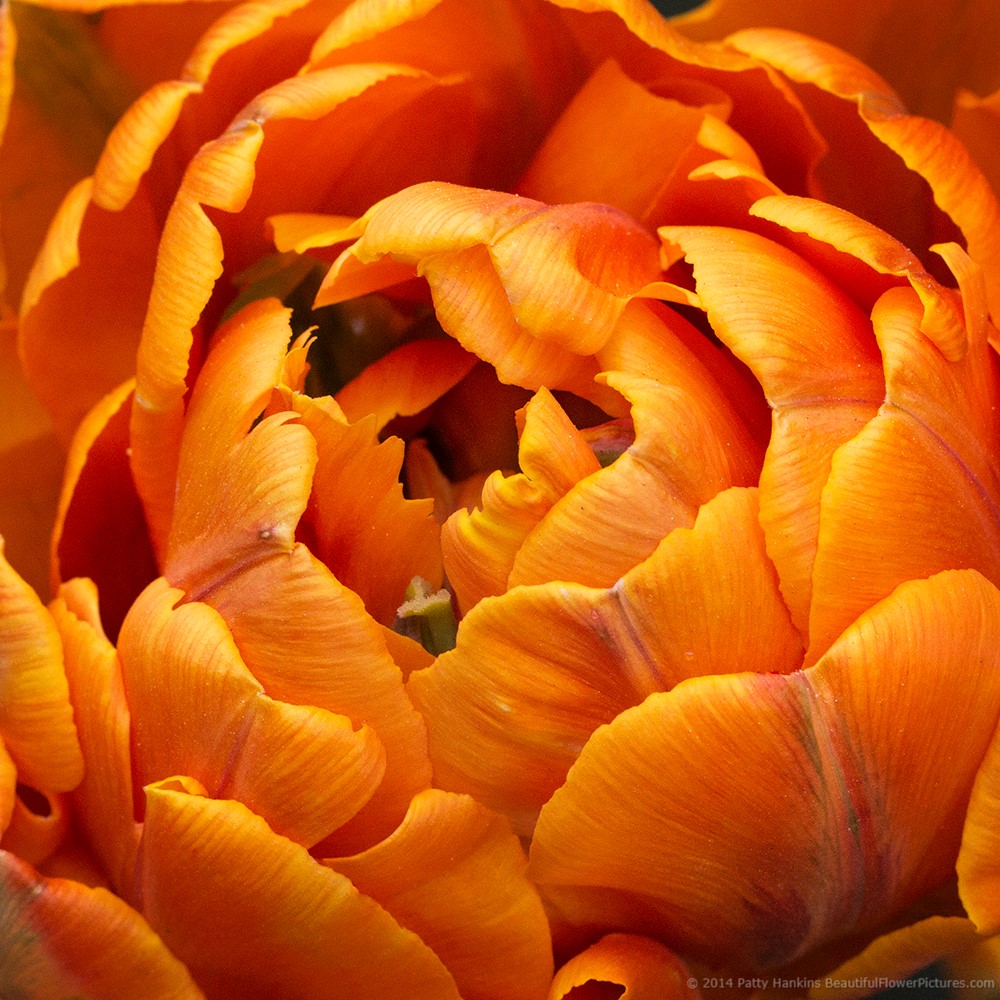
Orange Princess Tulip © 2014 Patty Hankins
Bonus Tip: Have Fun! Have fun while you’re photographing. Don’t forget to slow down and take few moments to appreciate the beauty of nature around you.
If you found these tips helpful – consider joining me for my Photographing Flowers Without Swearing at Your Camera workshop on July 15-17. During the workshop we’ll talk about how to take better flower photos – and visit a few of my favorite gardens so we can take some wonderful photos of flowers
More info about the workshop is at http://beautifulflowerpictures.com/photographing-flowers-without-swearing/
by hankinslawrenceimages | Feb 12, 2016 | Photo Tips
Bill and I are just back from teaching our landscape photography workshop at the Chincoteague National Wildlife Refuge in Virginia. I’m hoping to share some of the photos I took over the weekend with you next week. This week, I thought I’d share an article we published last year about always looking behind you when you are out photographing. There are several spots in the Chincoteague National Wildlife Refuge where there are wonderful photographic opportunities both in front and behind you when you stand in some of the classic scenic spots. – Patty
One aspect of working the scene that Bill and I encourage our students to think about is to always be aware of your environment. As a landscape or nature photographer, you are photographing in a three dimensional world with 360 degrees of space around you.
So often we’ve seen photographers so intent on capturing the scene in front of them that they totally miss other nearby photo opportunities – including ones directly behind them.
Over the years, Bill and I have taken pairs of wonderful photos where the second was taken 180 degrees in the opposite direction from the scene we had planned on photographing.
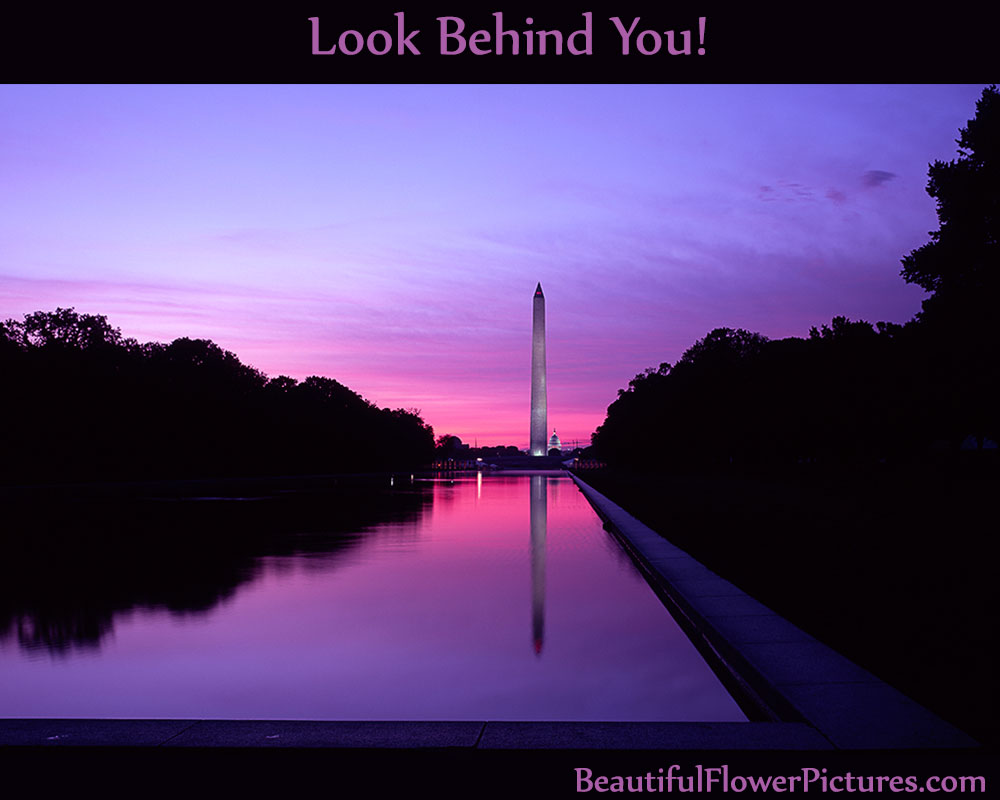
Several years ago, Bill was photographing inside the Lincoln Memorial in Washington, DC in hopes of photographing the full statue of Abraham Lincoln without any people in the photo. He happened to turn around to see one of the most amazing sunrises we’ve ever photographed.

Lincoln Memorial © 2004 William Lawrence
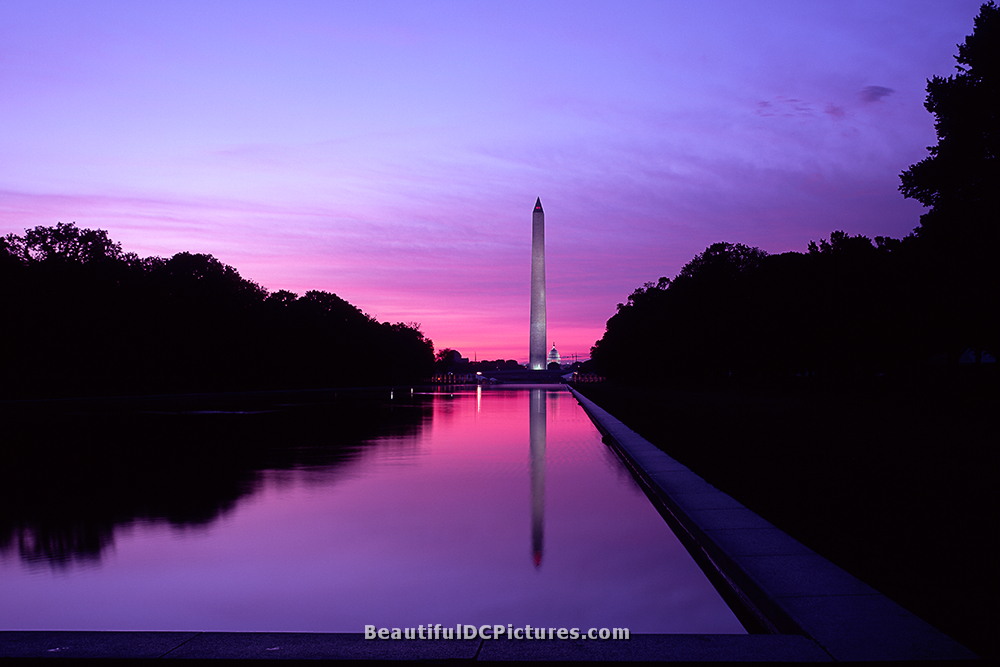
DC Sunrise © 2004 William Lawrence
When we’re on a photo trip, Bill and I frequently spend the middle of the day scouting locations for future photo sessions. The light isn’t as good mid-day as it is early or late in the day – and it gives us a chance to plan our upcoming shoots. We try to find places where we can not only photograph the sunrise before the sun comes up, but also where we can photograph the wonderful golden light that occurs 180 degrees away from the sun shortly after the sun comes up (or shortly before the sun goes down). Some of our favorite spots are places where we can literally turn around and photograph something wonderful after the sun comes up over the horizon.
One of these spots is in Chincoteague National Wildlife Refuge in Virginia. We frequently photograph one section of the marsh before the sun is up – and then turn around and photograph another section just after the sun rises.
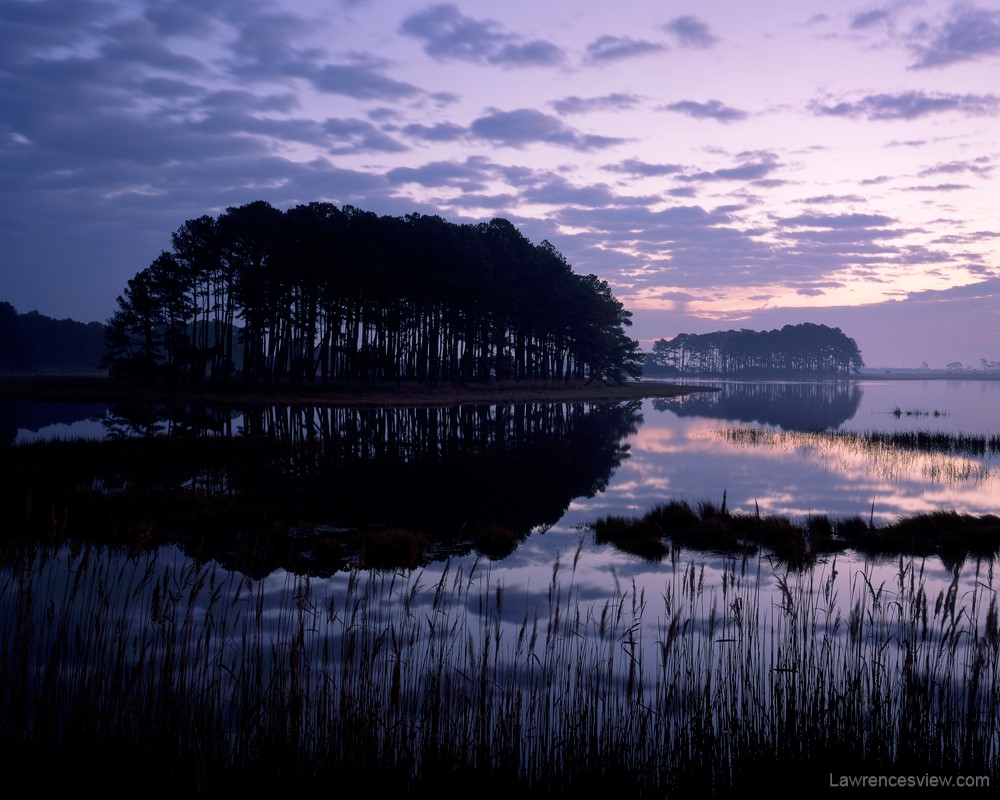
Chincoteague Sunrise © 2006 William Lawrence
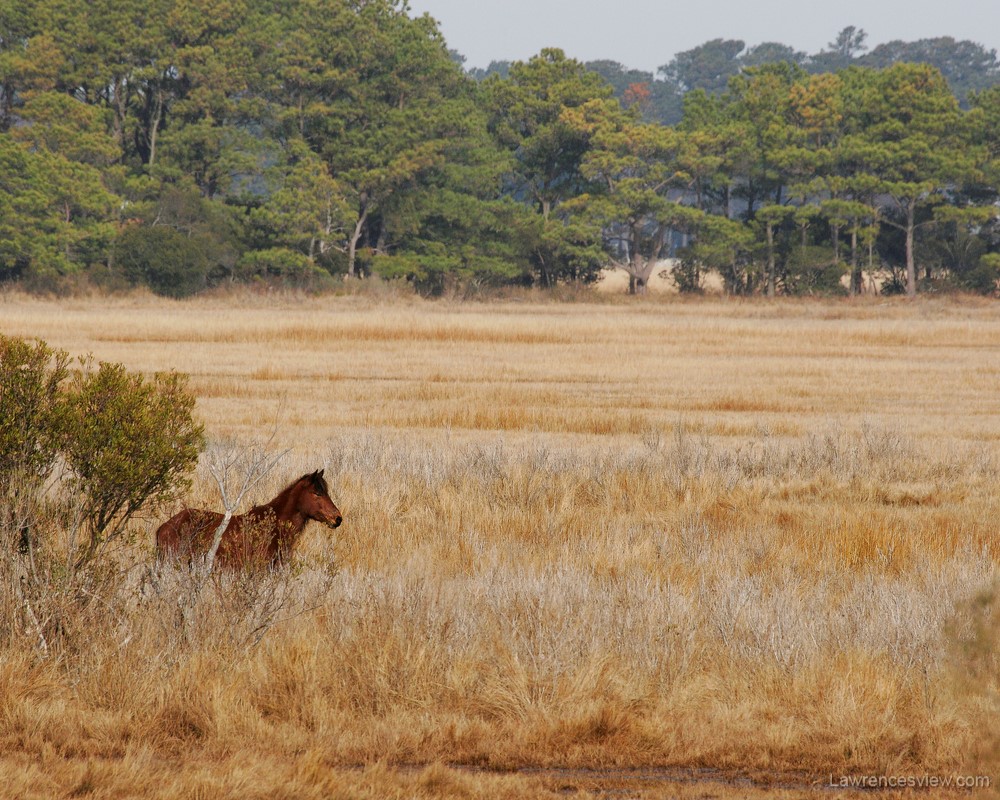
Chincoteague Pony © 2006 William Lawrence
At Bosque del Apache National Wildlife Refuge in New Mexico we photographed a spectacular sunrise over the frozen pond. In one direction the sky was filled with intense shades of yellow and orange. In the opposite direction it was filled with soft shades of blue and pink.
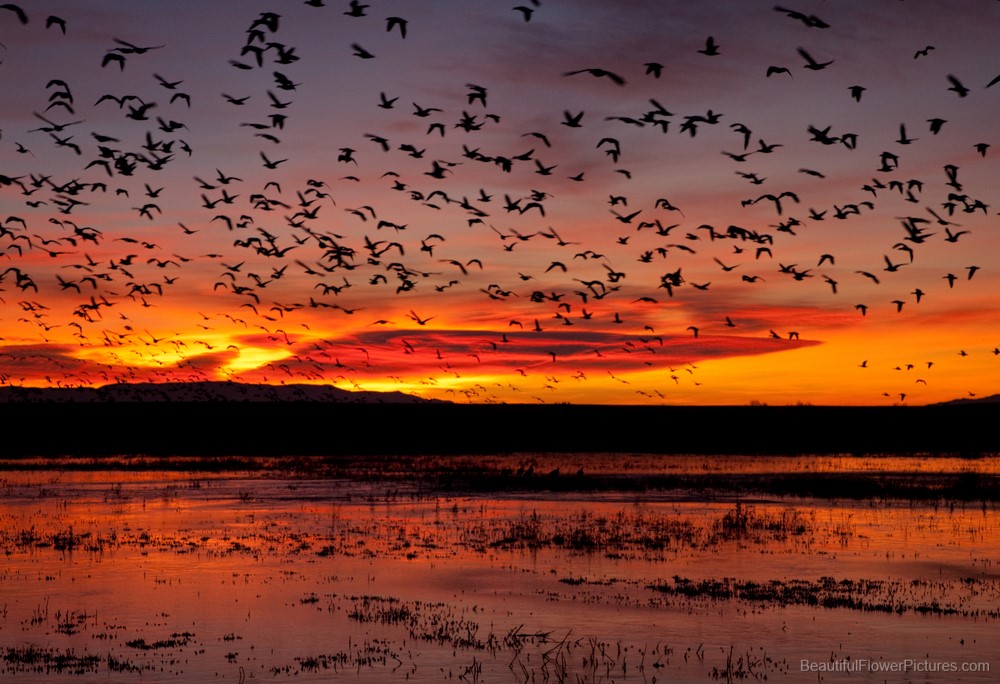
Sunrise at Bosque del Apache ©2009 Patty Hankins
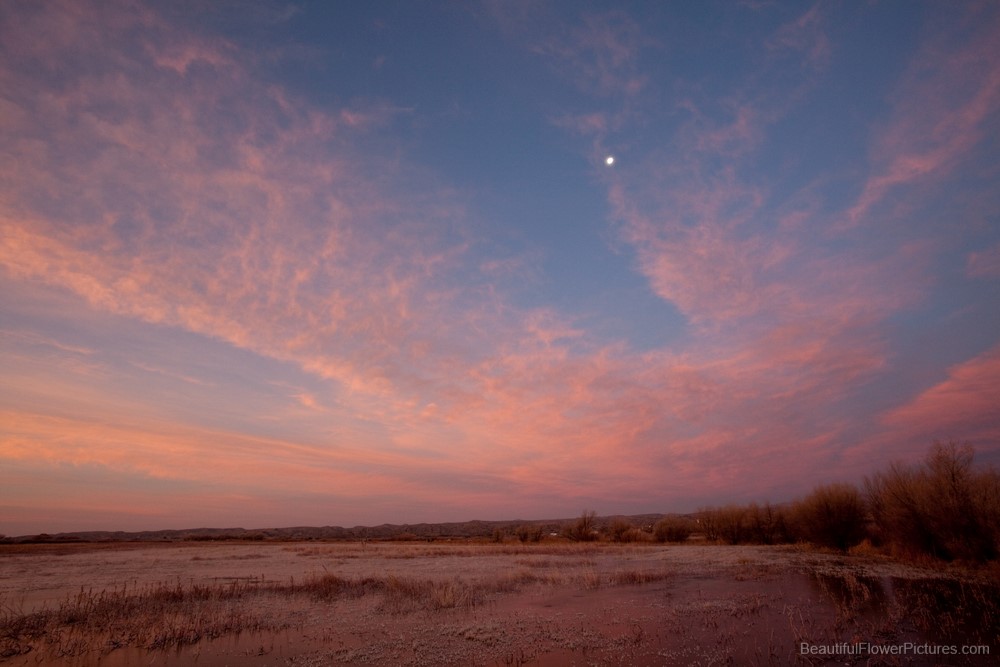
Sunrise at Bosque del Apache ©2009 Patty Hankins
The other reason to always be aware of your surroundings when photographing is you never know what might be coming up behind you. It could be a bear, a speeding car, or someone who’s not paying attention to what’s in front of them and is about to walk into you and your tripod.
Or it could just be a curious turkey vulture checking out your camera gear the way this one did while Bill was photographing a butterfly in the Big Cypress National Preserve in Florida.
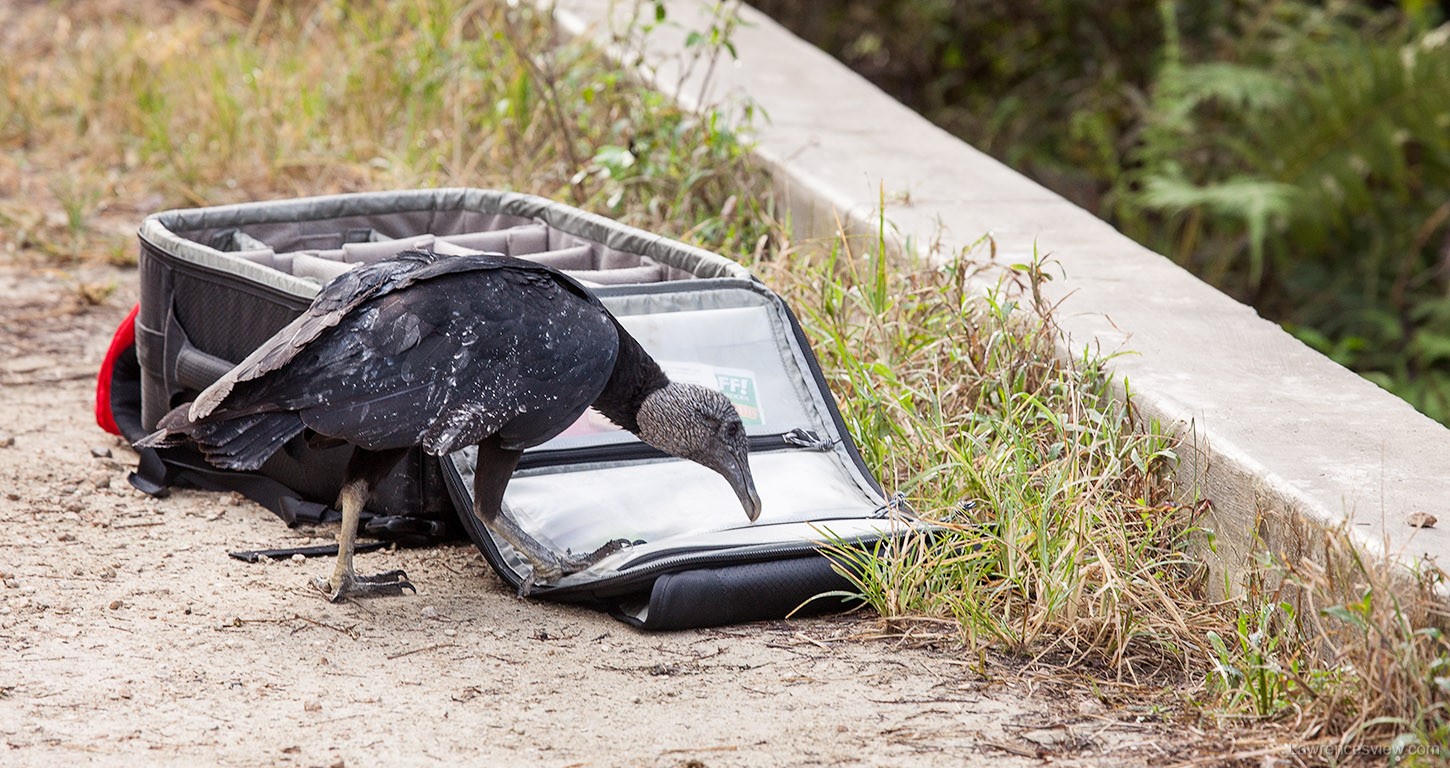
Turkey Vulture © 2013 William Lawrence
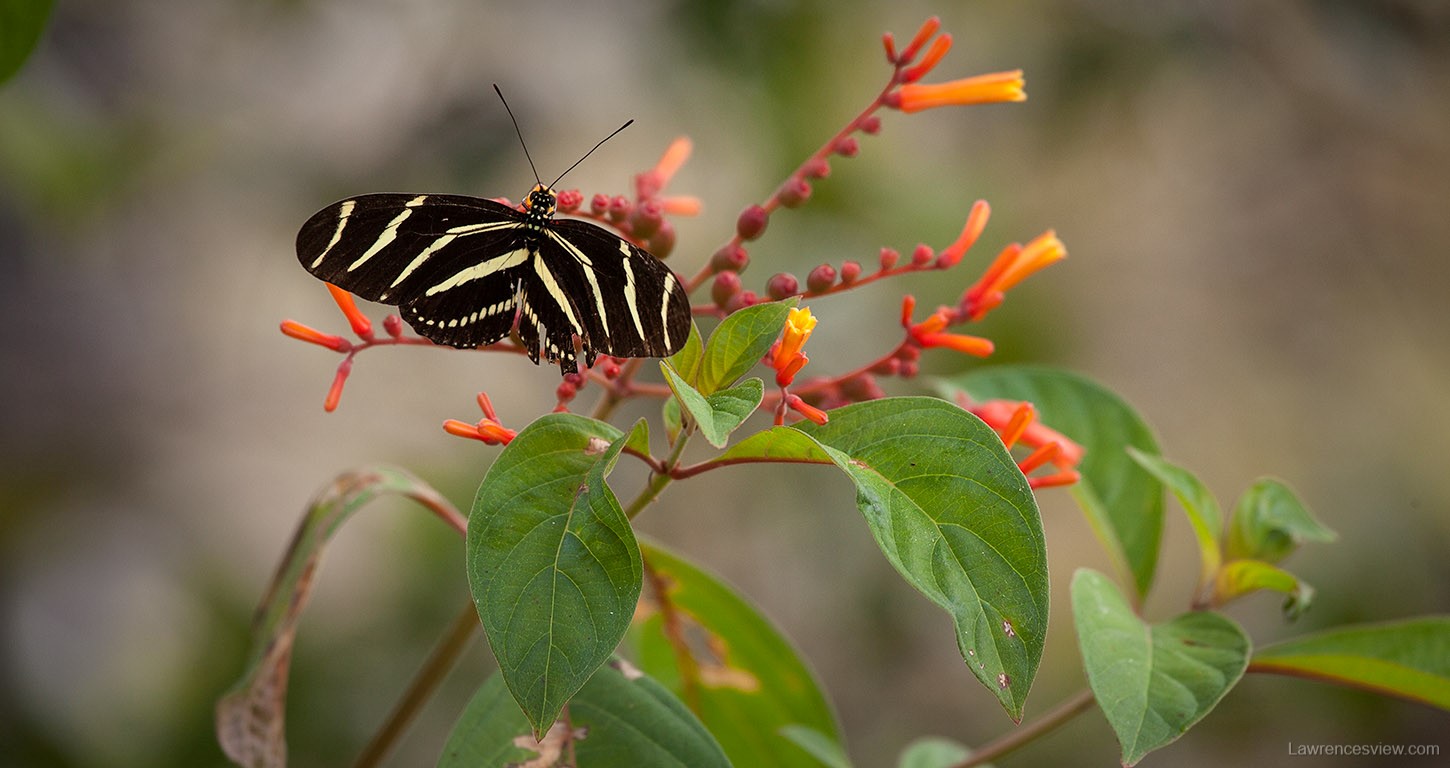
Butterfly © 2013 William Lawrence
Remembering to look behind you is just one of the landscape photography ideas we talk about in our workshops. If you’re interested in learning more, please join us for one of our workshops. You can find all of our upcoming workshops at http://beautifulflowerpictures.com/2016-workshops/
We’d love to have you join us for one of our workshops.